Contents
Crowd Connectors Troubleshooting
Unable to log in to the connected application after performing SSO
There could be several reasons why you are unable to log in to the Connected app after successful single sign-on (SSO) operation. To address this issue, kindly refer to the following potential resolutions.
1. Is the Test configuration working?
If the test configuration has been performed in the plugin's IDP configuration tab and results Test Failed, the possible causes are listed below.
- Error Code: INVALID_SIGNATURE
Description: This issue comes when the configured certificate in the plugin's configure IDP tab did not match the Certificate in SAML Response.
How can it be fixed?:
- Copy Expected Certificate from Test window.
- Paste it in IDP Signing Certificate text box in Configure IDP Tab.
- Save settings.

- Error Code: INVALID_CONDITIONS
Description: This issue generally comes up when the Application(Jira,Confluence,Bitbucket,Bamboo and fisheye) server's time is not within the time interval specified by IDP in SAML Response. Hence, the SAML Response gets invalidated and SAML app is unable to proceed it even if the difference is in milliseconds.
How can it be fixed?:
- Read Resolution in the Test window and note the value of the minutes which you need to set in Validate SAML Response.
- Go to the SSO settings tab in the plugin scroll down to Advanced SSO settings and change the value of Validate IDP's SAML Response to minutes mentioed in Test window and save it.
- Go to Configure IDP tab in the plugin try Test configuration again.

- Error Code: INVALID_ISSUER
Description: This problem will come when the IDP entity ID / Issuer configured in the plugin does not match with the IDP Issuer.
How can it be fixed?:
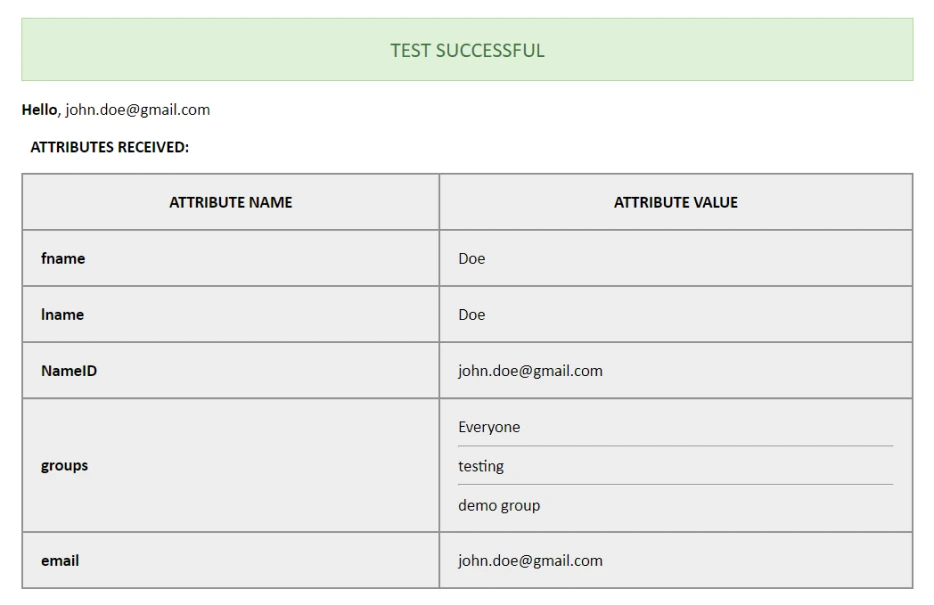
- Copy the value of the Issuer from the Test window. For the reference shown in the picture below.
- Paste it in the IDP Entity/Issuer text field in the configure IDP tab of the plugin.
- Save settings.

2. Check User profile mapping
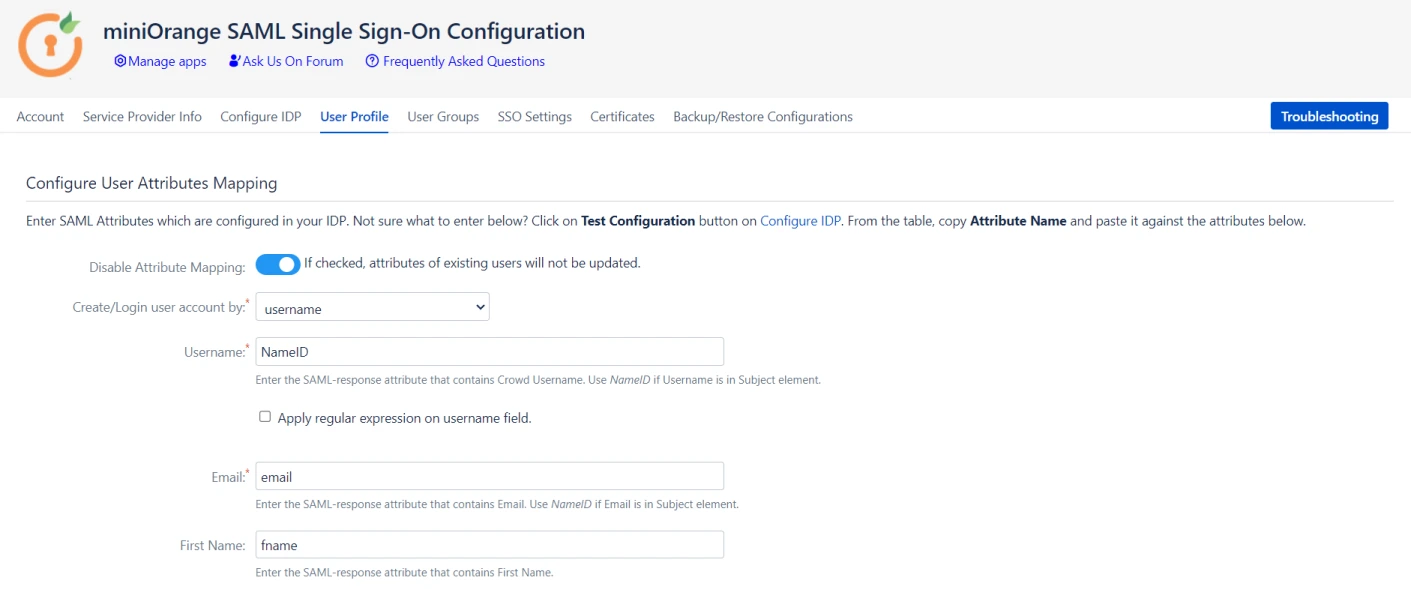
When the user logs into Crowd, one of the user's attributes from the IDP is used to search for the user in Crowd. This is used to detect the user in Crowd and log in the user to the same account.
You can configure it using the steps given below:
- Go to the User Profile tab.
- Select Username or Email for Login/Search Crowd user account by.
- Enter the attribute name from IDP corresponding to Username or Email using the test configuration results.
3. Check user permissions - check whether the user has sufficient permissions to log in to the application
- Check whether the user has sufficient groups to access the application.
- Go to the Users tab in Crowd.
- Search for your user.
- Add the user to the required group.
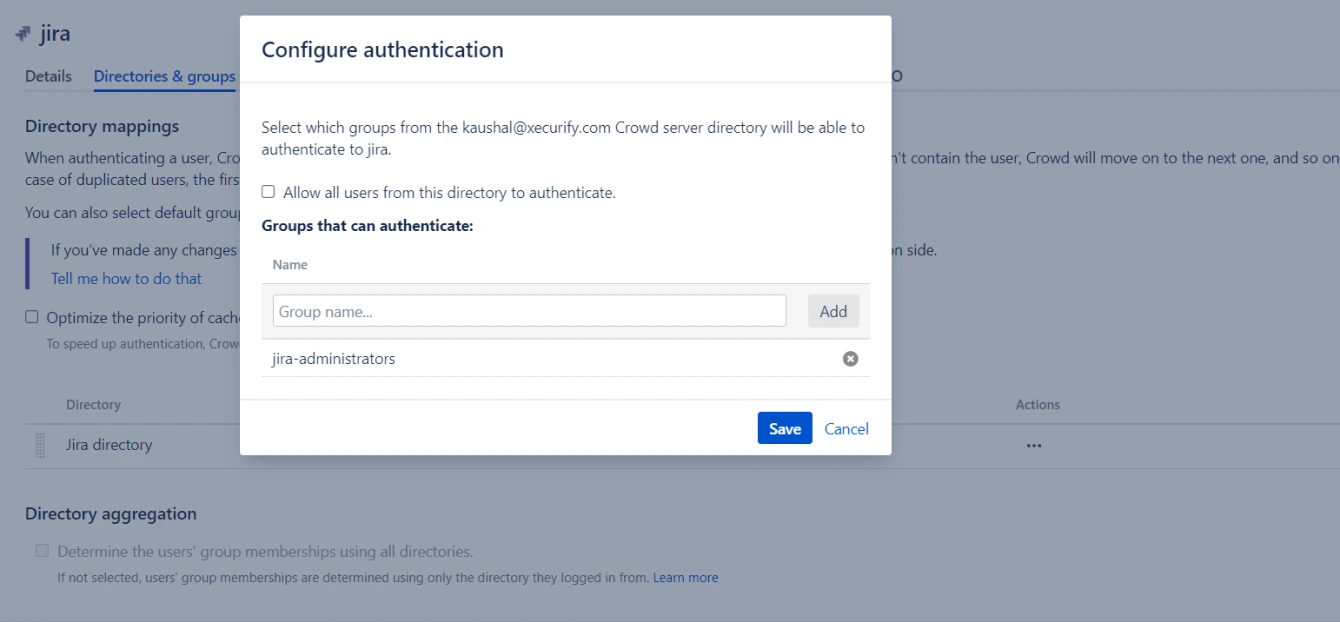
- Check whether the user is allowed to authenticate.
- Go to the Applications tab in Crowd.
- Select the application created in Crowd which is connected to the concerned Application.
- Go to the Directories and Groups tab.
- Make sure the correct directory is added to the list.
- Click on “Who can authenticate” and select the required user groups.
4. Enable Crowd SSO token creation (Crowd version > 4.3)
Please enable the token creation for all the applications in Crowd so that the plugin can create the user’s session.
- Go to the Applications tab in Crowd.
- Select the concerned application.
- Go to the Options tab.
- Enable Allow to generate user tokens option.

5. Check if the Crowd SSO authenticator is enabled in server files.
Please check if the Crowd authenticator is enabled and is configured correctly for your Atlassian applications:
- Jira - https://miniorange.in/atlassian/jira-crowd-sso-connector#stepc
- Confluence - https://miniorange.in/atlassian/confluence-crowd-sso-connector#stepc
- Bitbucket - https://miniorange.in/atlassian/bitbucket-crowd-sso-connector#stepc
- Bamboo - https://miniorange.in/atlassian/bamboo-crowd-sso-connector#stepc
- Fisheye - https://miniorange.in/atlassian/fisheye-crowd-sso-connector#stepc
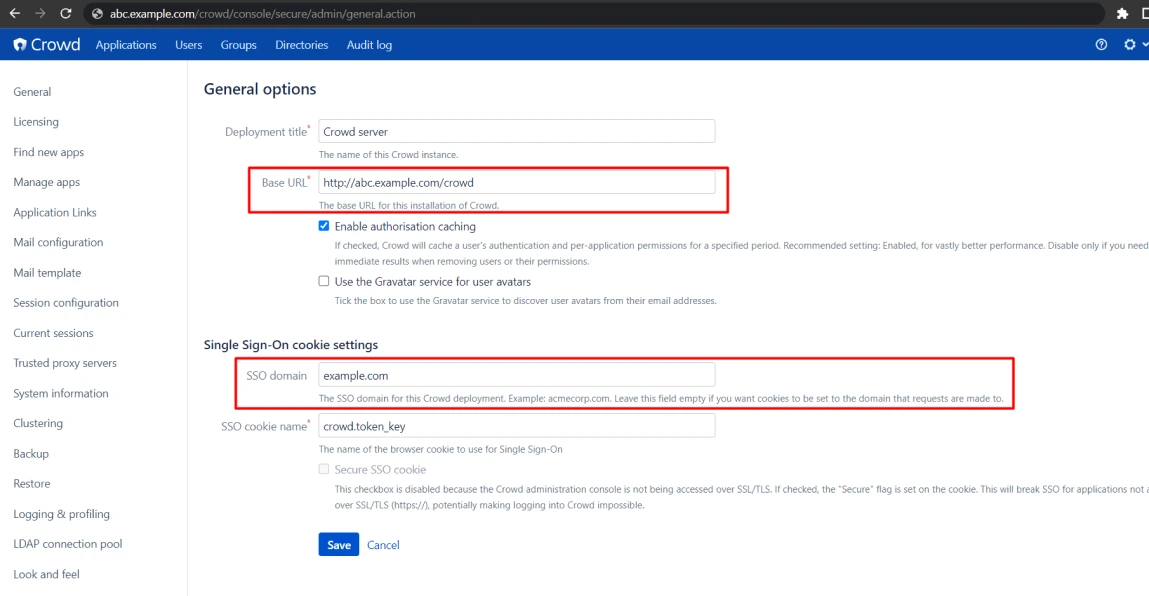
6. Check if the SSO cookie is set to the parent domain in Crowd
- Go to the General tab of Crowd.
- Configure the SSO domain to your parent domain. Eg. If your Crowd domain is crowd.example.com then your parent domain is example.com
7. Proxy IP in the trusted proxy configurations
If you have a reverse proxy configuration for your Atlassian apps, please add the proxy IPs to the trusted proxy configuration in Crowd.
- Go to the Trusted Proxy Servers tab in Crowd and add the proxy IP address.
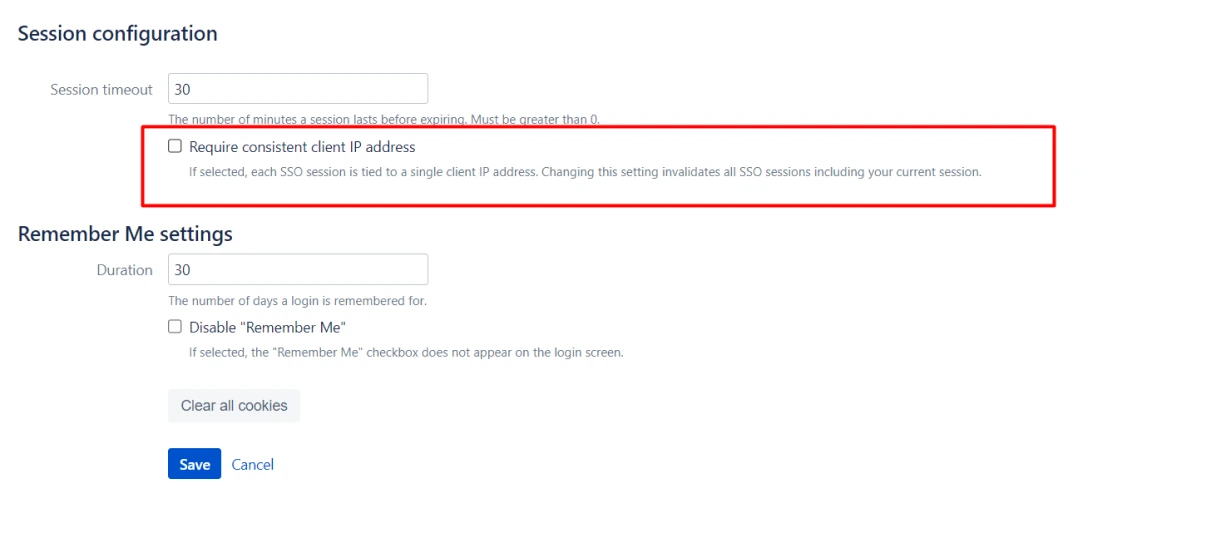
8. Are you accessing the application with different networks? Disable the consistent IP check
- Go to the Session Configuration tab in Crowd.
- Disable the Require consistent client IP address option.
9. Add the application base URL to the remote address section of the configured app in Crowd
- Go to the configure application in Crowd.
- Go to the Remote addresses tab.
- Ensure that your Application URL (Jira/Confluence/Bitbucket, etc.) is added to this section.


