Contents
Crowd Using SCIM User And Group Provisioning For Microsoft Entra ID (Previously known as Azure AD)
User Sync & Group Sync app provisions user and group information from Microsoft Entra ID (Previously known as Azure AD) to Crowd. Users, groups, and directory details can be provisioned using SCIM. SCIM provisioning works based on events performed on IDP. This way the administrator only needs to manage user accounts in Microsoft Entra ID (Previously known as Azure AD). This reduces the administration time required to create users and groups in Atlassian modules such as Crowd.
Download And Installation
- Log into your Crowd instance as an admin.
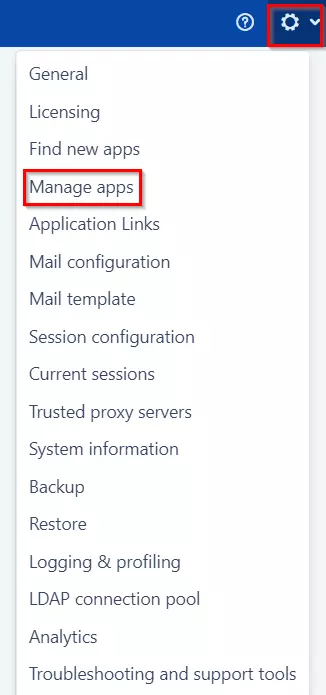
- Navigate to the Administration menu and Click Manage Apps.
- Click Find new apps or Find new add-ons from the left-hand side of the page.
- Locate SCIM for Crowd via search and click on install.
Step 1: Get SCIM Client Details
- In the SCIM configuration, Please enter App Name and click on the Save Settings button. Copy the SCIM Base URL and SCIM Bearer Token, these will be used later to configure the SCIM application on Microsoft Entra ID (Previously known as Azure AD).

Step 2: Setup Microsoft Entra ID (Previously known as Azure AD) SCIM Configurations
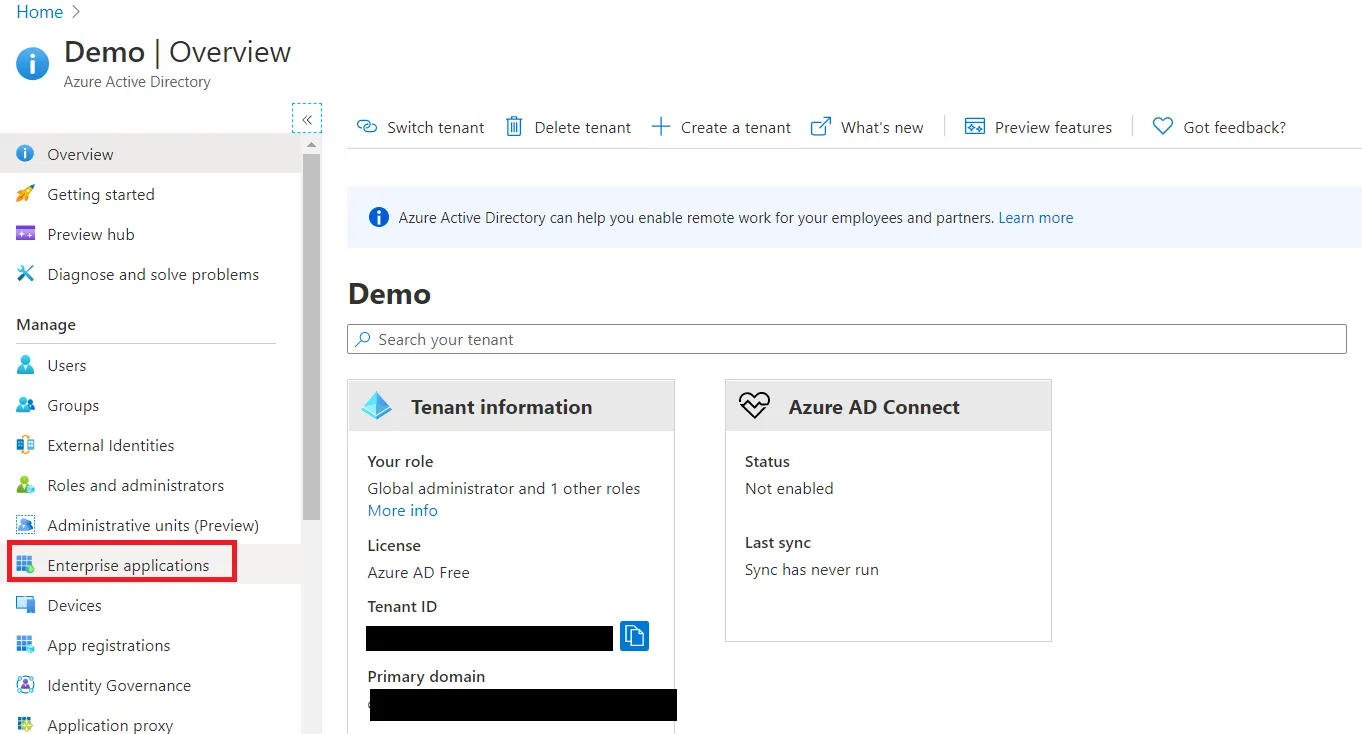
- Log in to your Microsoft Entra ID (Previously known as Azure AD) portal and select the Microsoft Entra ID Directory. Then create an Enterprise application.
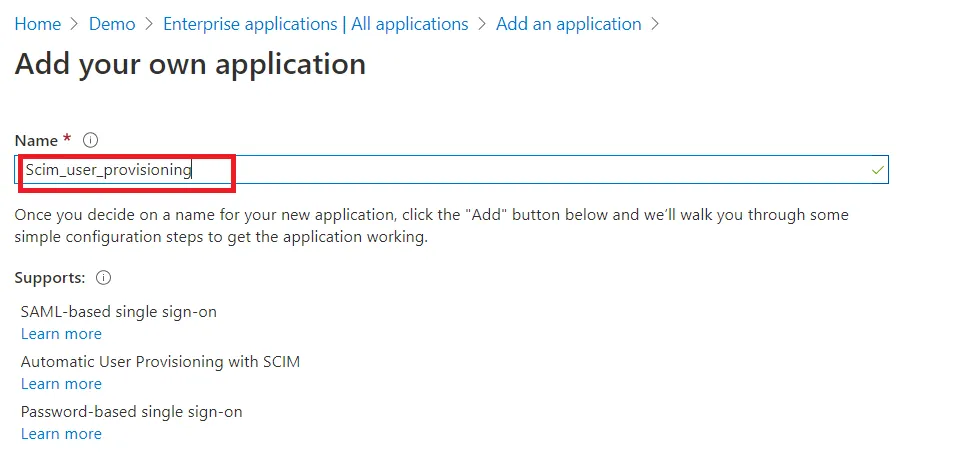
- Click on New Application and select a non-gallery application.
- Give a suitable name to your user-provisioning application.
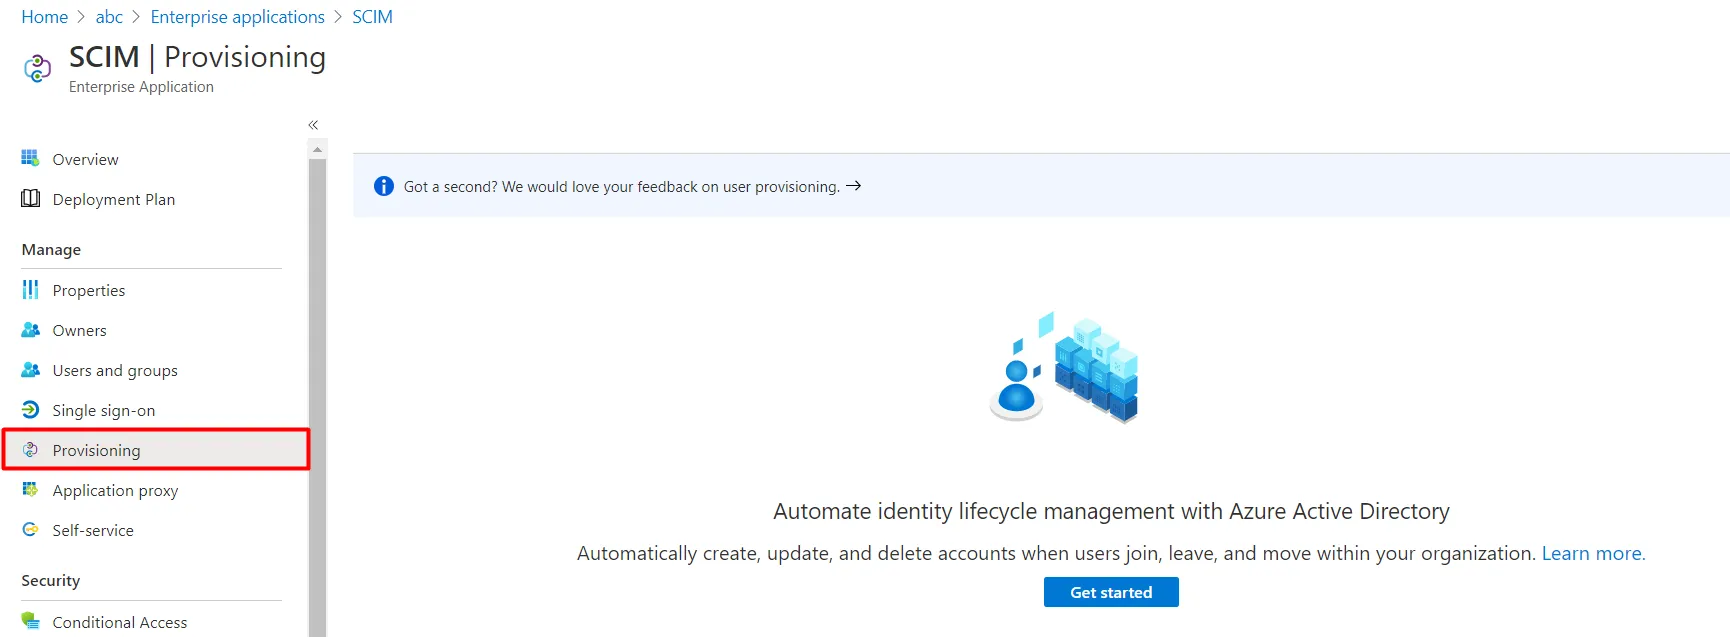
- Click on Provisioning in left menu and click on Get started.
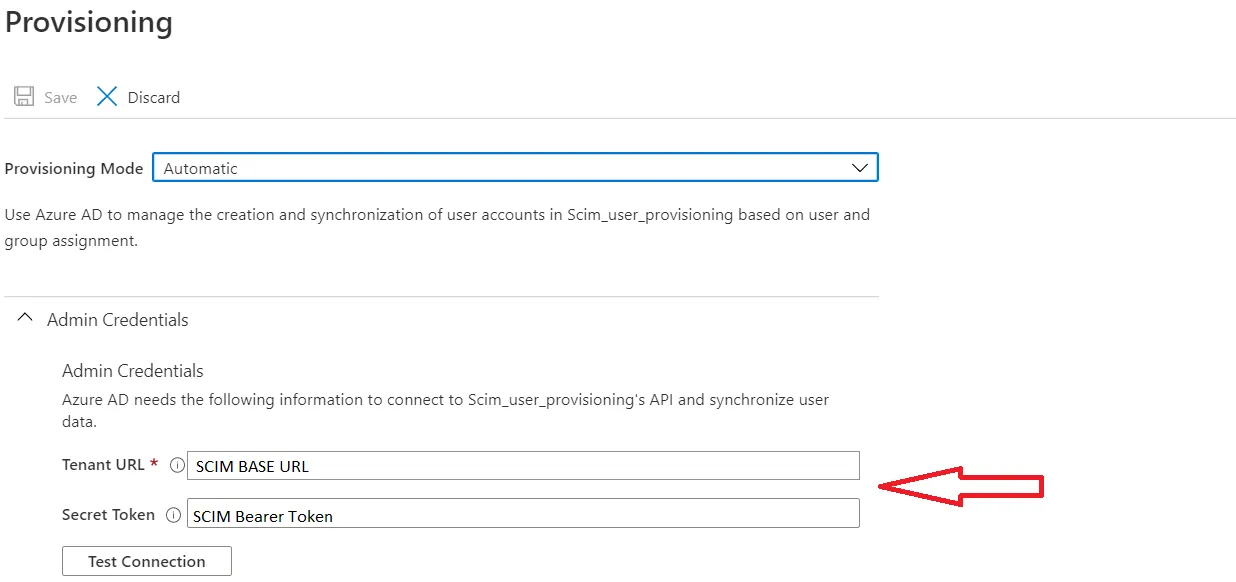
- Select Automatic in Provisioning Mode and Enter SCIM Base URL, SCIM Bearer Token (which you will find in step 1).
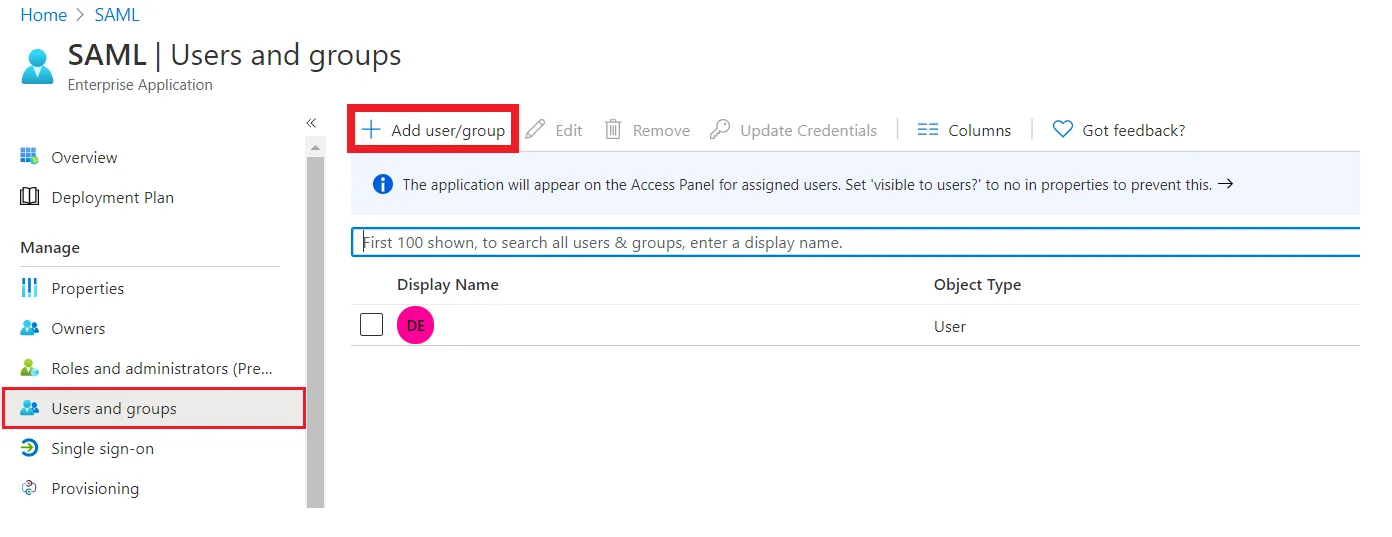
- Assign users to your application. Assigned users will be created in your Atlassian module if they are not already present. You can also assign groups. Members of assigned groups will be provisioned for the Atlassian module.
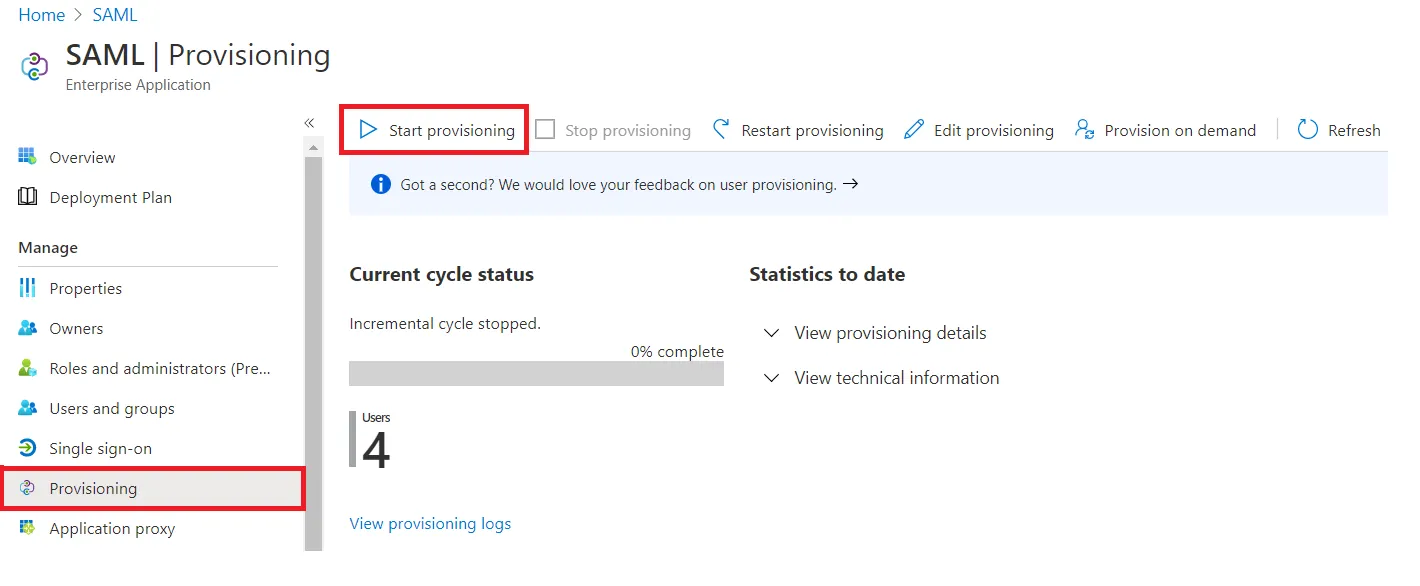
- Once done with the configuration, Go back to the application and click on Start provisioning.

Step 3: User Sync Settings
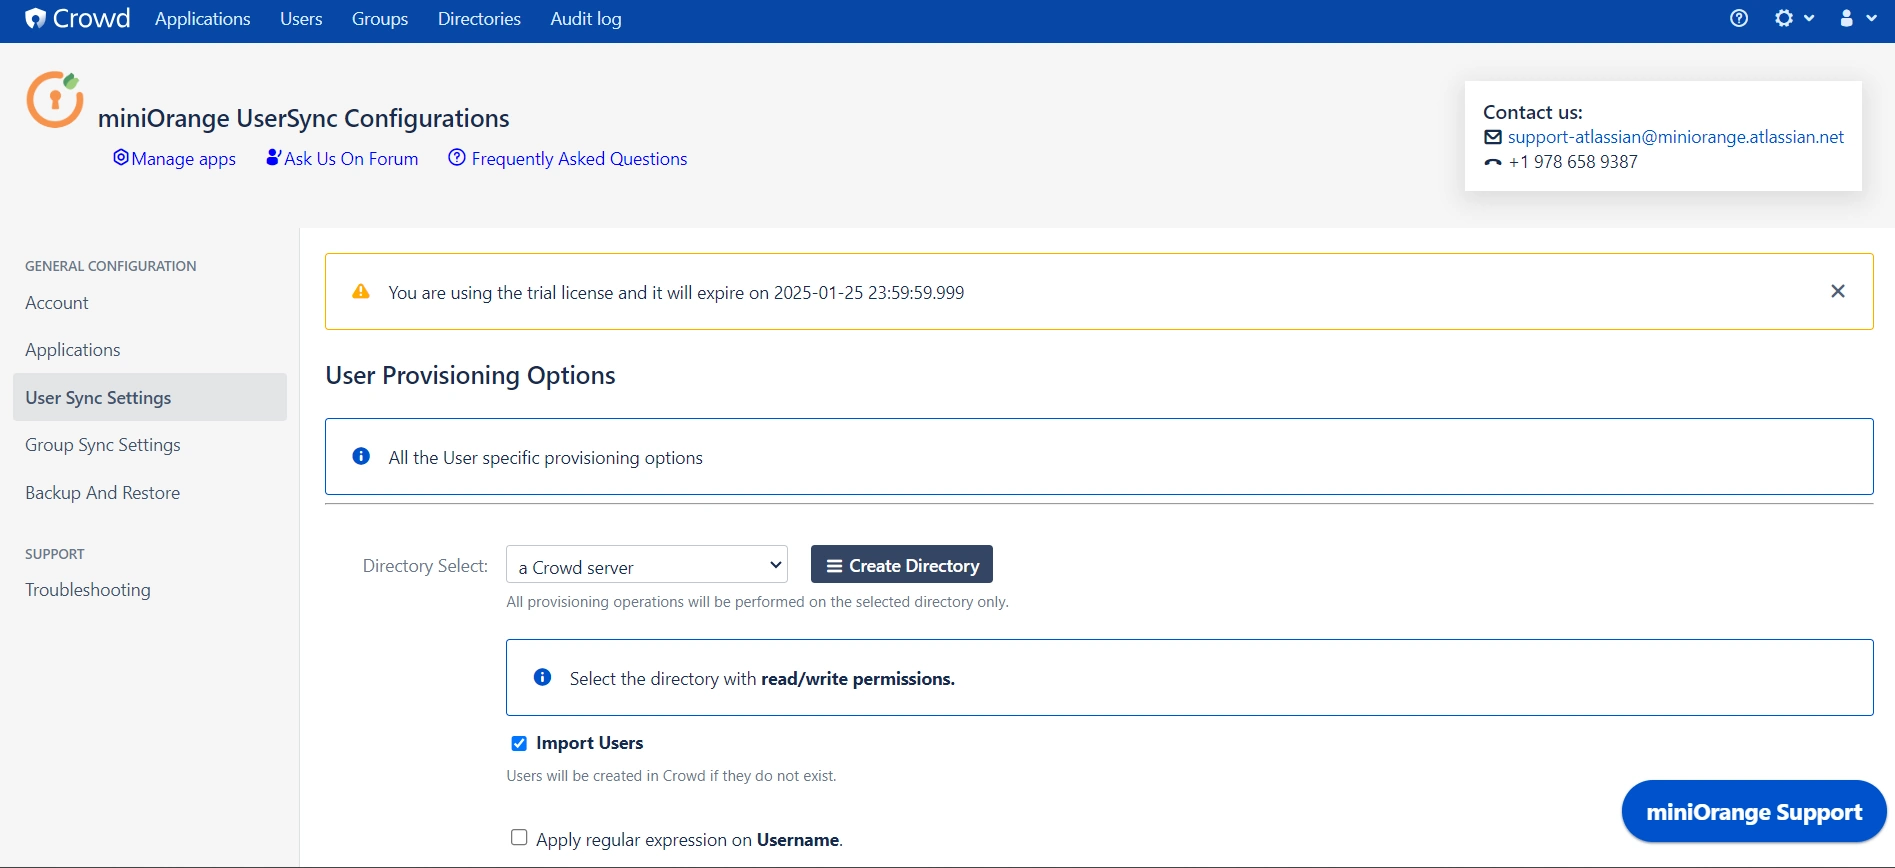
- Select the User Sync Settings tab from the left sidebar. Here you can configure different settings about user creation and updation.
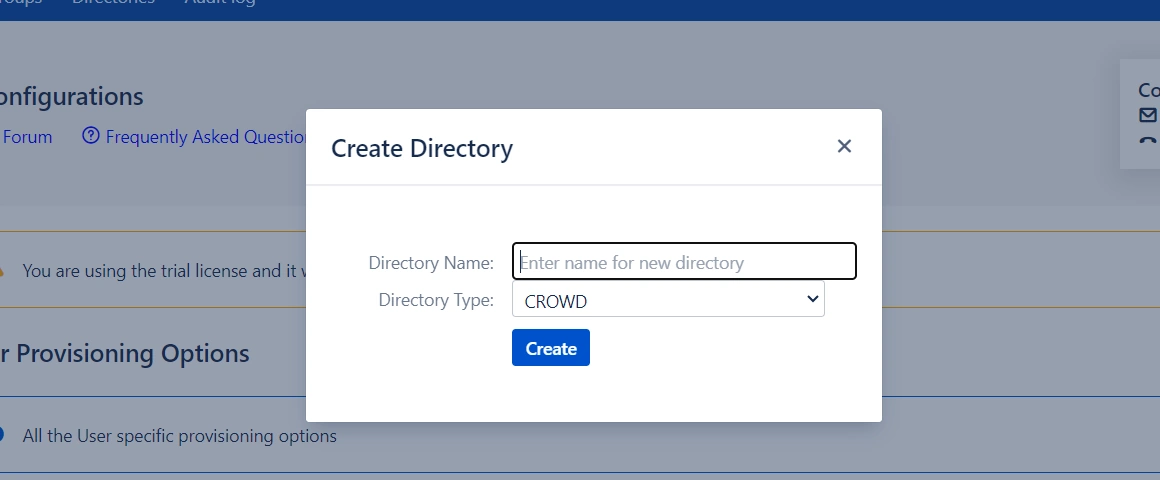
- You can Create the directory using Create Directory option where you want SCIM Operations to be performed.
- You can also select your Directory Type from the dropdown.
- Enable Import Users option to import all active Microsoft Entra ID (Previously known as Azure AD) Users.
- The user can be automatically enabled or disabled here based on IDP configuration.
- You also have the option to set Default Project Lead and Default Component Lead.
- Attribute mapping enables you to map your attributes sourced from the IDP to Crowd attributes. Through this section you can map your Crowd attributes to the attributes coming from IDP. By default, email corresponds to the email/mail attribute, and displayName corresponds to the full name attribute. However, if you want to map these Crowd attributes with other attributes coming from IDP, you can use this feature to change the attribute mapping configurations.

Step 4: Group Sync Settings
- Select the Group Sync Settings tab from the left sidebar. Here you can configure different settings for group creation and group mapping.
- Here you can configure Default groups for new and all users.
- You can set Manual Group Mapping or On-The Fly Group Mapping.

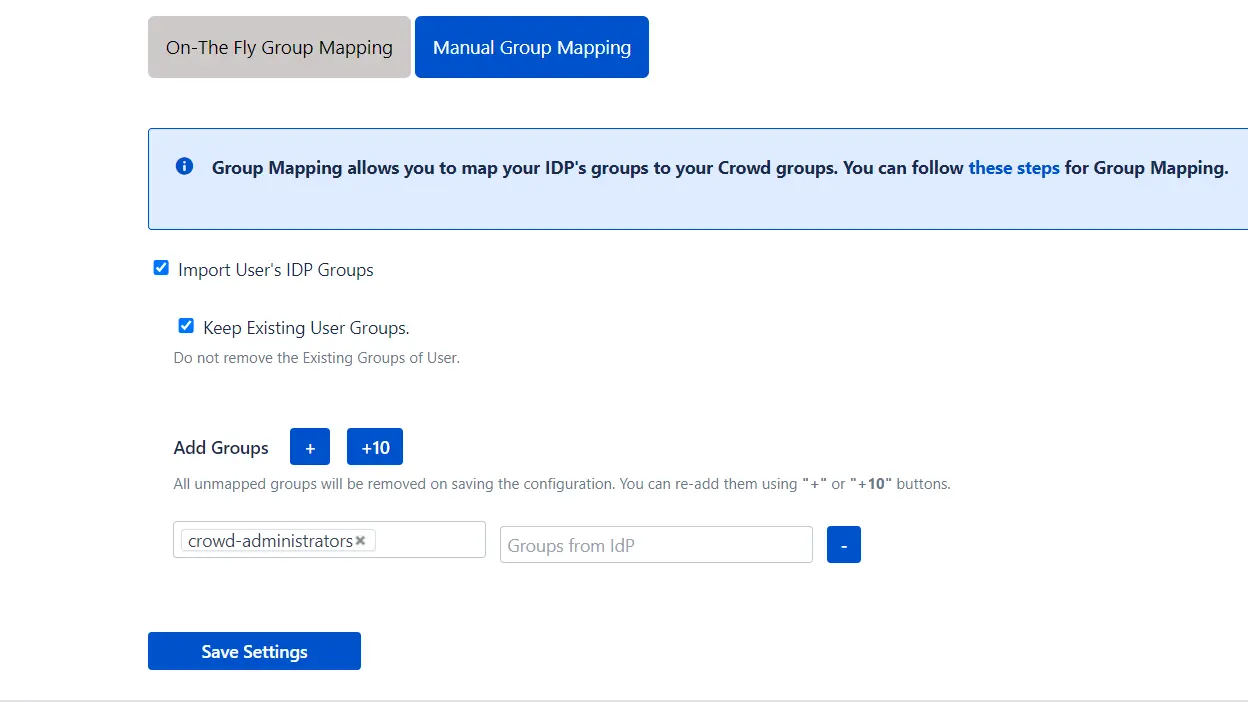
1. Manual Group Mapping -
- Here you can manually map Crowd groups with the groups from IDP.
- You can also configure to import IDP groups, and to keep existing users or not.
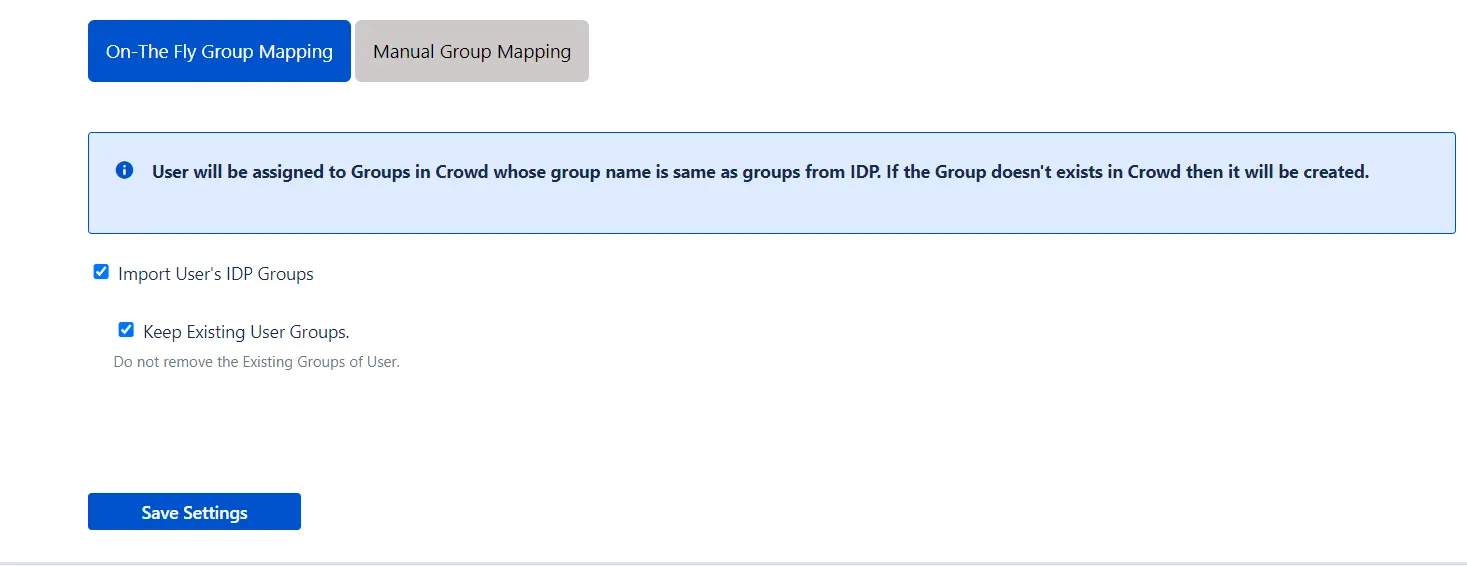
2. On-The Fly Group Mapping -
- Here users will be assigned to groups in Crowd whose group name is the same as groups from IDP. If the group doesn't exist in Crowd then it will be created.
- You can configure to keep the existing user groups.
Step 5: Backup & Restore
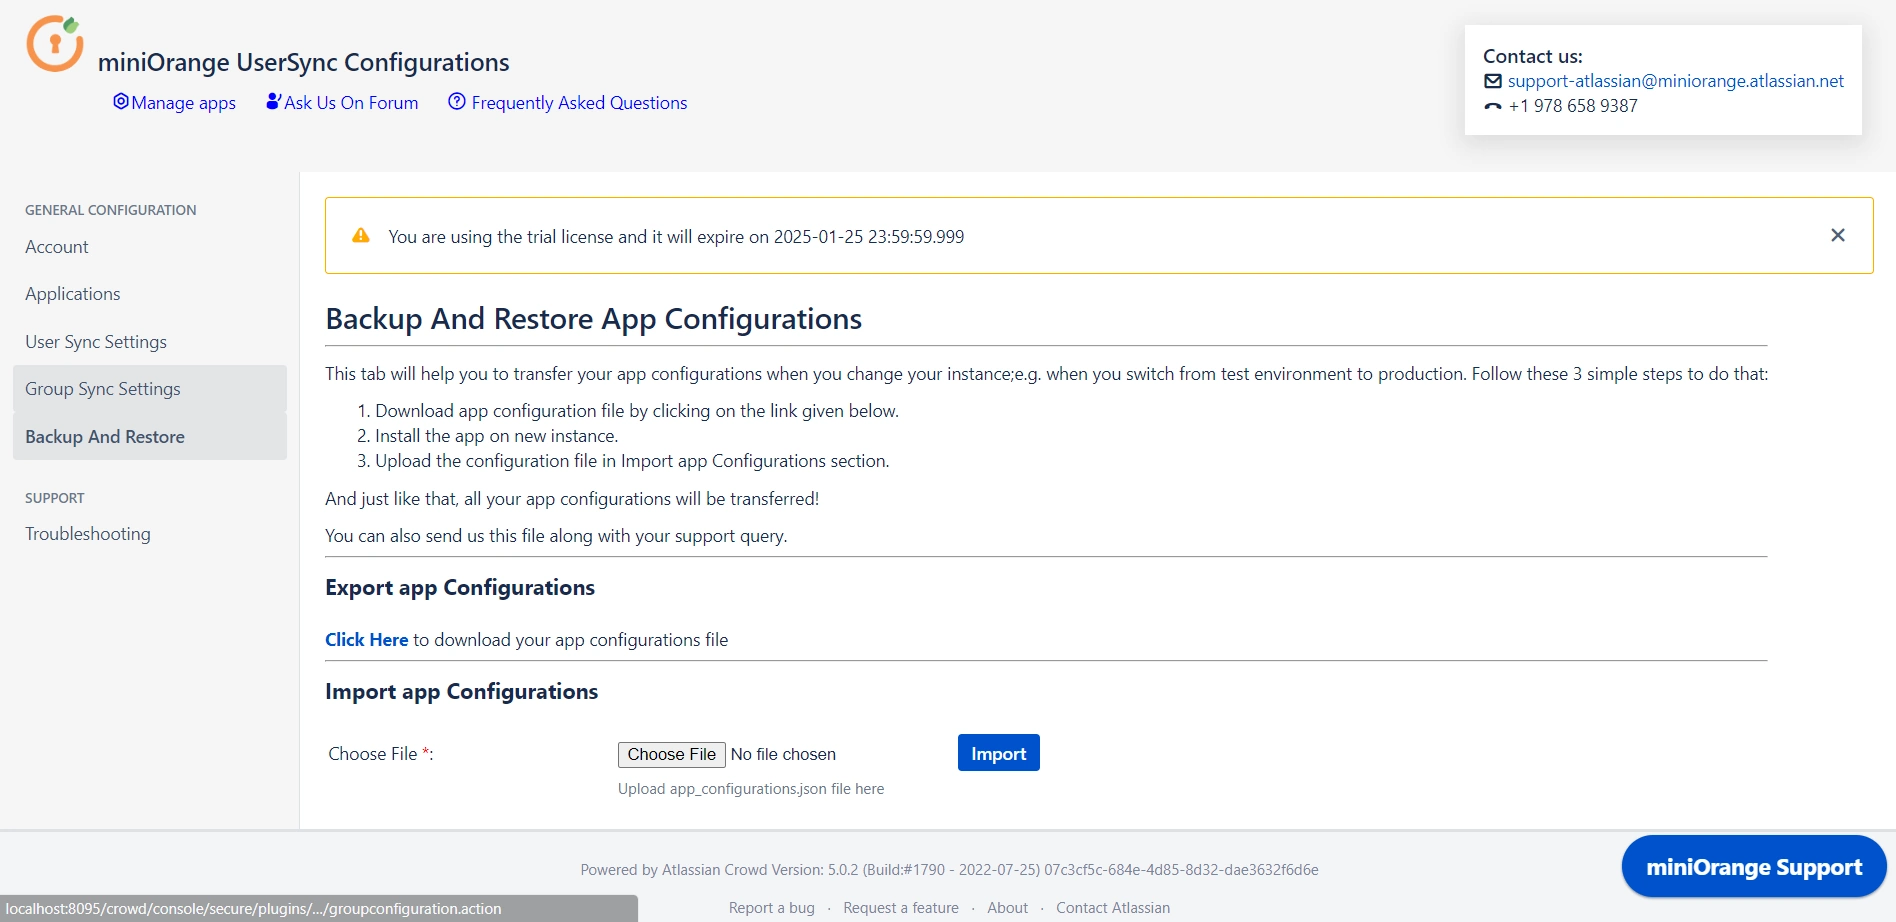
- In the Backup and Restore tab you can Import and Export plugin configurations in the JSON format.
Recommended Add-Ons

Two Factor Authentication
Enable 2FA/MFA for users & groups and let users configure 2FA during their first login.
Know More
Jira SAML SSO
Jira SAML SSO application enables SSO for Jira Software and Jira Service Desk.
Know More
Jira OAuth/OIDC SSO
Secure your Jira Service Management with OAuth/OpenID Connect SSO.
Know MoreBitbucket Git Authentication App | Kerberos/NTLM Apps | Word/PDF Exporter | WebAuthn | SonarQube SSO | Jenkins SSO
If you don't find what you are looking for, please contact us at support-atlassian@miniorange.atlassian.net or raise a support ticket here.

