Contents
Jira Project Configuration Manager
miniOrange Project Configuration Manager for Jira app, gives the ability to export the project configurations in JSON file format. These configurations can be used further to update the exiting projects as well as creating new project with the similar configurations on the same Jira instance. Here, we will go through a guide to configure and how to use miniOrange Project Configuration Manager in Jira. By the end of the guide, You will be able to use the plugin to export the project configurations and also update or create new project with exported details.
Pre-requisites
To configure Project Configuration Manager plugin, you need the following items:
- Jira should be installed and configured.
- Admin credentials are set up in Jira.
- Valid Jira Server or Data center License.
Download And Installation
- Log into your Jira instance as an admin.
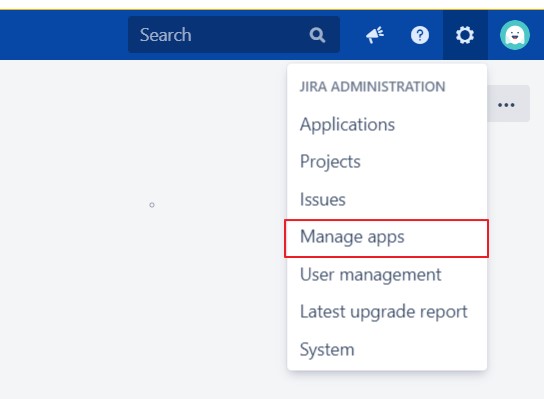
- Navigate to the settings menu and Click Manage Apps.
- Click Find new apps or find new add-ons from the left-hand side of the page.
- Locate miniOrange Project Configuration Manager for JIRA via search.
- Click Try free to begin a new trial or buy now to purchase a license for miniOrange Project Configuration Manager for Jira.
- Enter your information and click Generate license when redirected to MyAtlassian.
- Click Apply license.

 How To Use:
- Go to the Export Configurations tab.
- From the Project to Export drop down list please select the project whose configurations you want export.
- Click on the Export Project button.
- The project configurations will get exported successfully in the JSON file.
- Import project configuration section gives options to create new project with the uploaded configuration file or update the existing project configurations.
- Go to the Import Configuration section.
- Upload the Project Configuration file.
- From the Select Action option please select Create Project with similar configurations option.
- In the Project Detail section, enter Project Name and Key with which you want to create new Project.
- Click on the Import Project button.
- The new project will get updated successfully.
- Go to the Import Configuration section.
- Upload the Project Configuration file.
- From the Select Project dropdown list please select the project whose configurations you want to update.
- Click on the Import Project button.
- The Configurations of the existing project will get updated successfully.
Export Project Configurations

Import Project Configurations:
a. Create New Project

b. Update Existing Project

Recommended Add-Ons

Crowd SAML SSO
Enabling SAML SSO allows users to login to Crowd using Identity provider credentials.
Know More
Crowd Bulk User Management
It allows to manage users in Crowd and Automatically and efficiently deactivate users.
Know More
Jira Bulk User management
Deactivate users automatically by their last active time to save user licenses.
Know MoreBitbucket Git Authentication App | Kerberos/NTLM Apps | Word/PDF Exporter | WebAuthn | SonarQube SSO | Jenkins SSO
If you don't find what you are looking for, please contact us at support-atlassian@miniorange.atlassian.net or raise a support ticket here.

