Contents
SSO for JSM Customers using Gluu Server as OAuth Provider
Our SAML/OAuth SSO for JSM Customers app offers the functionality to seamlessly integrate OAuth/OpenID Single Sign-On into the JSM customer portal, ensuring compatibility with all OAuth/OpenID Providers. This guide will outline the steps for configuring SSO between the JSM customer portal and your OAuth/OpenID Provider. By following these instructions, customers will undergo authentication via your OAuth/OpenID Provider prior to accessing the JSM customer portal. This integration facilitates a smooth customer experience while also mitigating spam ticket.
Download And Installation
- Log into your Jira instance as an admin.
- Navigate to the settings and Click on Apps.
- Locate SAML/OAuth SSO for JSM Customers.
- Click on free trial to begin a new trial SAML/OAuth SSO for JSM Customers.
- On menu bar click on Apps. Locate SAML/OAuth SSO for JSM Customers .
Step 1: Setup Gluu as OAuth Provider
- Login to your Gluu Server.
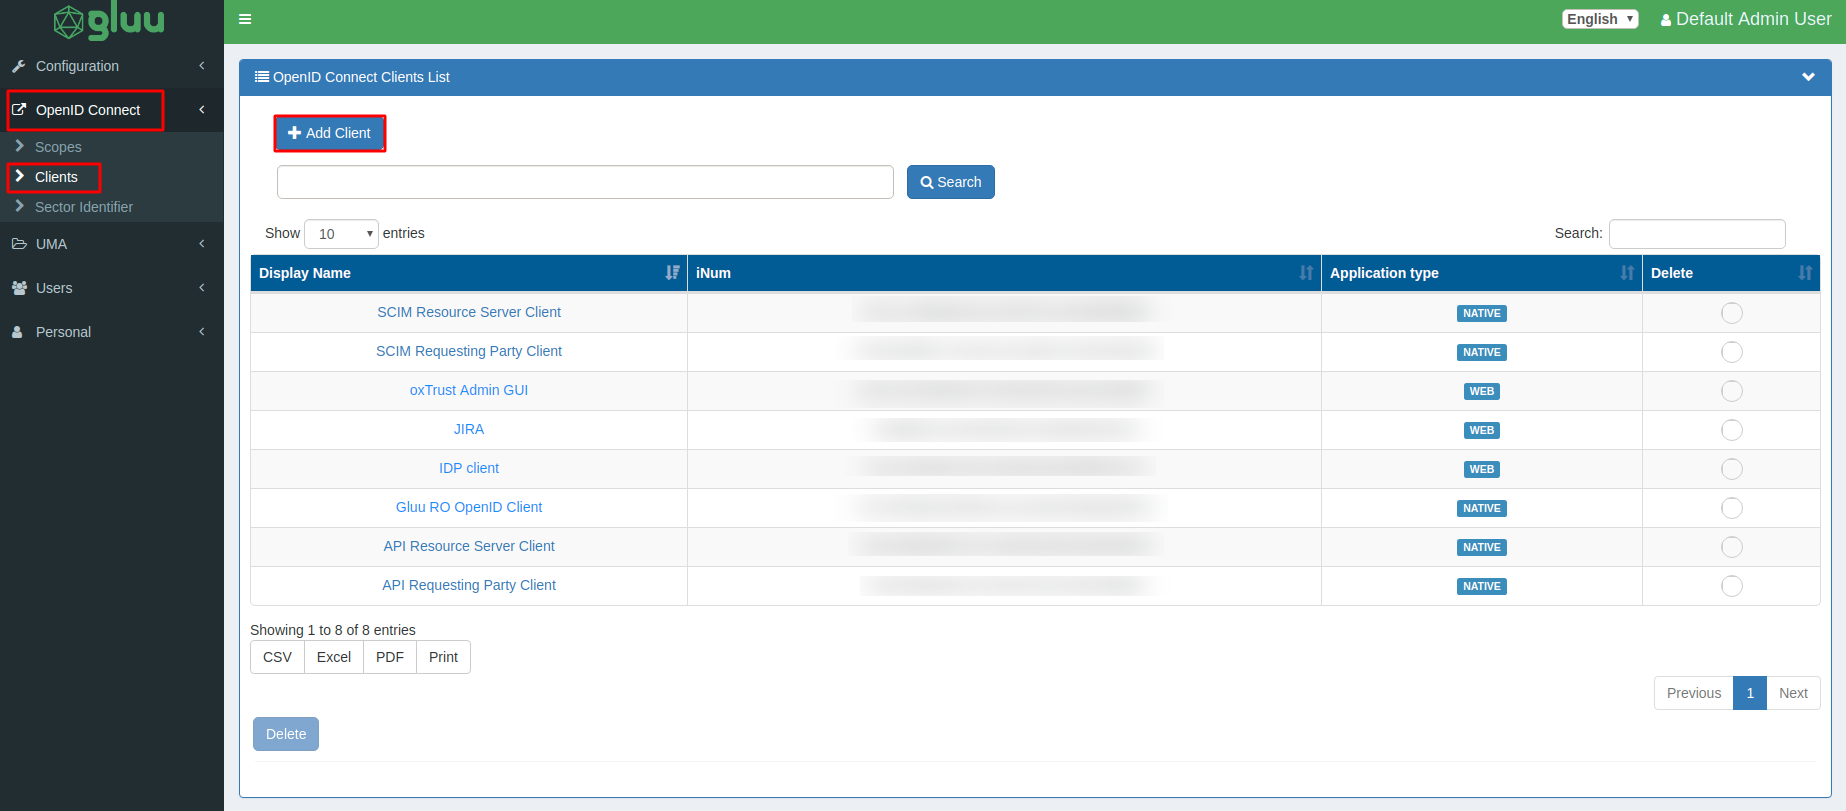
- Select OpenID Connect > Clients from the left-hand side menu and click on Add Client.
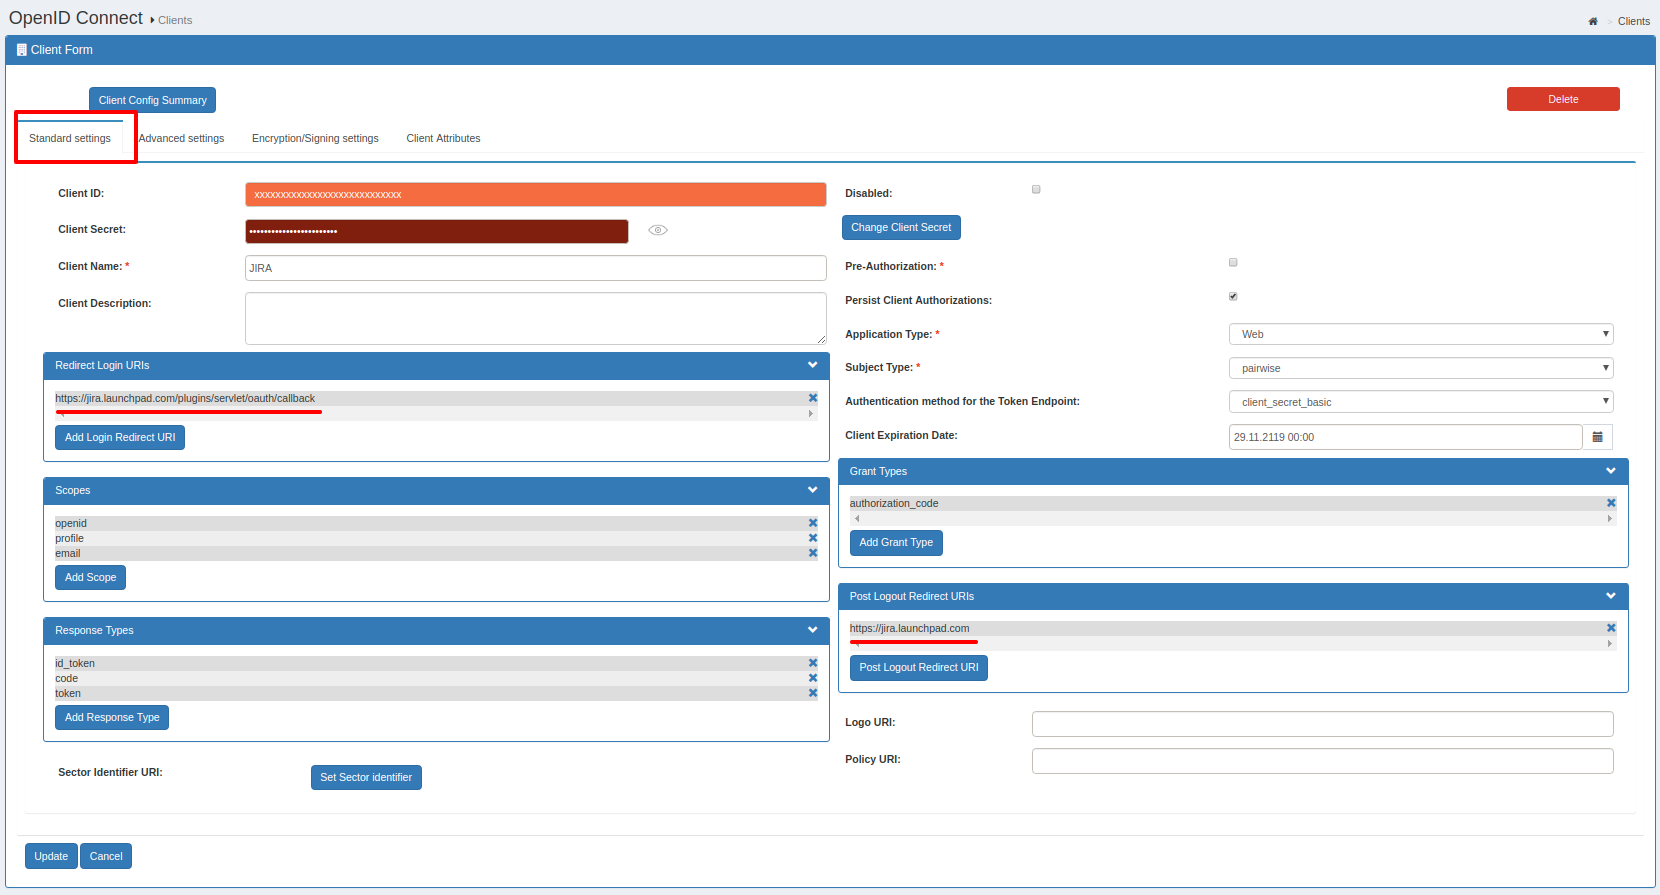
- Configure Standard Settings using below details.
- Once all the settings are done click on Update to save your changes.
- Copy generated Client ID and Secret.
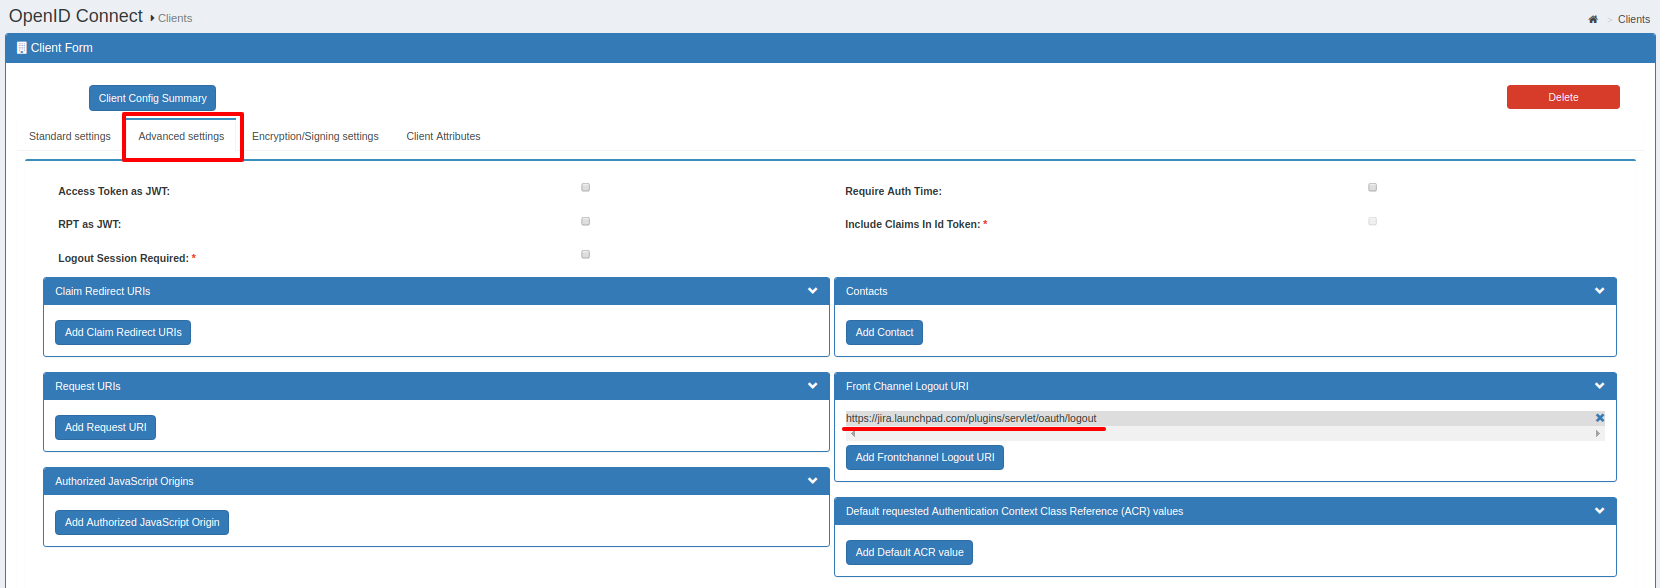
- Switch to Advanced Settings for configuring Front Channel Logout URI. Enter logout URI as <Base_URL>/plugins/servlet/oauth/logout
- Click on Update to reflect your settings.
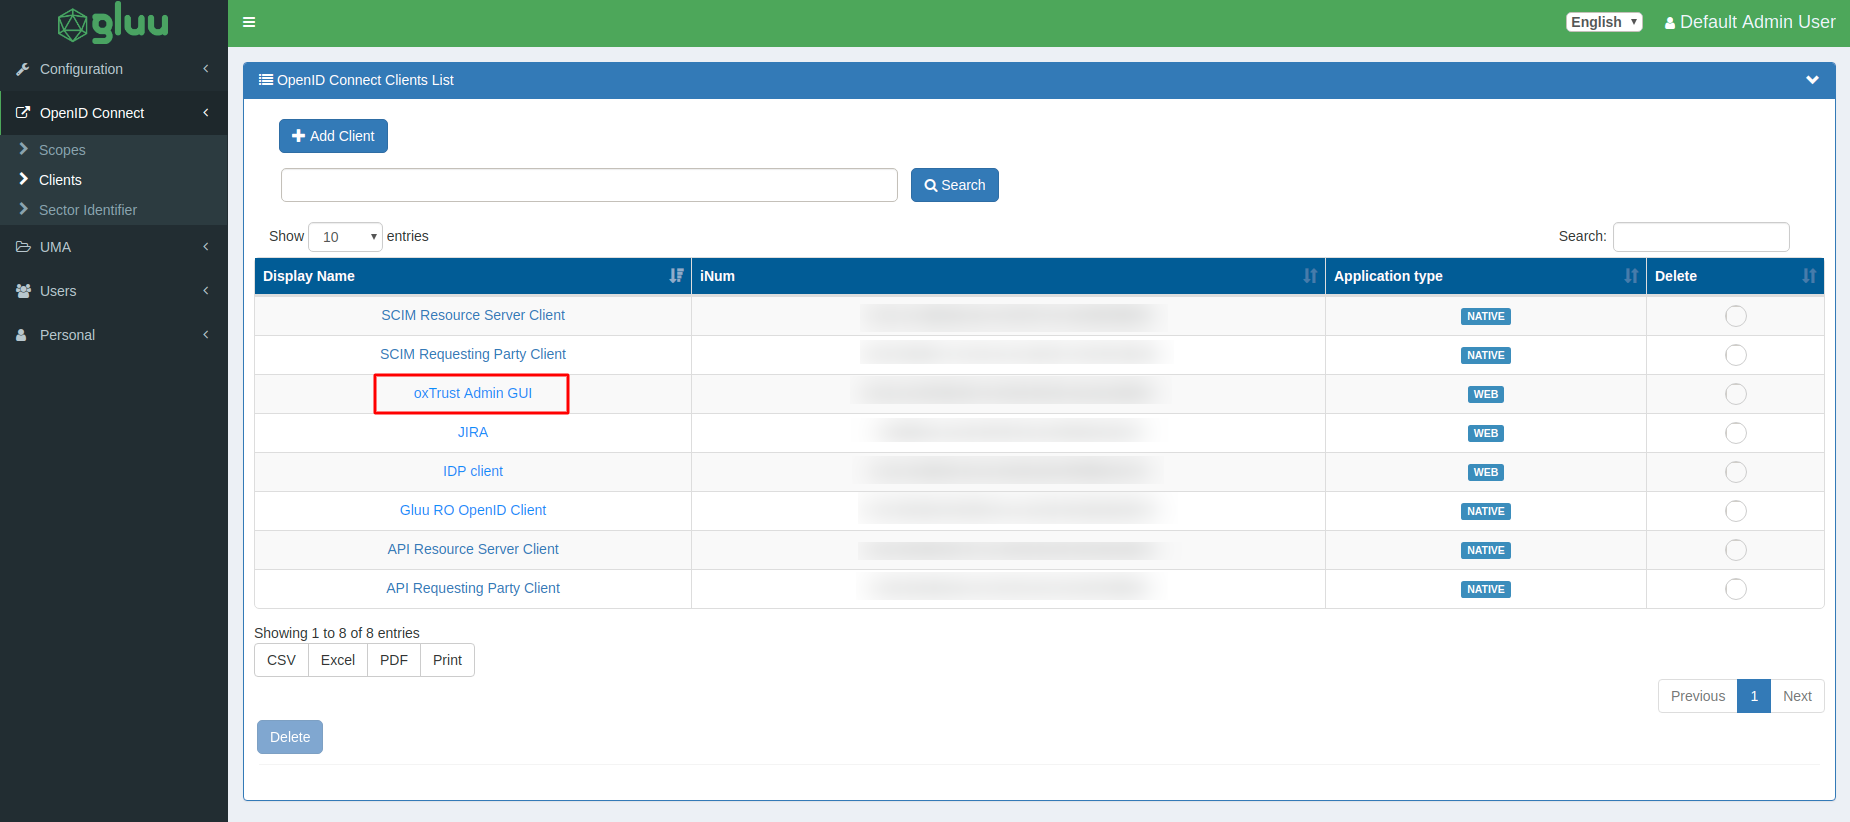
- Now, we need to setup Front Channel Logout URI for oxTrust. Browse to OpenID Connect > Clients and select oxTrust Admin GUI from the clients list.
- Go to Advanced Setting section and configure Front Channel Logout URI as <Base_URL>/plugins/servlet/oauth/logout.
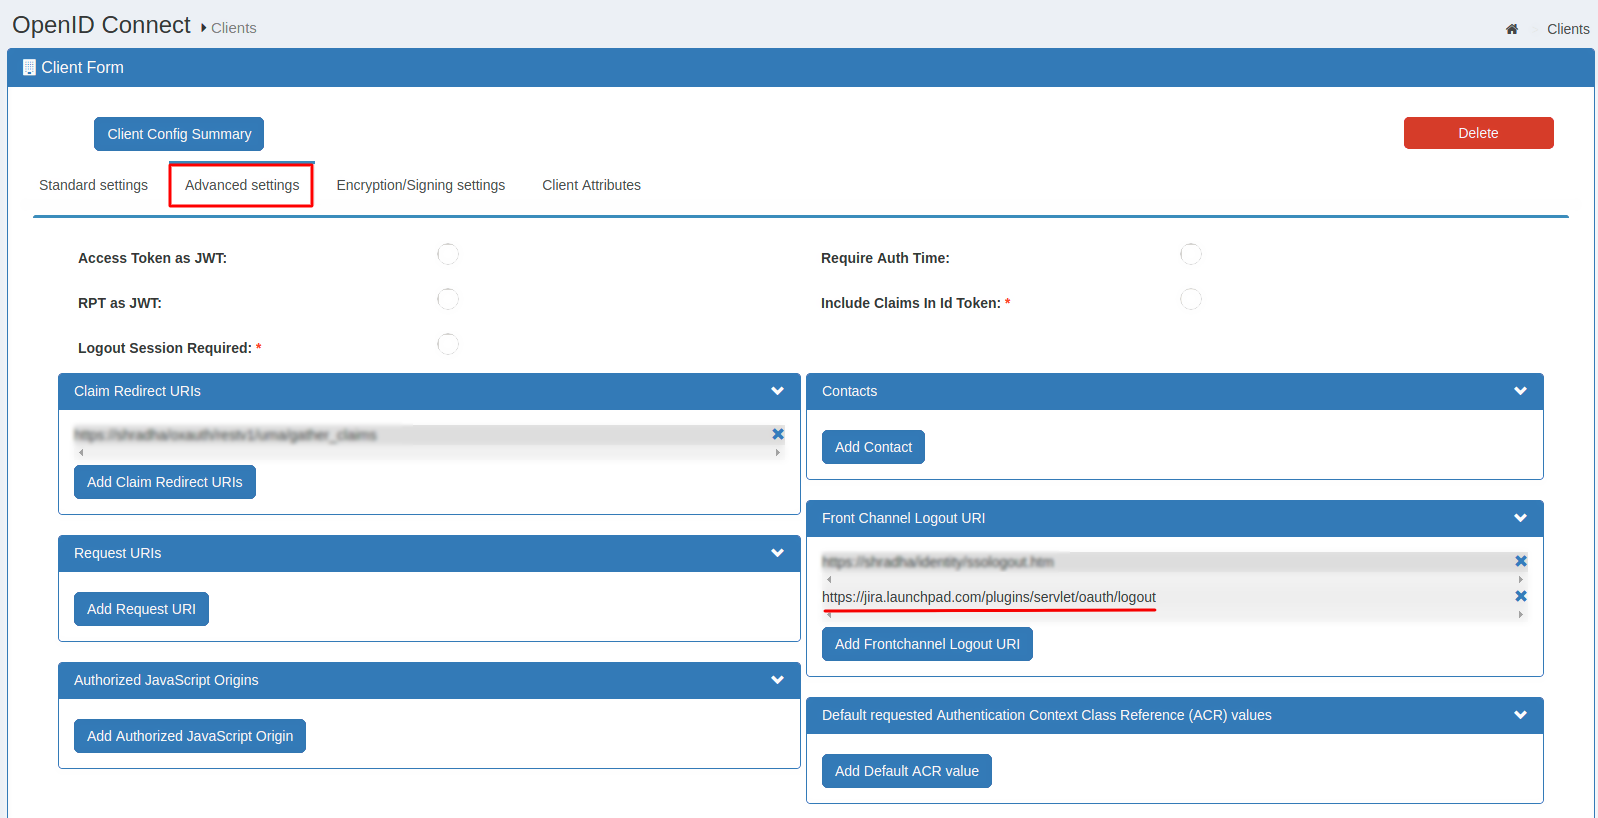 Note: The Front Channel Logout URI will be the same for your Atlassian app and oxTrust.
| Client Name: | Enter the client application name e.g. JIRA |
| Authentication method for the Token Endpoint: | Select client_secret_post from the list. |
| Redirect Login URI: | Enter the Callback URL provided in the plugin. |
| Scopes: | Select openid, profile and email from the list. |
| Response Type: | Select code, token and id_token. |
| Grant Type: | Select authorization_code from the list. |
| Post Logout Redirect URIs: | Enter URL where you want to redirect after Logout. e.g. JIRA Base URL. |
Step 2: Setup JSM as OAuth Client
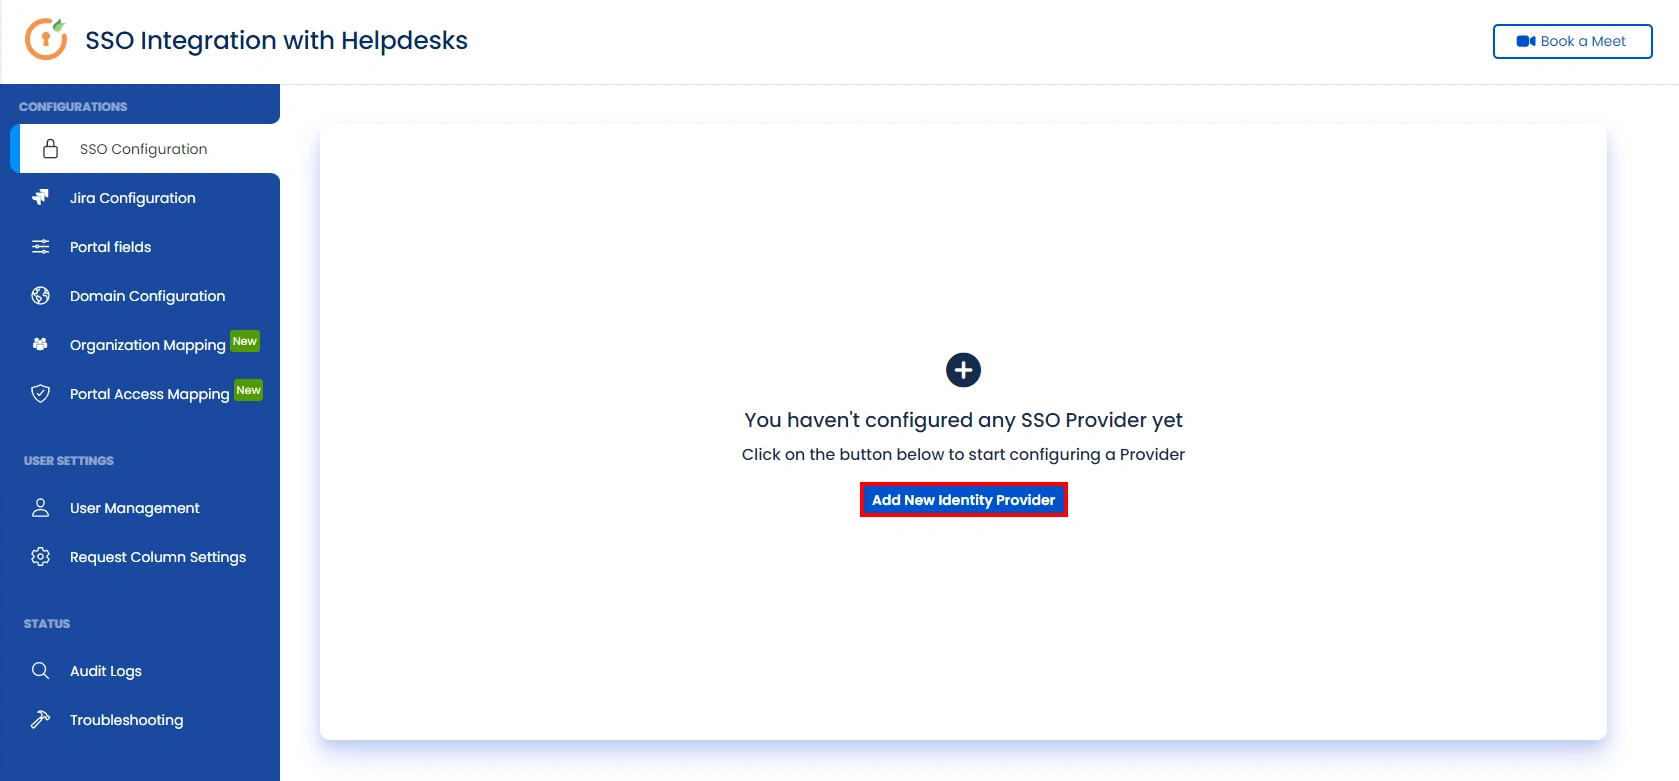
- Go to the Manage Apps -> click Getting started under SSO Integration with Helpdesk then click on the Add New Identity Provider.
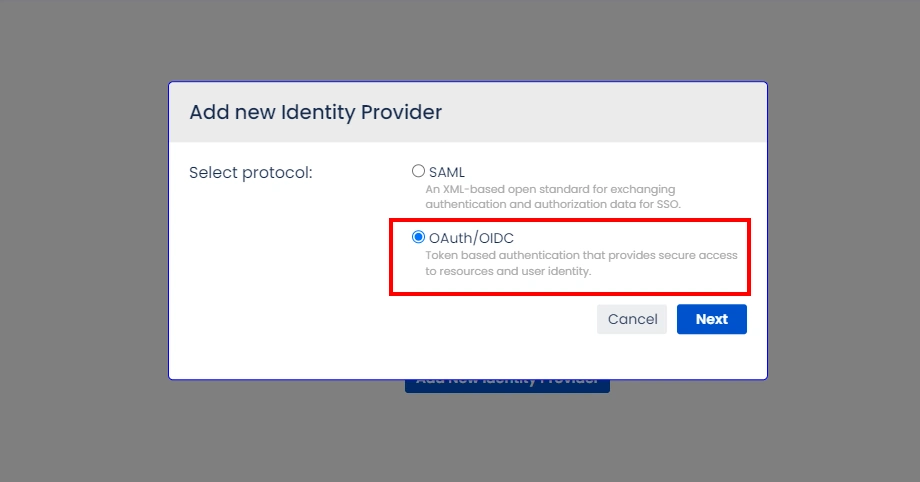
- Select OAuth/OIDC and click on the next button.
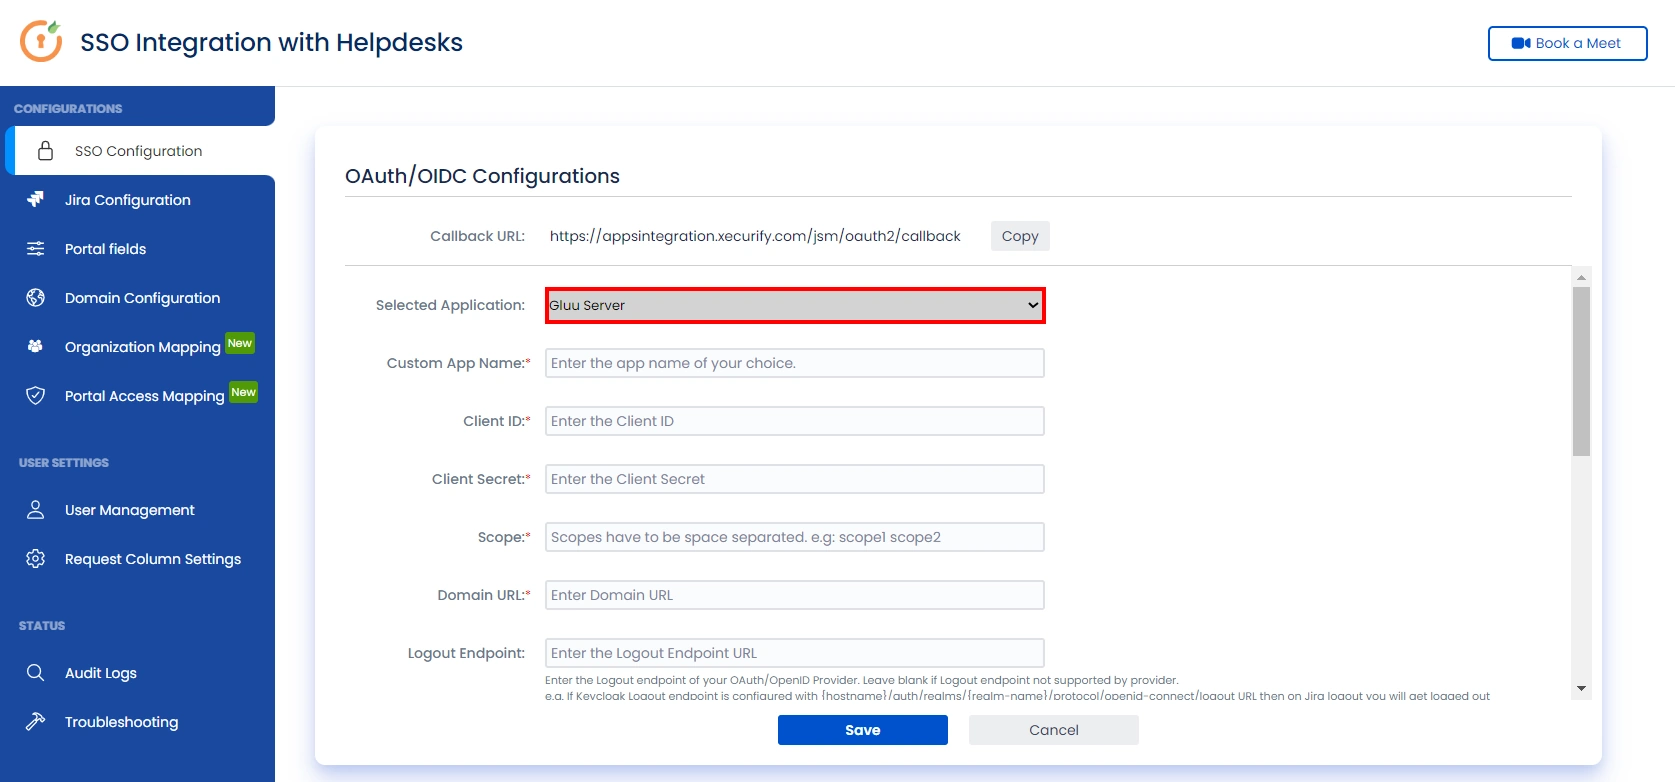
- Select Gluu Server from the Selected Application dropdown menu.
- Enter Client ID, Client Secret , Gluu domain, and scope(required) as openid email profile.
- Your Domain name will be https://<Gluu_Base_URL>
- Click on Save button and then test connection for verifying the entered details.
Step 3: User Attribute Mapping
- Once you see all the values in Test connection, go to User Attribute Mapping. Map attributes like Email, firstname, lastname, etc. Click on Save.

Step 4: Integrate Atlassian HelpDesk with JSM SSO
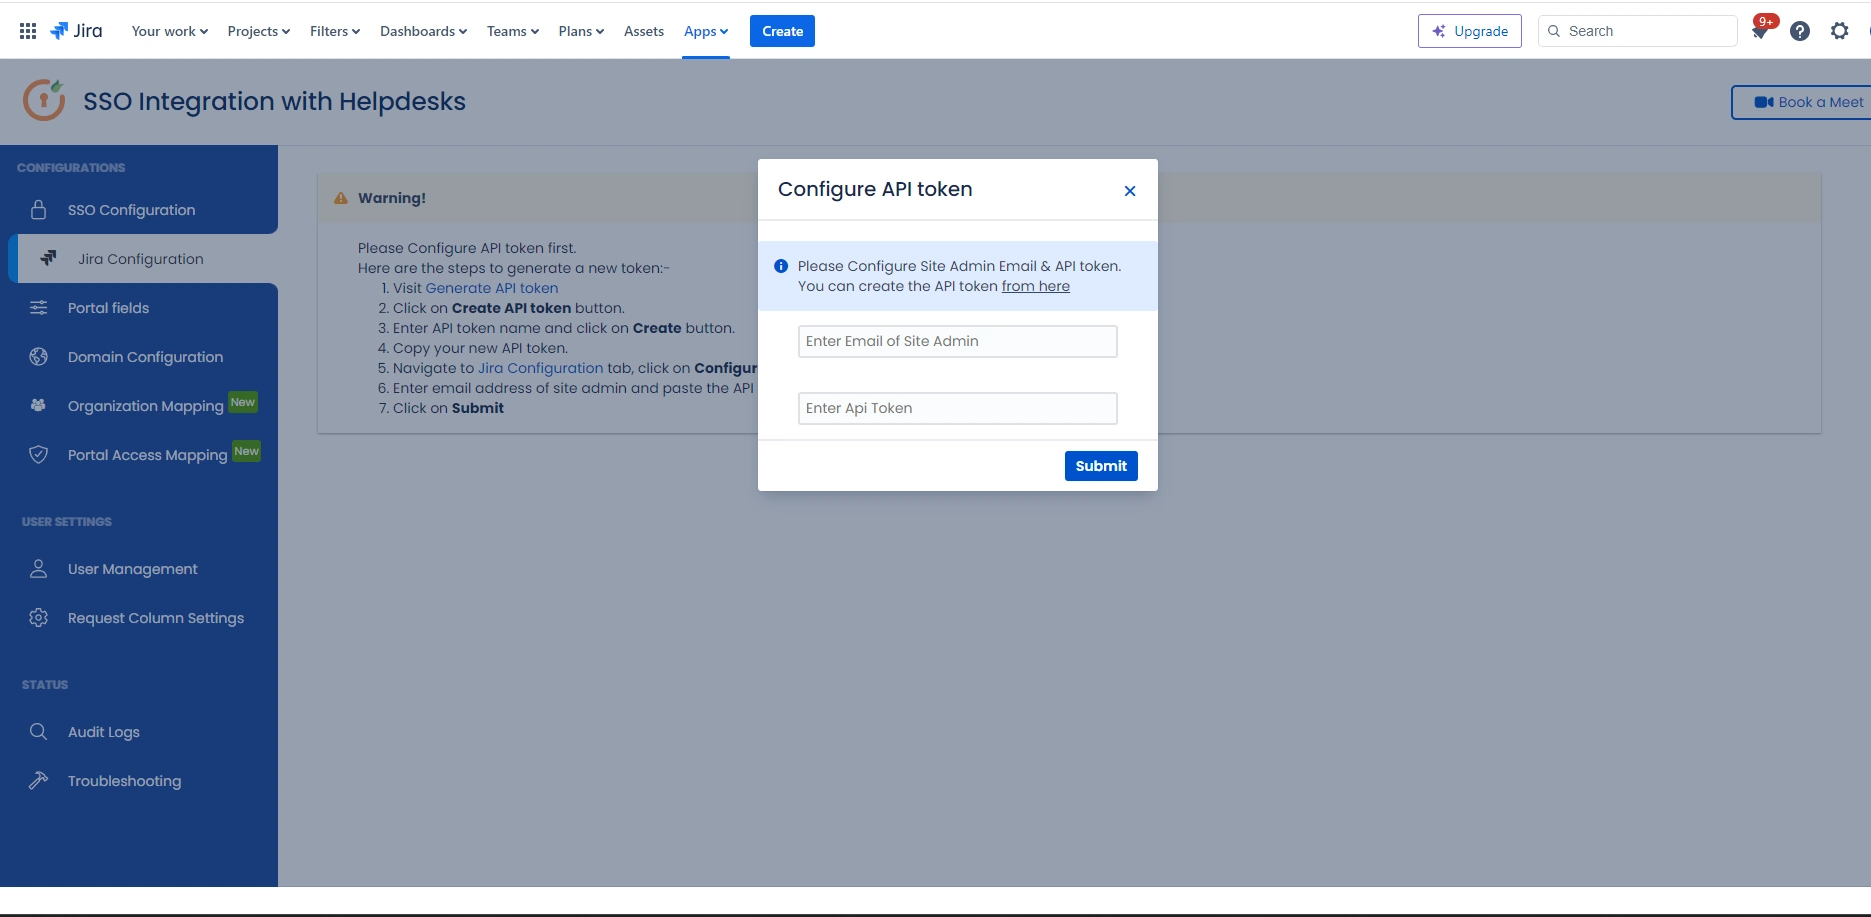
- Navigate to the Jira Configuration tab. Click on the Configure API Token and configure the Service Account API token with the email.
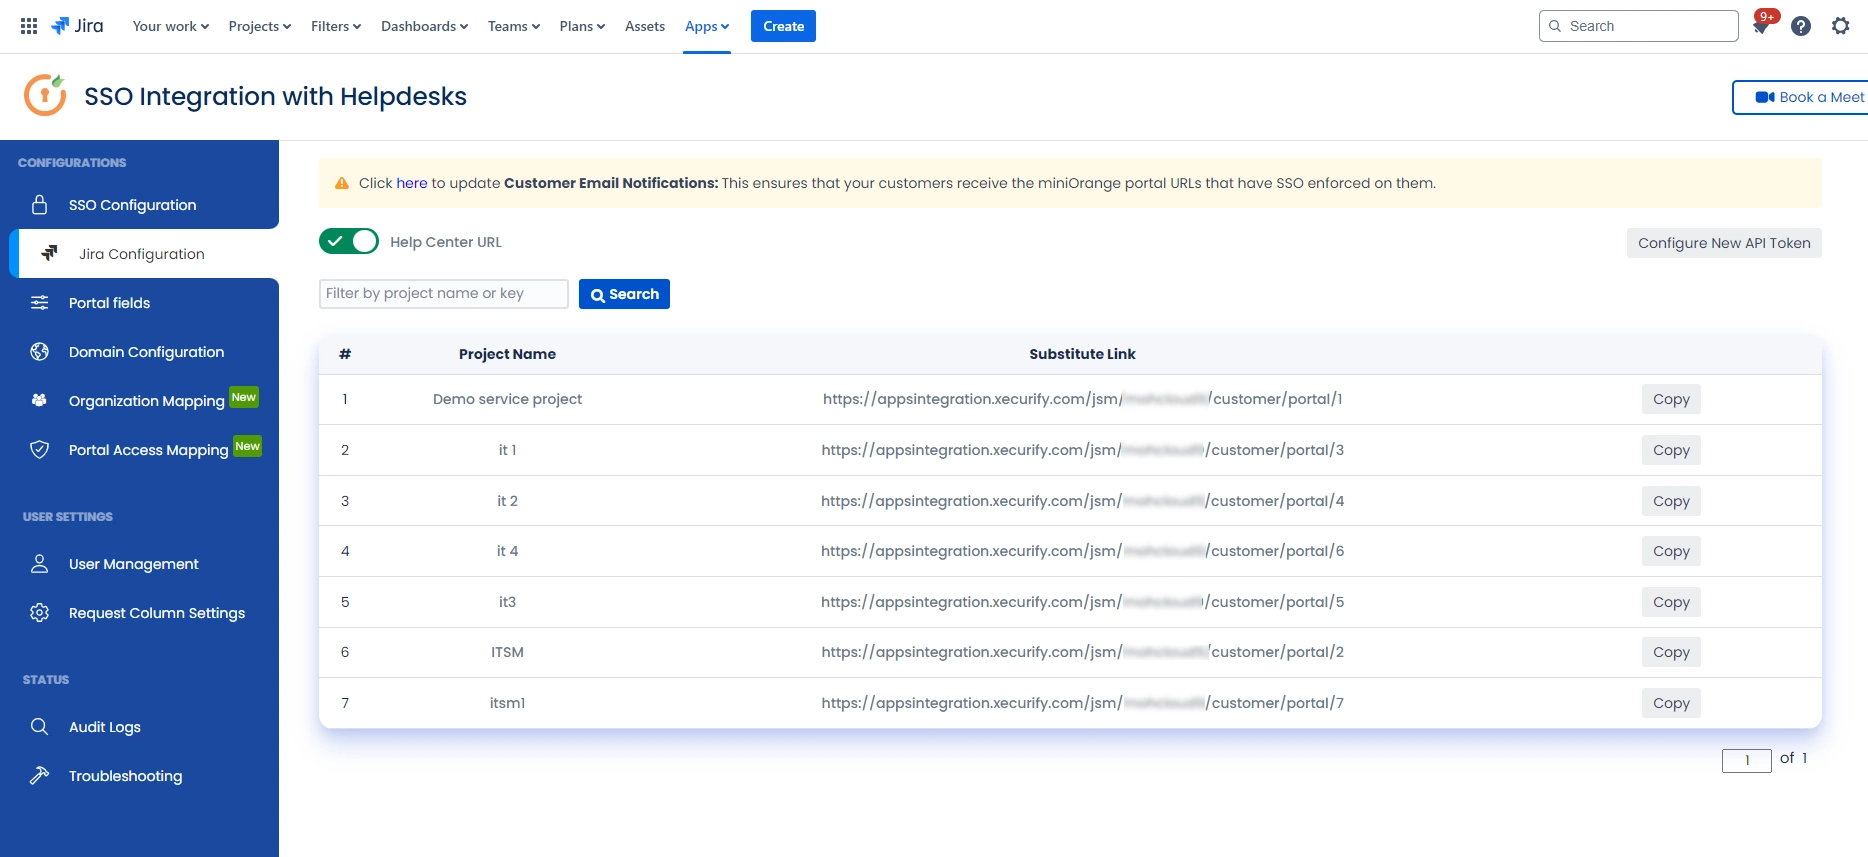
- After successful configuration of API token all the service desk projects with respective links will be displayed. These substituted links will be used by customers for accessing particular projects with SSO.
- Copy any of the substitute links you see for your portals and try accessing it in a private browser window. You would be automatically redirected to your Identity Provider for authentication and would be allowed access to the portal only after successful authentication.
Recommended Add-Ons

Two Factor Authentication
Enable 2FA/MFA for users & groups and let users configure 2FA during their first login.
Know More
User Sync SCIM Provisioning
Synchronize users, groups & directory with SCIM & REST APIs for Server/DC.
Know More
API Token Authentication
Secure your JIRA Data Center/Server REST API using API Tokens.
Know MoreAdditional Resources
Bitbucket Git Authentication App | Kerberos/NTLM Apps | Word/PDF Exporter | WebAuthn | SonarQube SSO | Jenkins SSO
If you don't find what you are looking for, please contact us at support-atlassian@miniorange.atlassian.net or raise a support ticket here.

