Manage Users
In the Manage users section, you gain a detailed understanding of how to manage users effectively within the dashboard environment. This section allows you to perform all user-related activities, including creating users, bulk user uploads, etc. You will also be able to perform operations related to updating and managing user roles.
How to create new a User:
- Login into miniOrange Partner Portal dashboard.
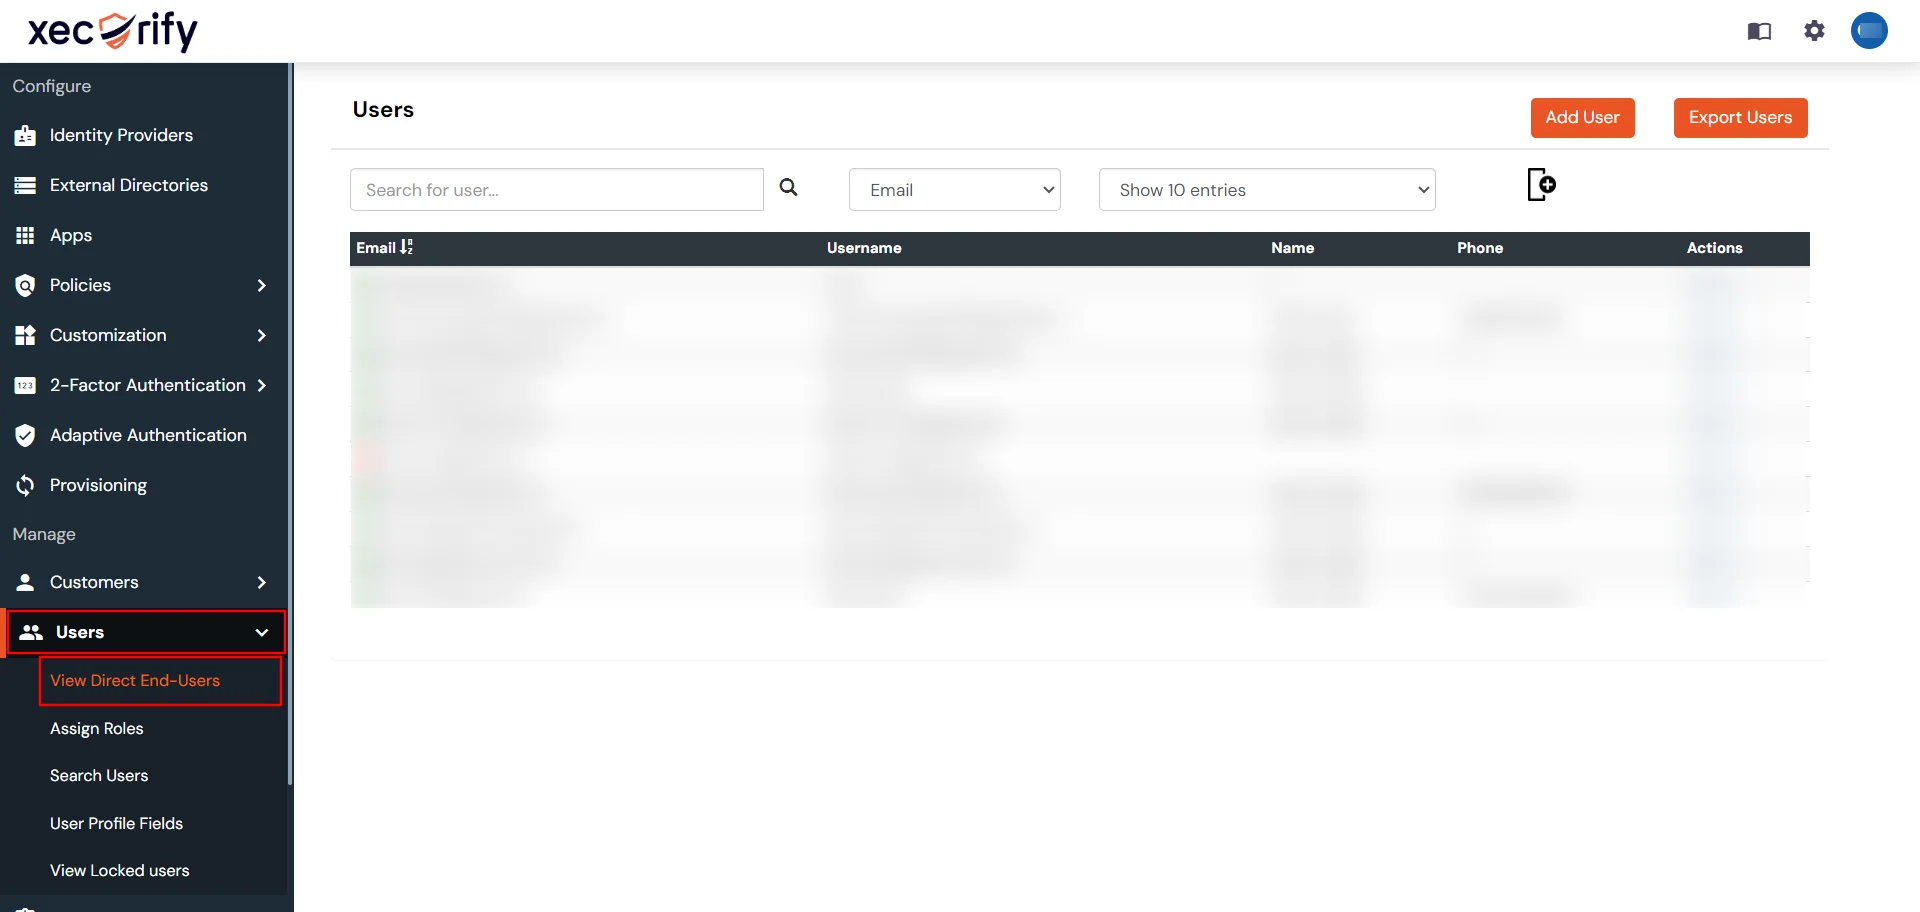
- Go to Users >> View Direct End-Users from the left side.
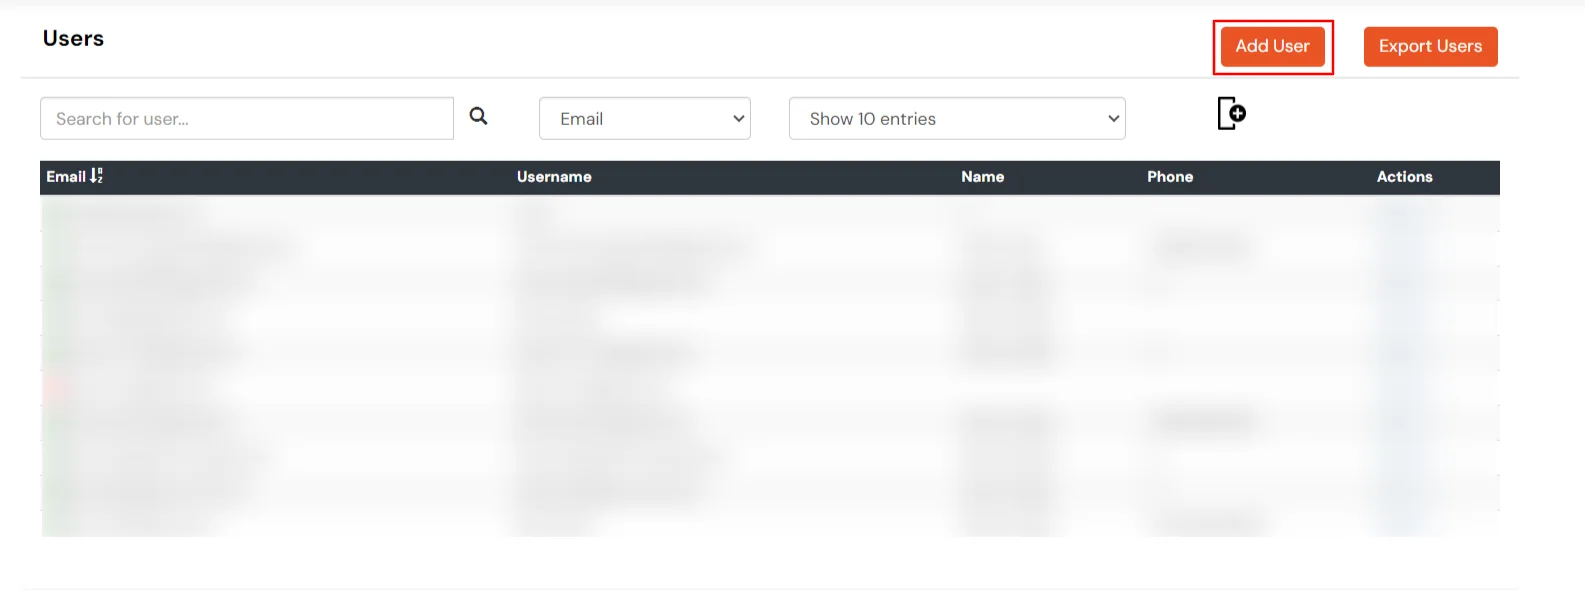
- To add a new user, locate the "Add User" button situated at the top right corner of the users table. Clicking on this button will prompt you to provide the required details of the new user, as demonstrated below.
- The required fields for adding a new user include:
- Email: The email address of the new user, which can also be used for login.
- Username: The username of the new user, which can be used for login purposes.
- First Name: The first name of the new user.
- Last Name: The last name of the new user.
- Password: The password for the new user's account.
- Phone: The phone number of the user, including the country code.
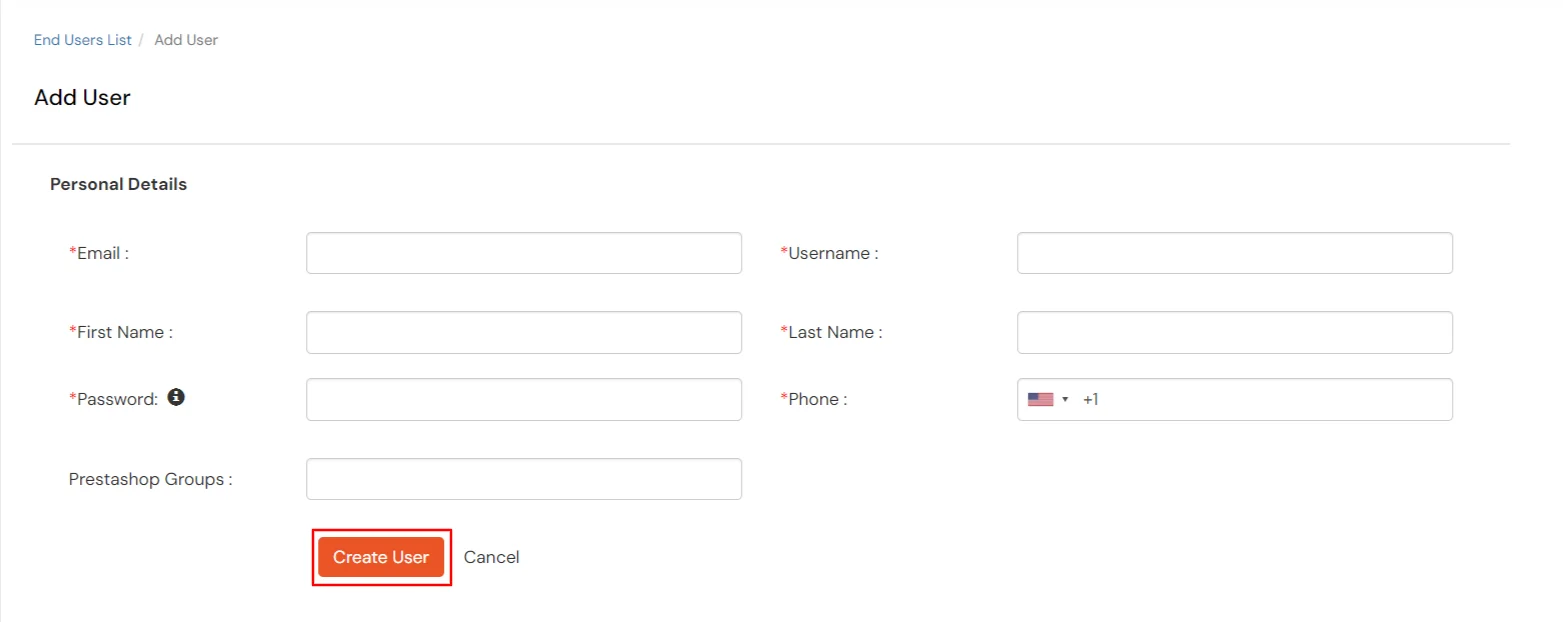
- To ensure successful user creation, the mandatory fields are indicated with a red asterisk. Fill these fields with appropriate data and click on the "Create User" button. This action will create the user, and their details will be visible in the user table, as illustrated below.
- To edit a specific user, follow these steps:
- Locate the user you want to edit.
- Click on the Select below the action column for that user.
- A dropdown menu will appear, as shown below.
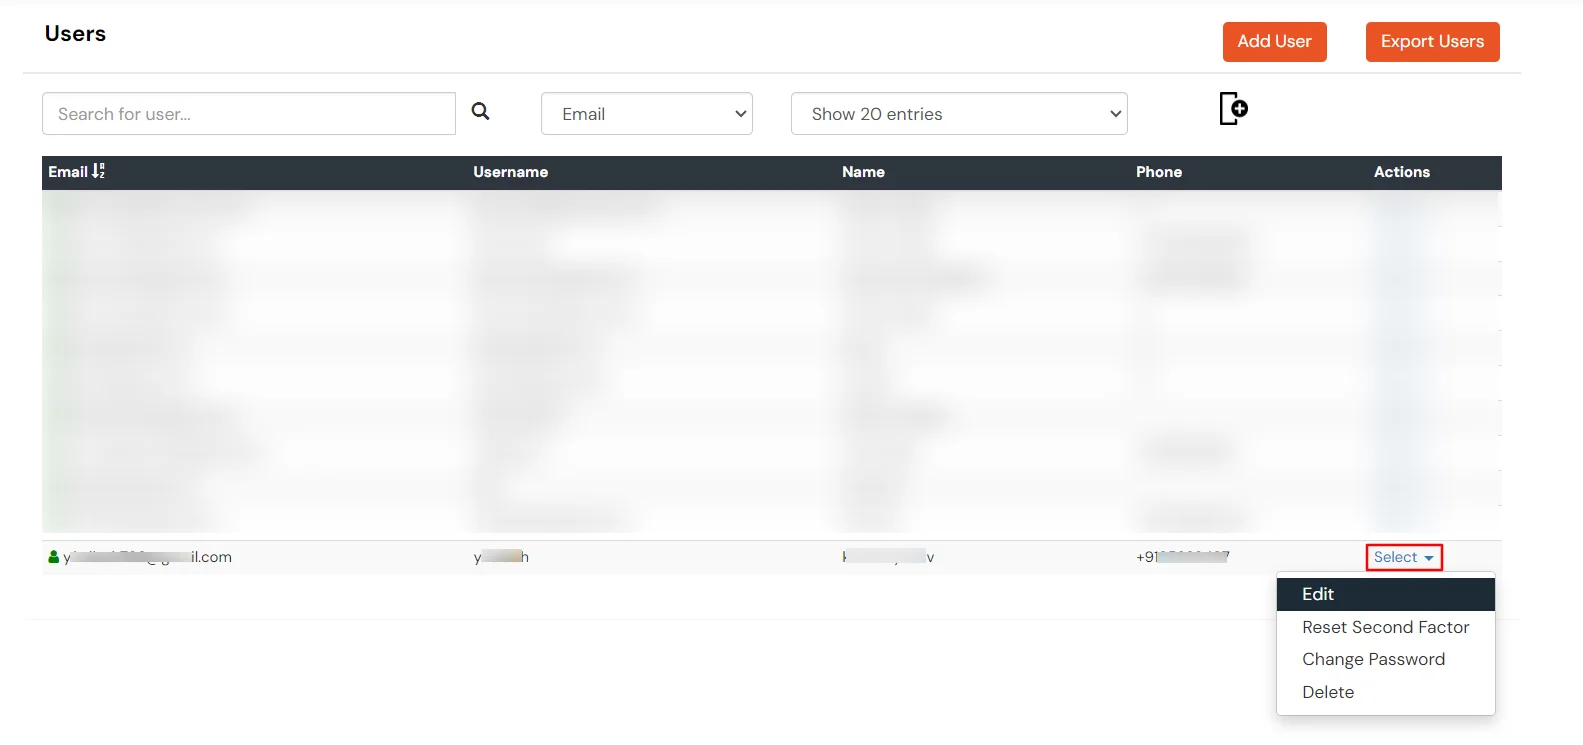
- To edit user details, follow these steps:
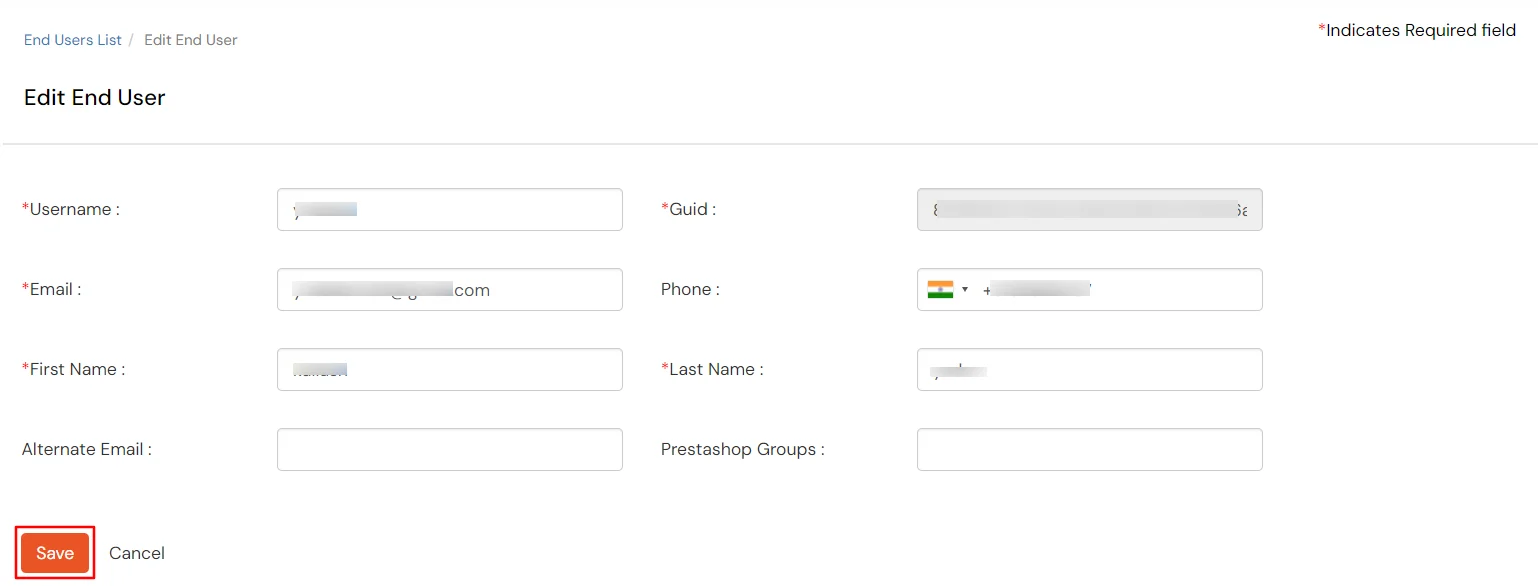
- Click on the "Edit" option. This will prompt you to modify the existing data related to the user.
- Edit the required fields and click on the "Save" button, as illustrated below. The updated details will be displayed in the user table.
- To change the password, use the following steps:
- Click on the Select located under the action menu for the desired user.
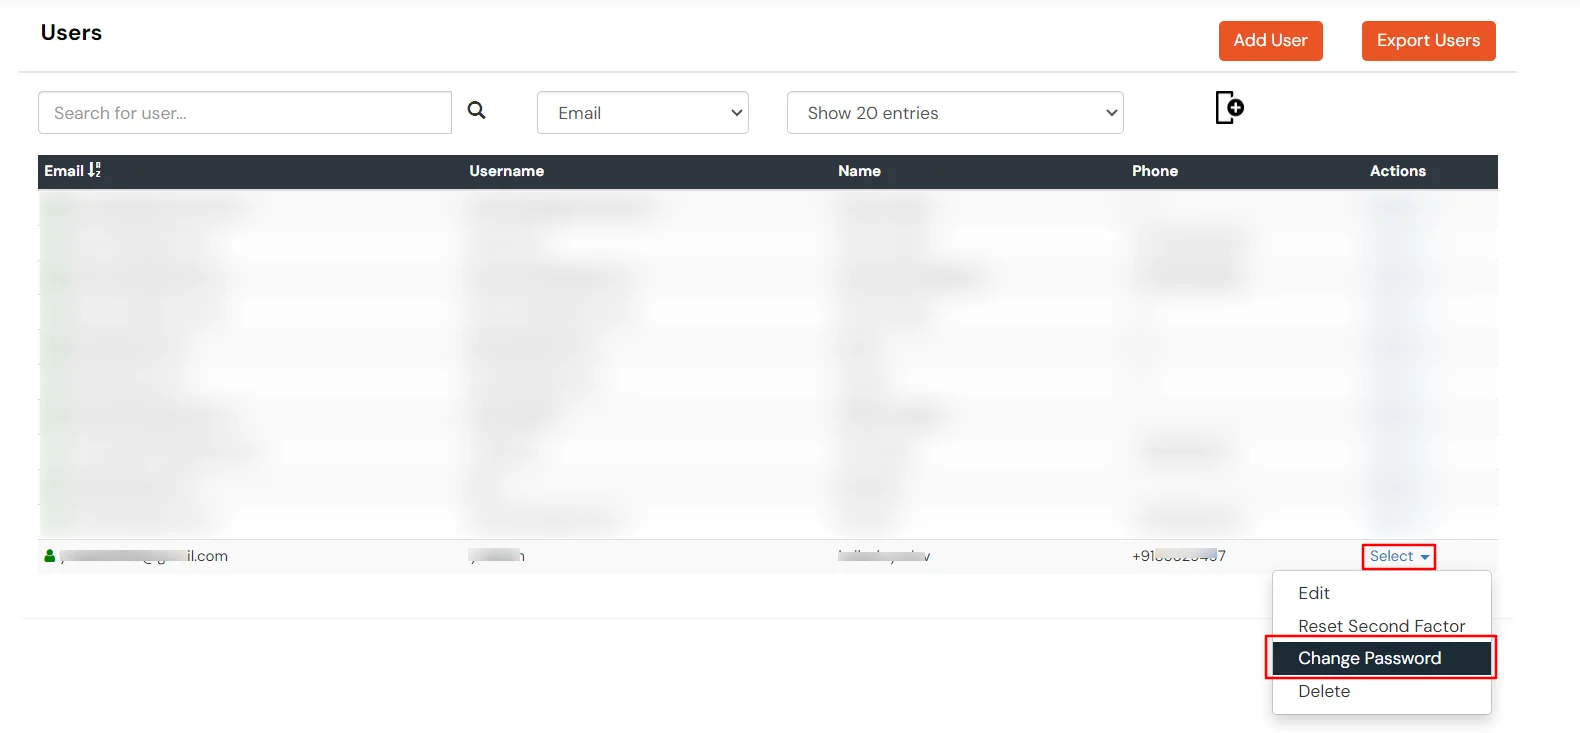
- Select the "Change Password" option. This will prompt you to enter new values for the "Password" and "Confirm Password" fields, as shown below.

- Add the required fields and click on Change Password button.


