Hello there!
Need Help? We are right here!
Need Help? We are right here!
Search Results:
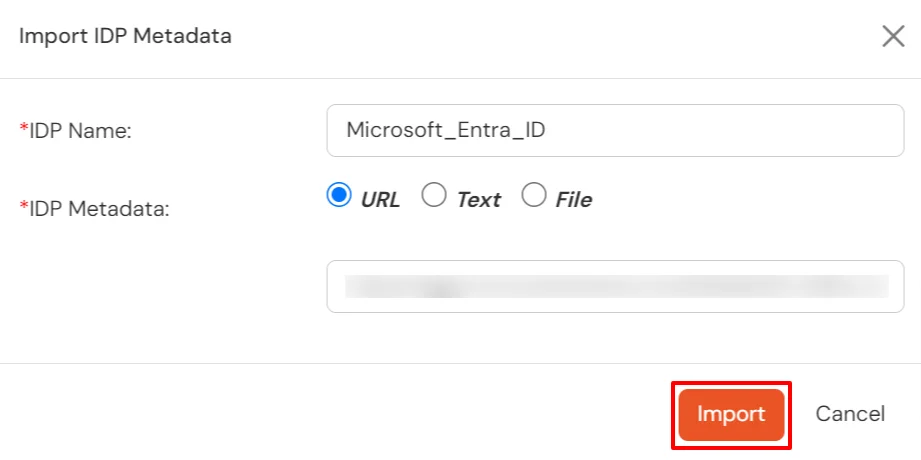
×miniOrange Identity Broker service solution enables cross protocol authentication. You can configure Microsoft Entra ID (Formerly Azure AD) as an IDP for Single Sign-On (SSO) into your applications/websites. Here, Microsoft Entra ID (Formerly Azure AD) will act as an Identity Provider (IDP) and miniOrange will act as a broker.
We offer a pre-built solution for integrating with Microsoft Entra ID (Formerly Azure AD), making it easier and quick to implement. Our team can also help you set up Microsoft Entra ID (Formerly Azure AD) as SAML or OIDC IDP to login into your applications.
miniOrange offers free help through a consultation call with our System Engineers to configure SSO for different apps using Microsoft Entra ID (Formerly Azure AD) as IDP in your environment with 30-day free trial.
For this, you need to just send us an email at idpsupport@xecurify.com to book a slot and we'll help you in no time.
Please make sure your organisation branding is already set under Customization >> Login and Registration Branding in the left menu of the dashboard.
Mentioned below are steps to configure Microsoft Entra ID (Formerly Azure AD) as IDP via SAML and OAuth configuration. Follow the steps accordingly based on your requirement (SAML or OAuth).


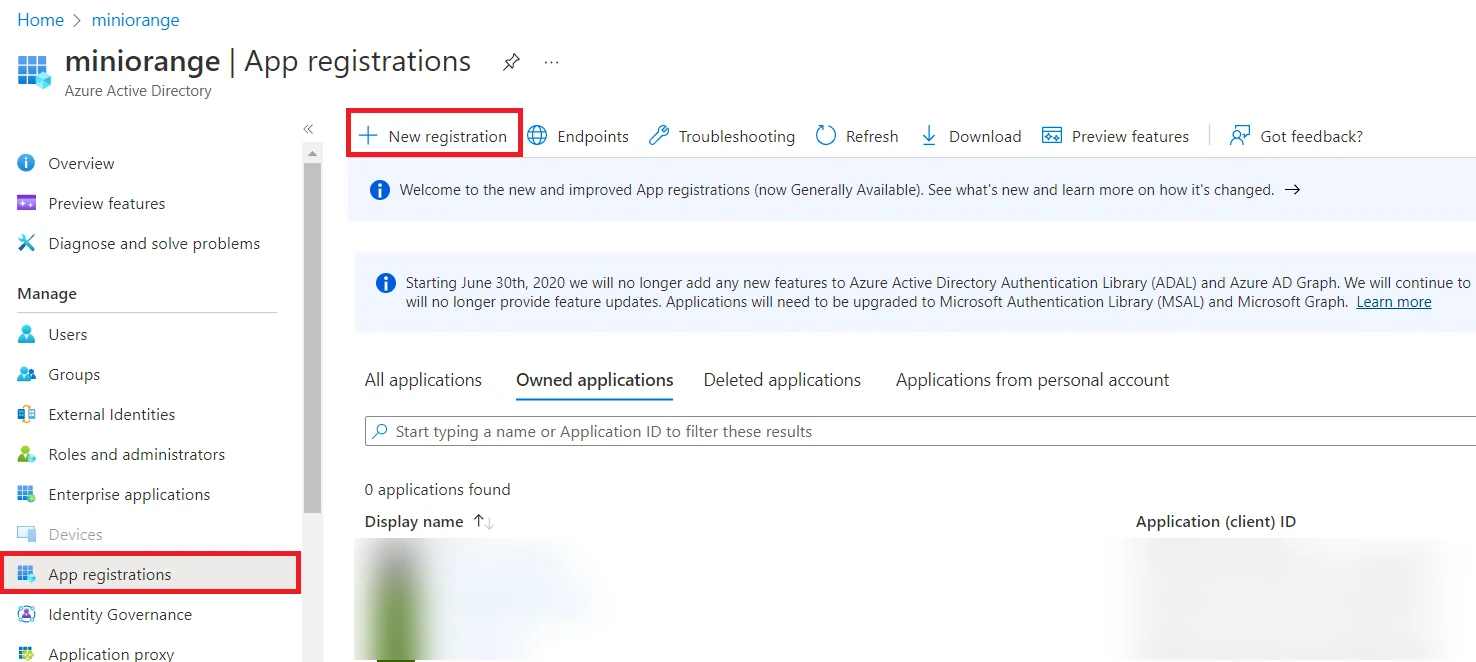
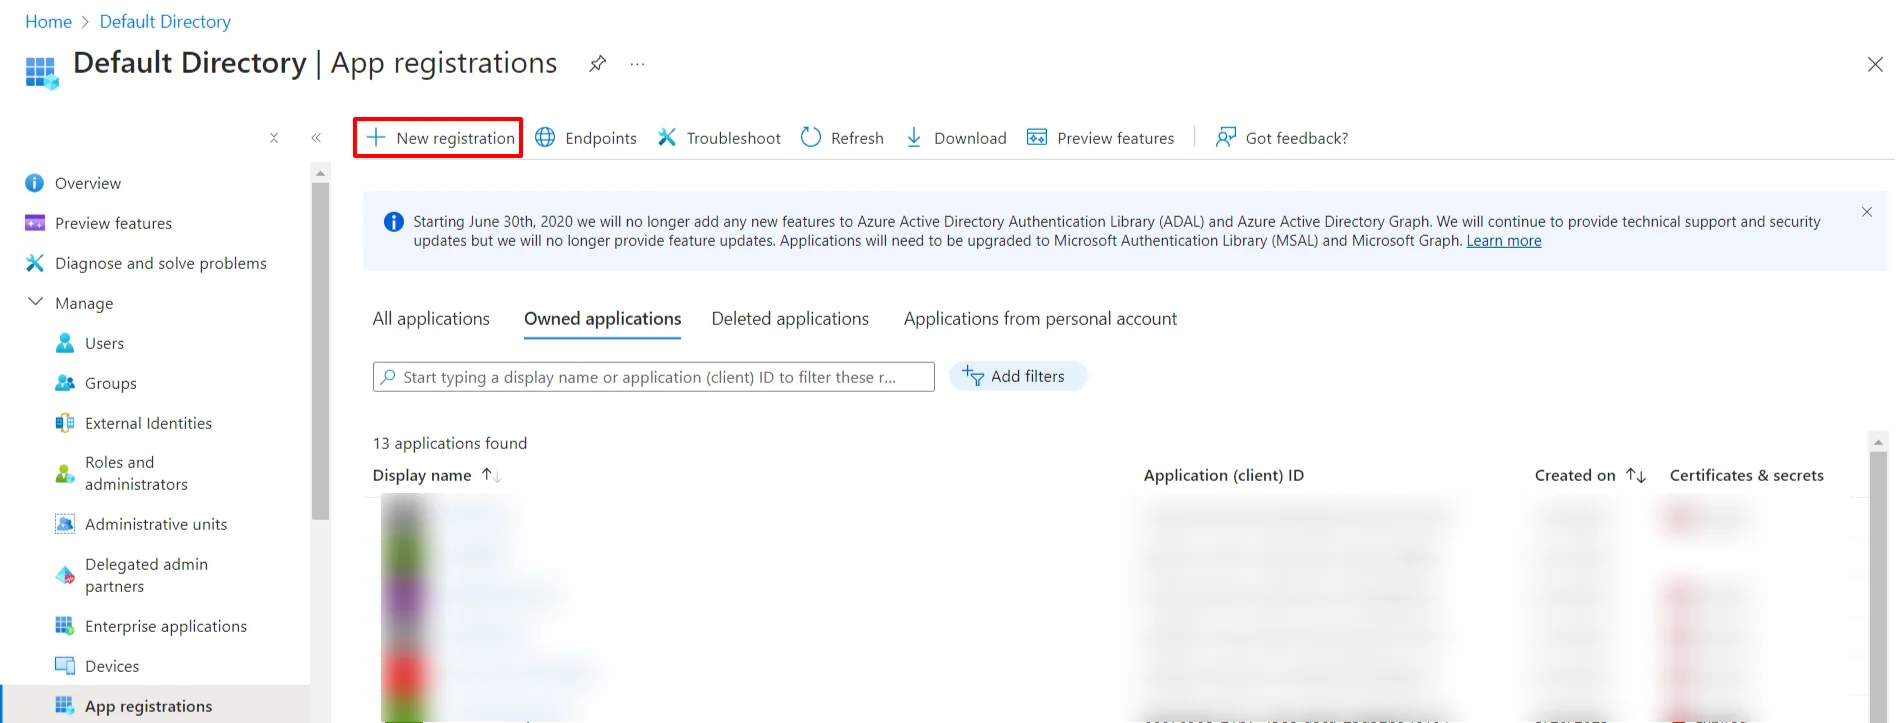
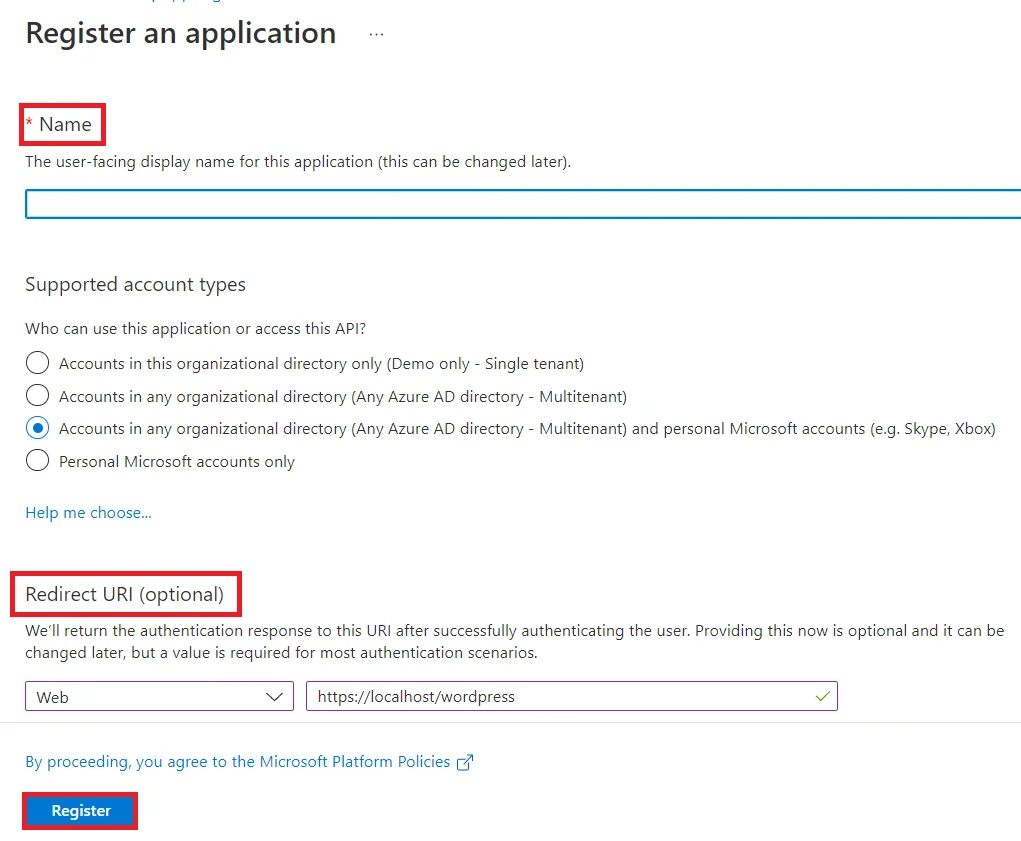


Follow the steps to configure Microsoft Entra ID (Formerly Azure AD) as IdP by OAuth configuration.

| IdP Name | Custom Provider |
| IdP Display Name | Choose appropriate Name |
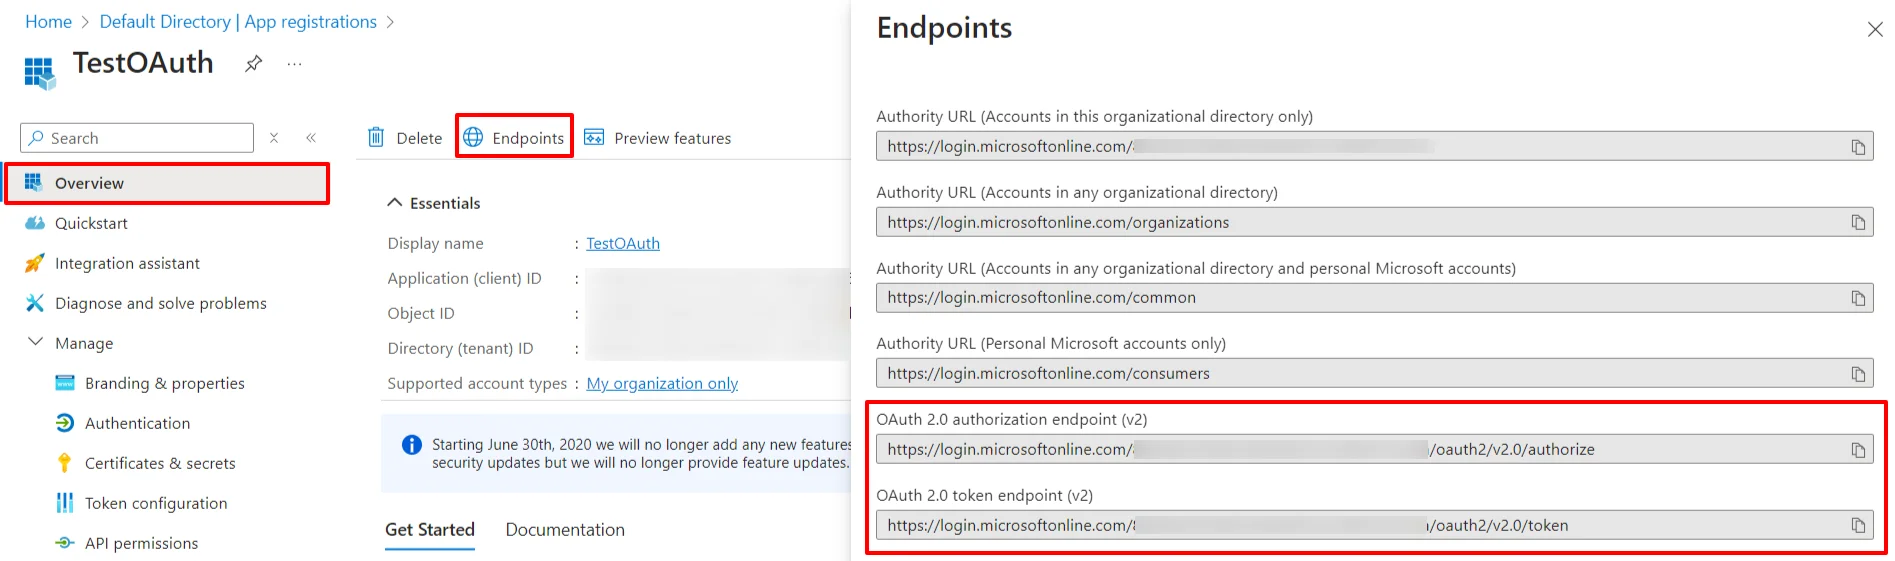
| OAuth Authorize Endpoint | https://login.microsoftonline.com/{tenant-id}/oauth2/authorize | OAuth Access Token Endpoint | https://login.microsoftonline.com/{tenant-id}/oauth2/token | OAuth Get User Info Endpoint (optional) | https://graph.microsoft.com/oidc/userinfo |
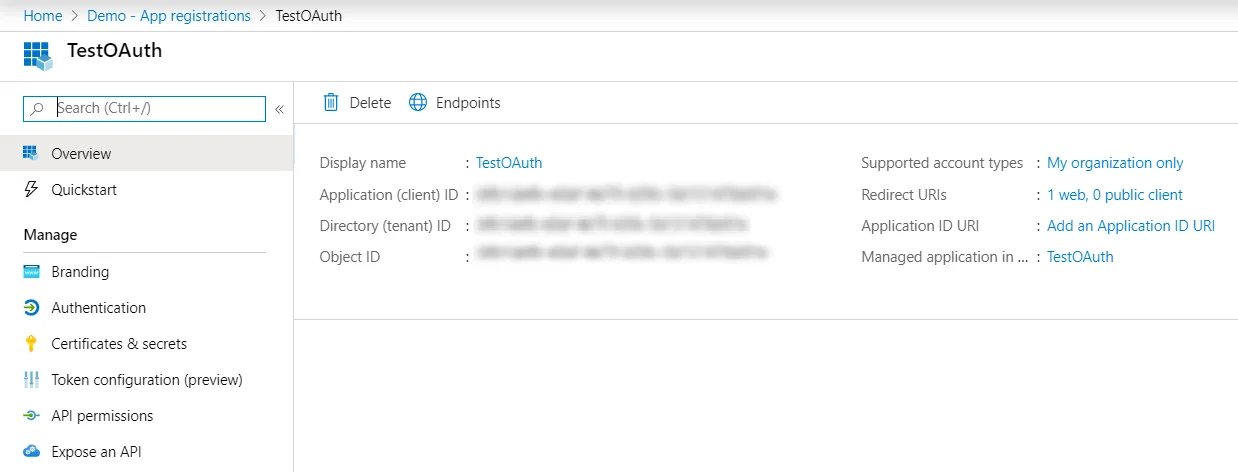
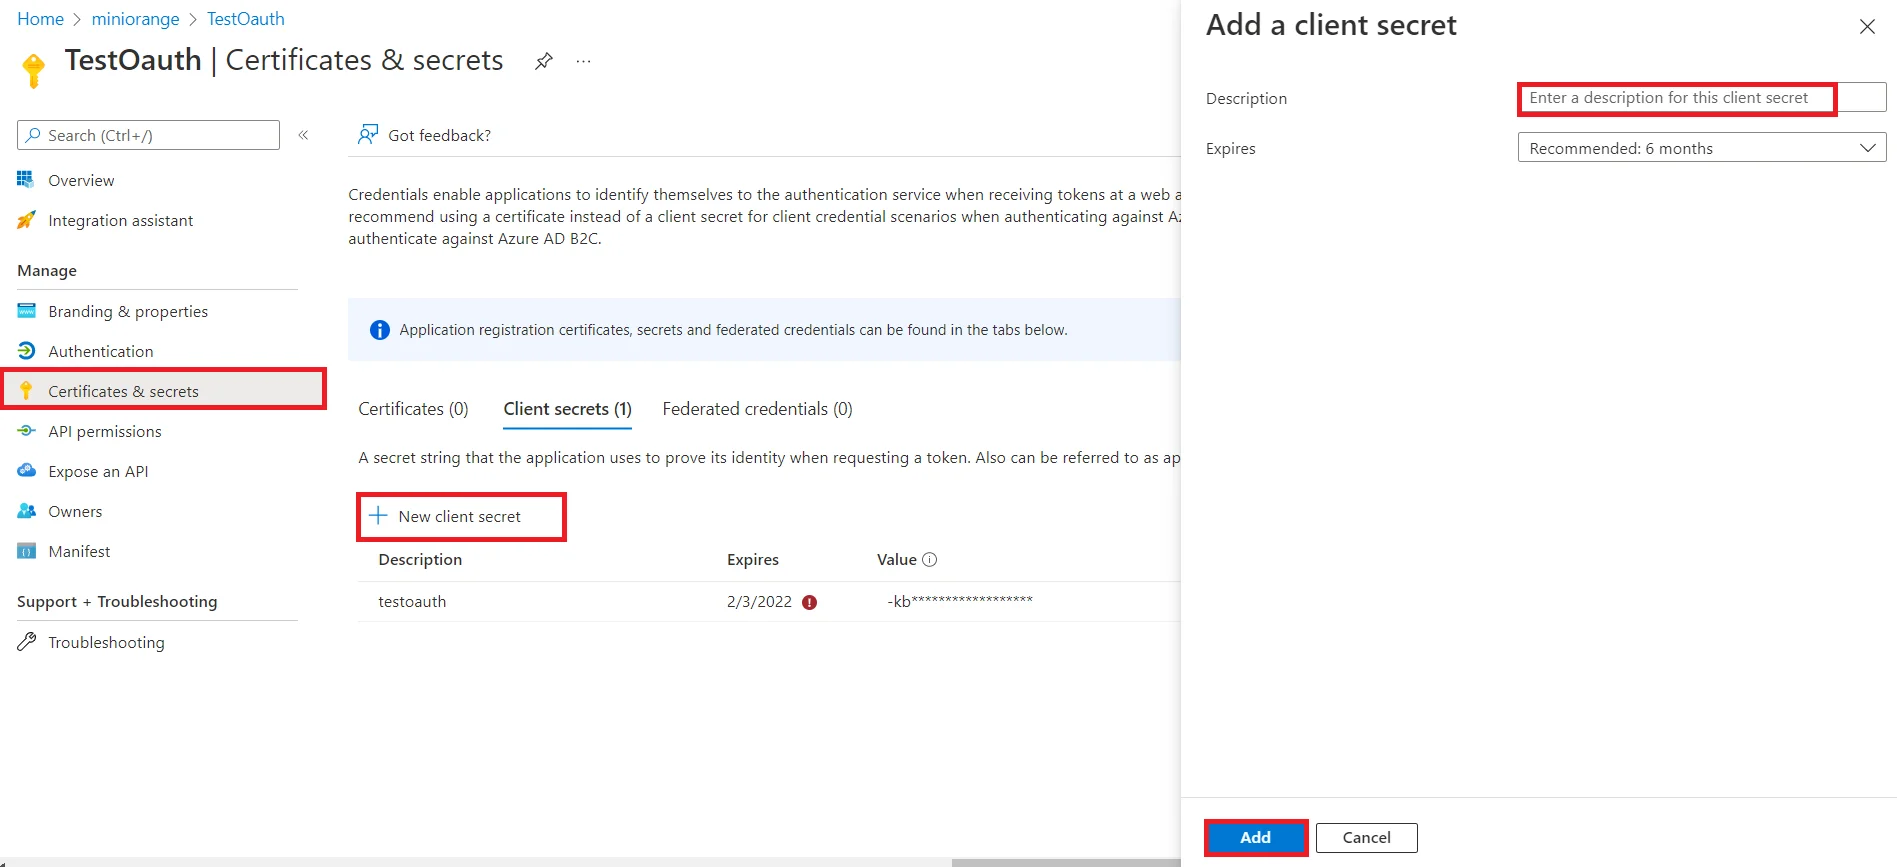
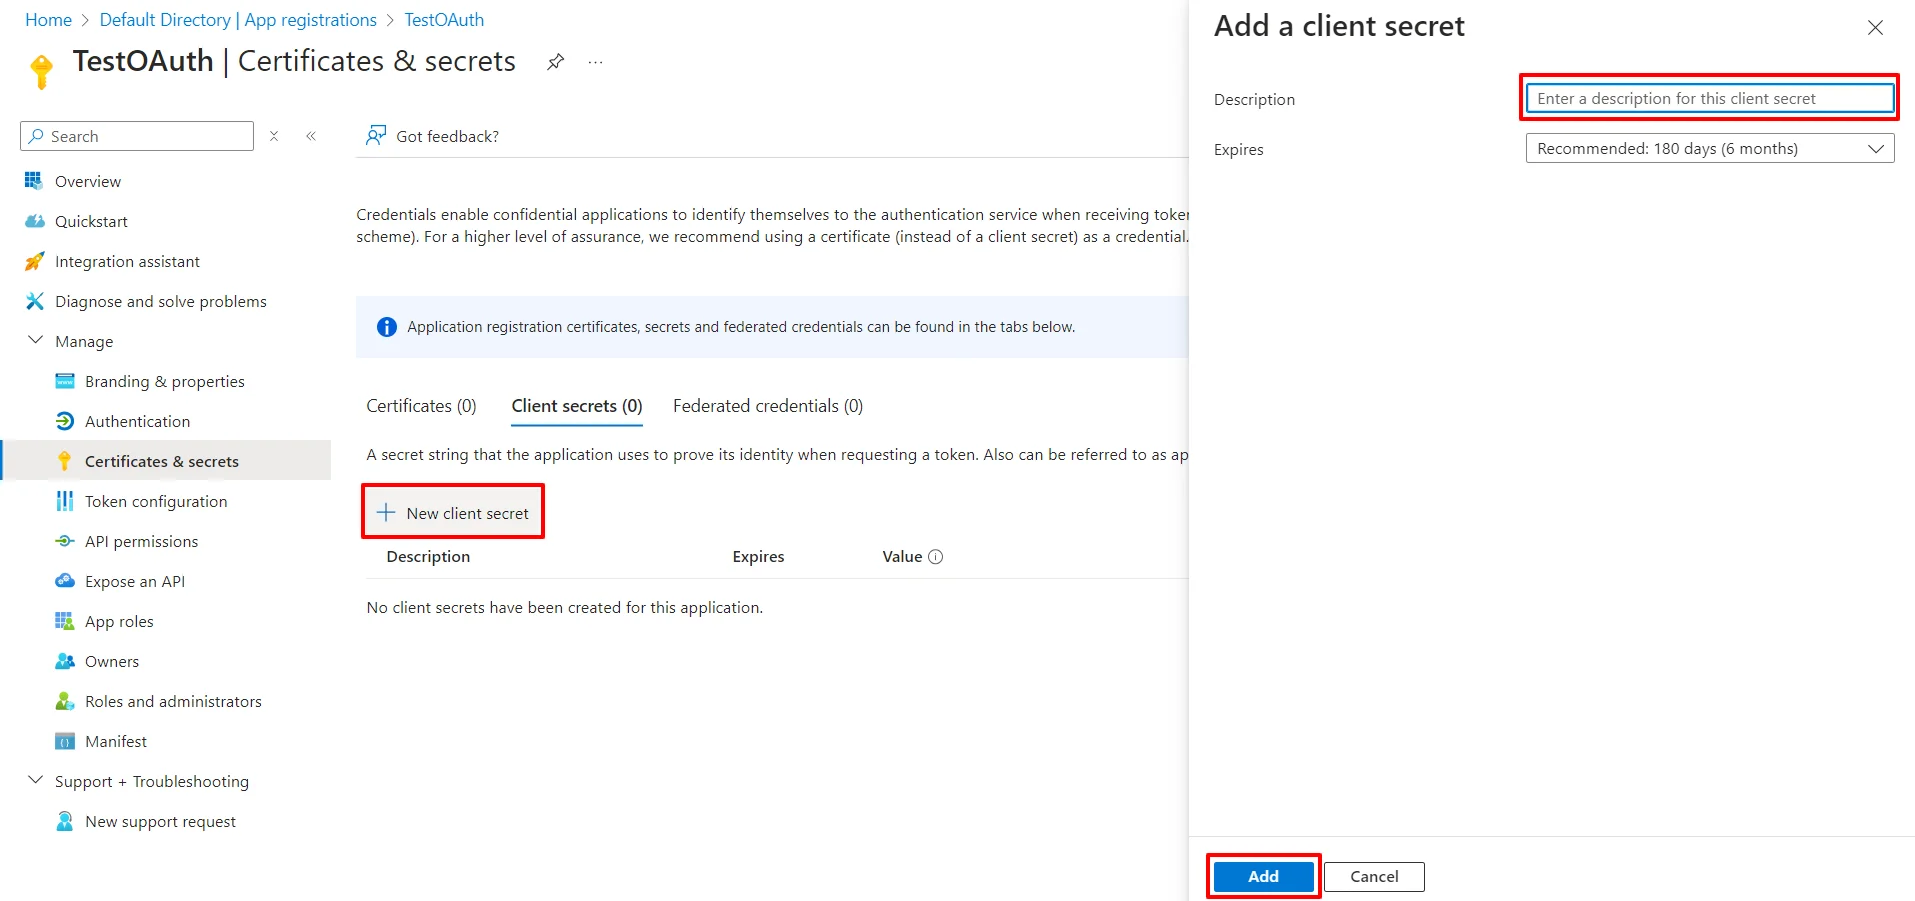
| Client ID | From step 1 |
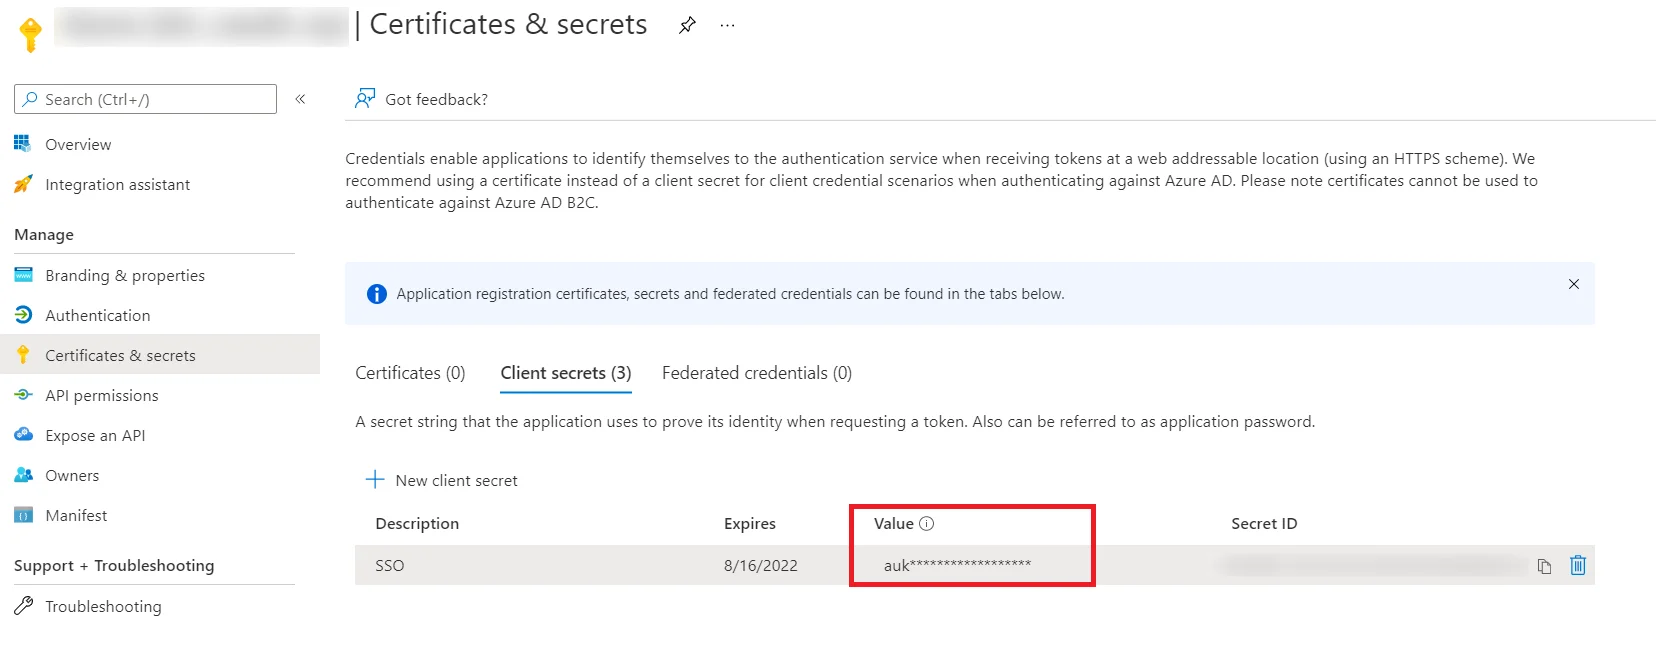
| Client secret | From step 1 |
| Scope | openid email profile |

You can follow this guide, if you want to configure SAML/WS-FED, OAuth/OIDC, JWT, Radius etc
Few usecases where customers configure multiple IDPs -
| For Cloud IDP - | https://login.xecurify.com/moas/discovery?customerId=<customer_id> |
| For On-Premise IDP - | https://yourdomain.com/discovery?customerId=<customer_id> |
You can see the screenshot below of the IDP Selection Page with a list of IDPs.
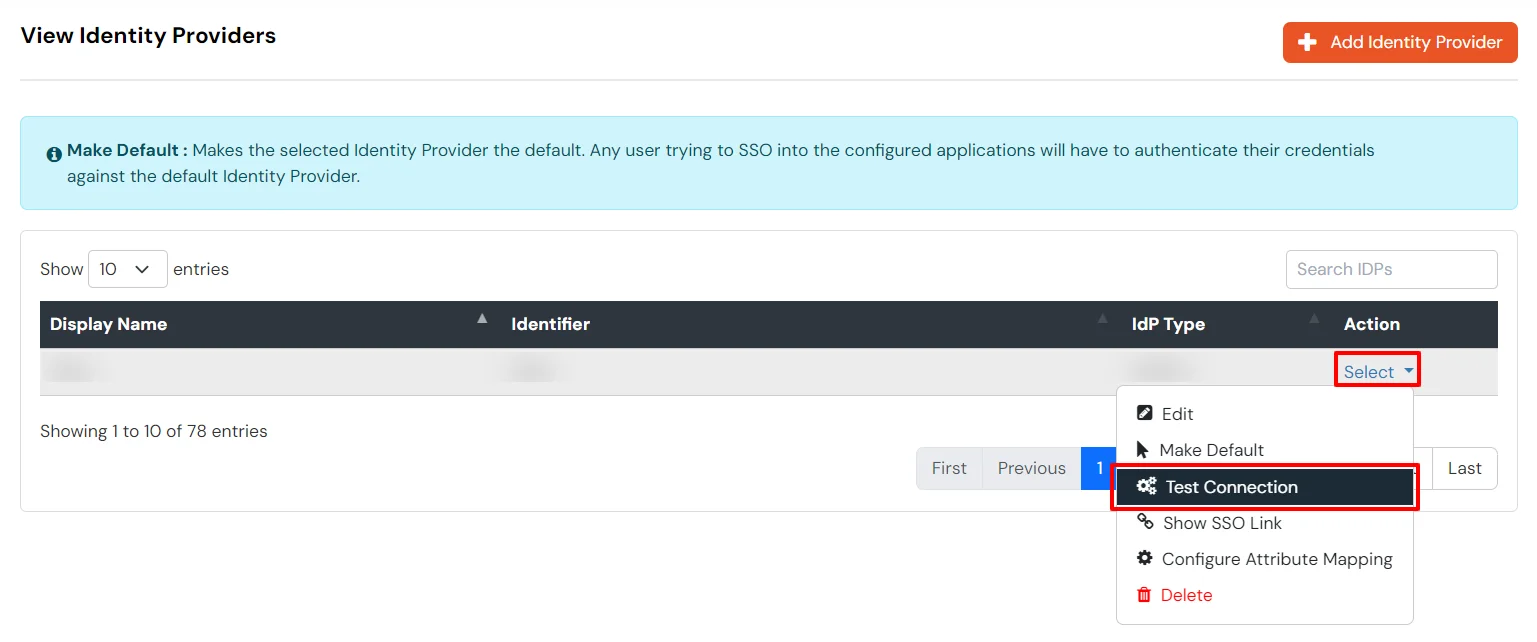
Note: To view the IDP in drop-down list, go to Identity Providers tab > against your configured IDP > Select >Edit , here Enable the Show IdP to Users option.


You receive these error message when you try to SSO in to an application that has been set up to use Microsoft Entra ID (Formerly Azure AD) as External IdP using SAML or OAuth based Single Sign-On (SSO).
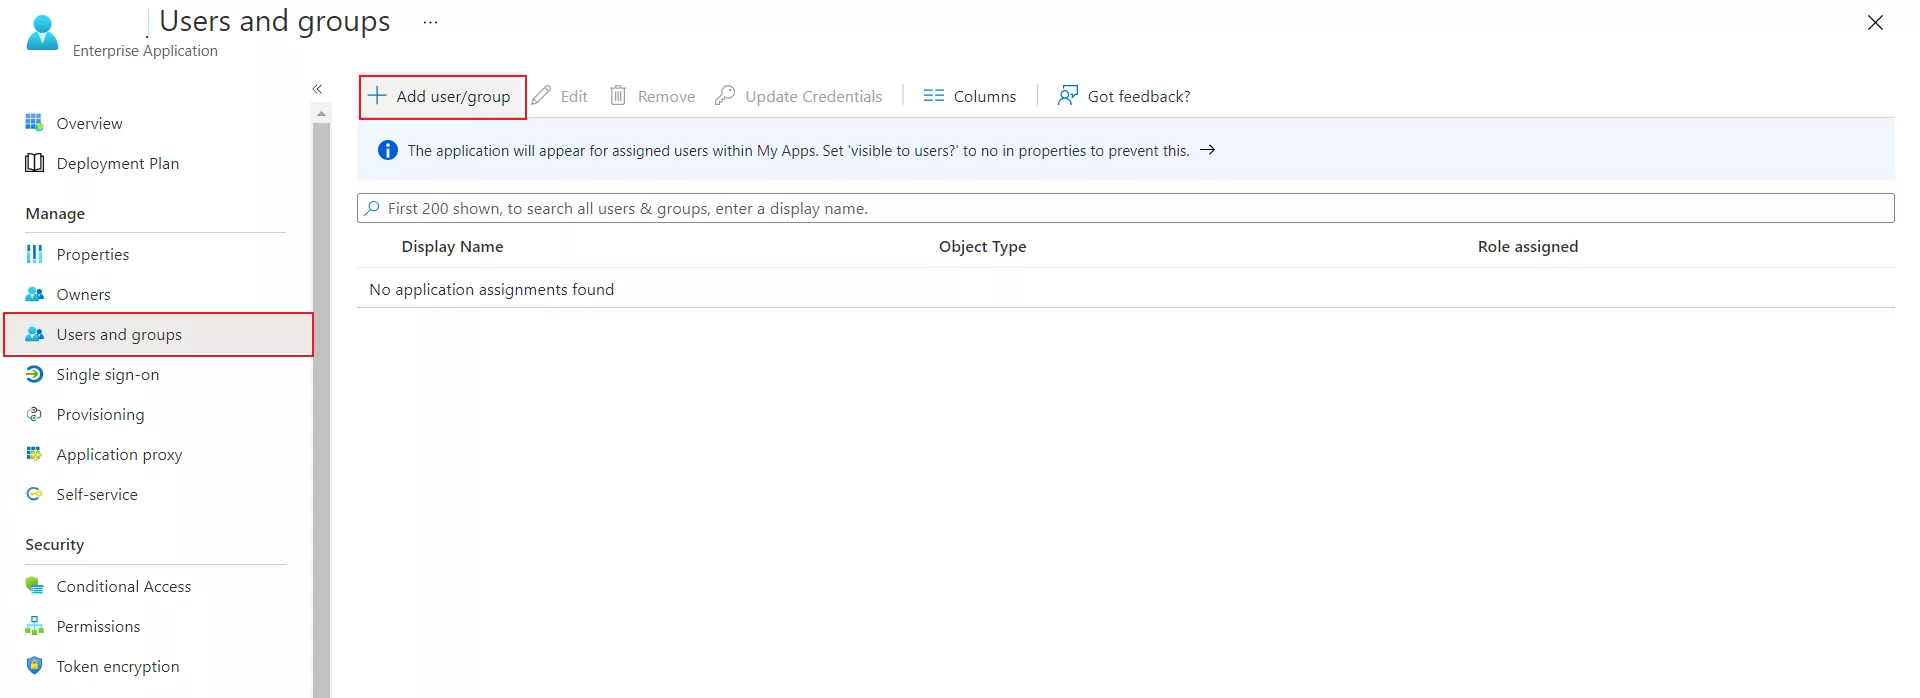
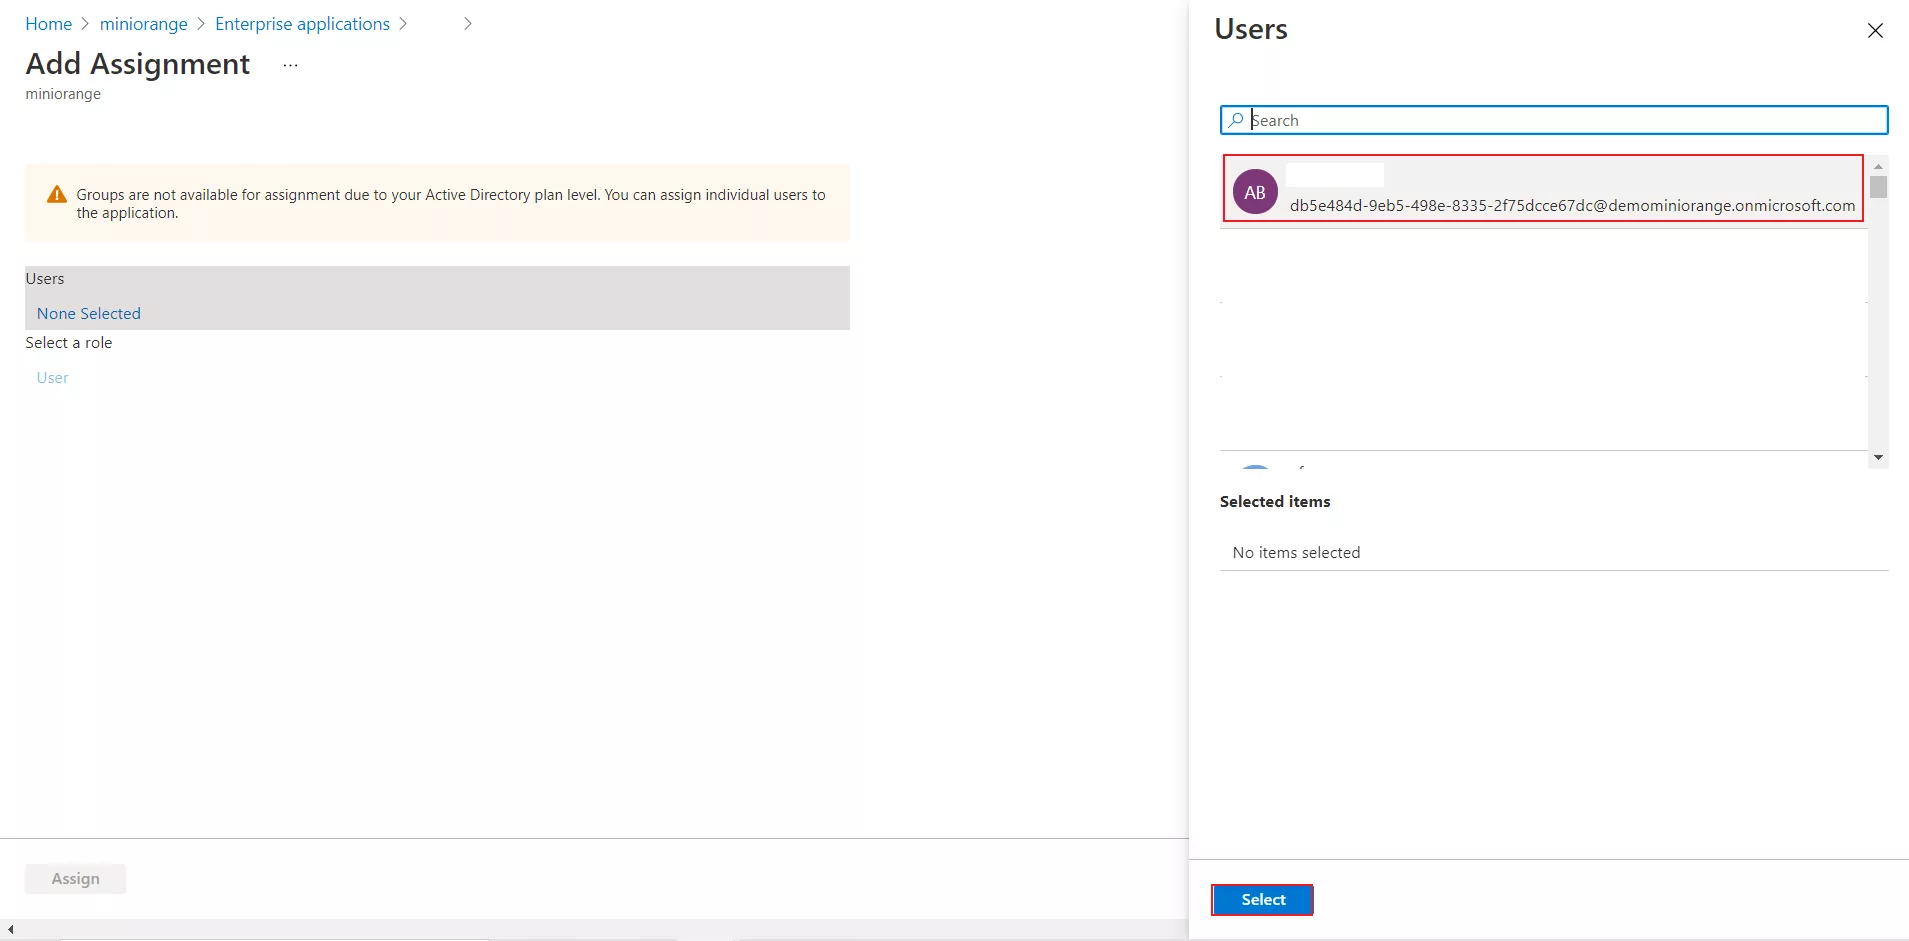
The user hasn't been granted access to the application in Microsoft Entra ID (Formerly Azure AD). The user must belong to a group that is assigned to the application, or be assigned directly.
To assign one or more users to an application directly, see Quickstart: Assign users to an app.
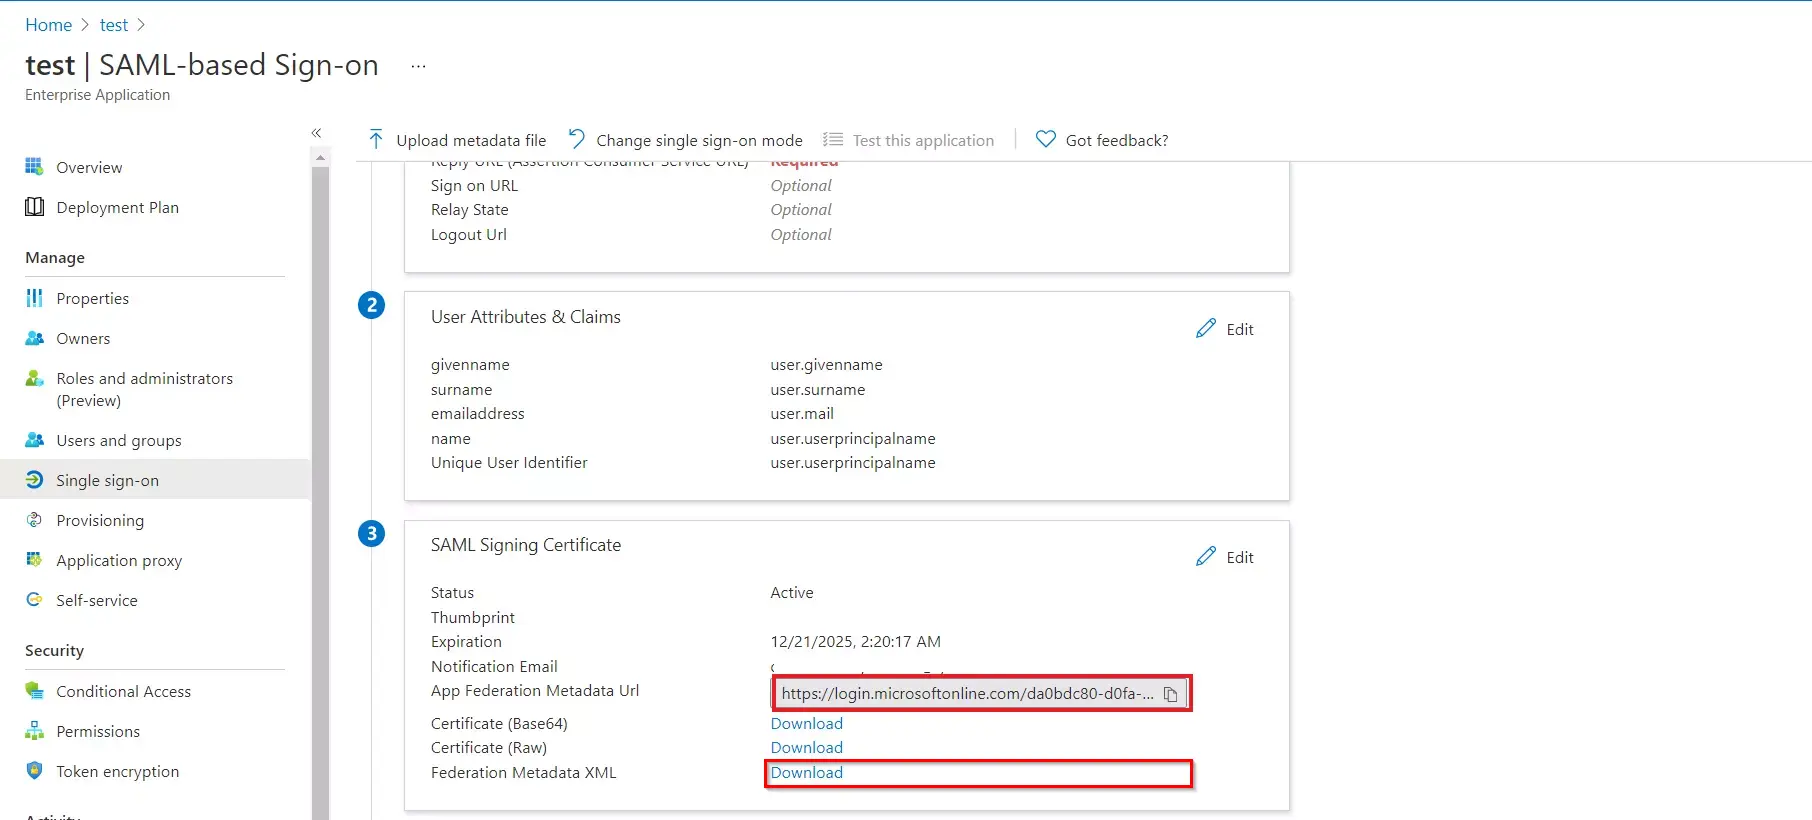
The application object is corrupted and Microsoft Entra ID (Formerly Azure AD) doesn't recognize the certificate configured for the application.
To delete and create a new certificate, follow the steps below:
The AssertionConsumerServiceURL value in the SAML request doesn't match the Reply URL value or pattern configured in Microsoft Entra ID (Formerly Azure AD). The AssertionConsumerServiceURL value in the SAML request is the URL you see in the error.
To fix the issue, follow these steps:
The Issuer attribute sent from miniOrange to Microsoft Entra ID (Formerly Azure AD) in the SAML request doesn’t match the Identifier value configured for the miniOrange in Microsoft Entra ID (Formerly Azure AD).
Ensure that the Issuer attribute in the SAML request matches the Identifier value configured in Microsoft Entra ID (Formerly Azure AD).
Verify that the value in the Identifier textbox matches the value for the identifier value displayed in the error.
The Issuer attribute sent from the application to Microsoft Entra ID (Formerly Azure AD) in the SAML request doesn’t match the Identifier value that's configured for the application in Microsoft Entra ID (Formerly Azure AD).
Ensure that the Issuer attribute in the SAML request matches the Identifier value configured in Microsoft Entra ID (Formerly Azure AD).
On the SAML-based SSO configuration page, in the Basic SAML configuration section, verify that the value in the Identifier textbox matches the value for the identifier value displayed in the error. If there's a trailing slash at the end of the url, it should be also included.
Microsoft Entra ID (Formerly Azure AD) doesn't support the SAML request sent by the miniOrange for single sign-on. Some common issues are:
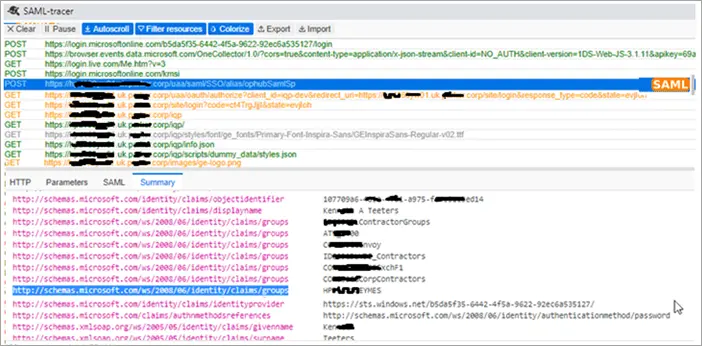
Capture the SAML request in SAML Tracer.
Contact us and share the following info:
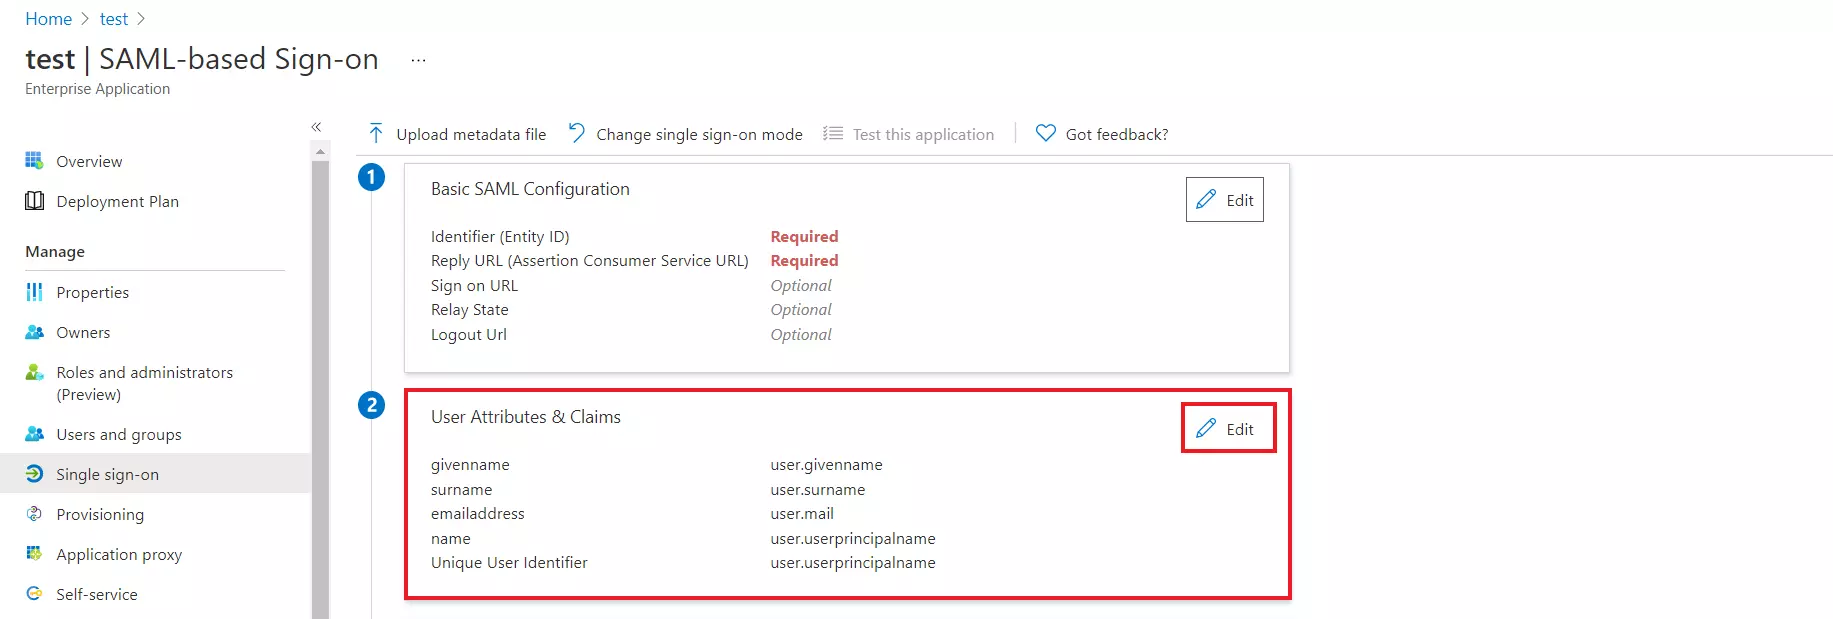
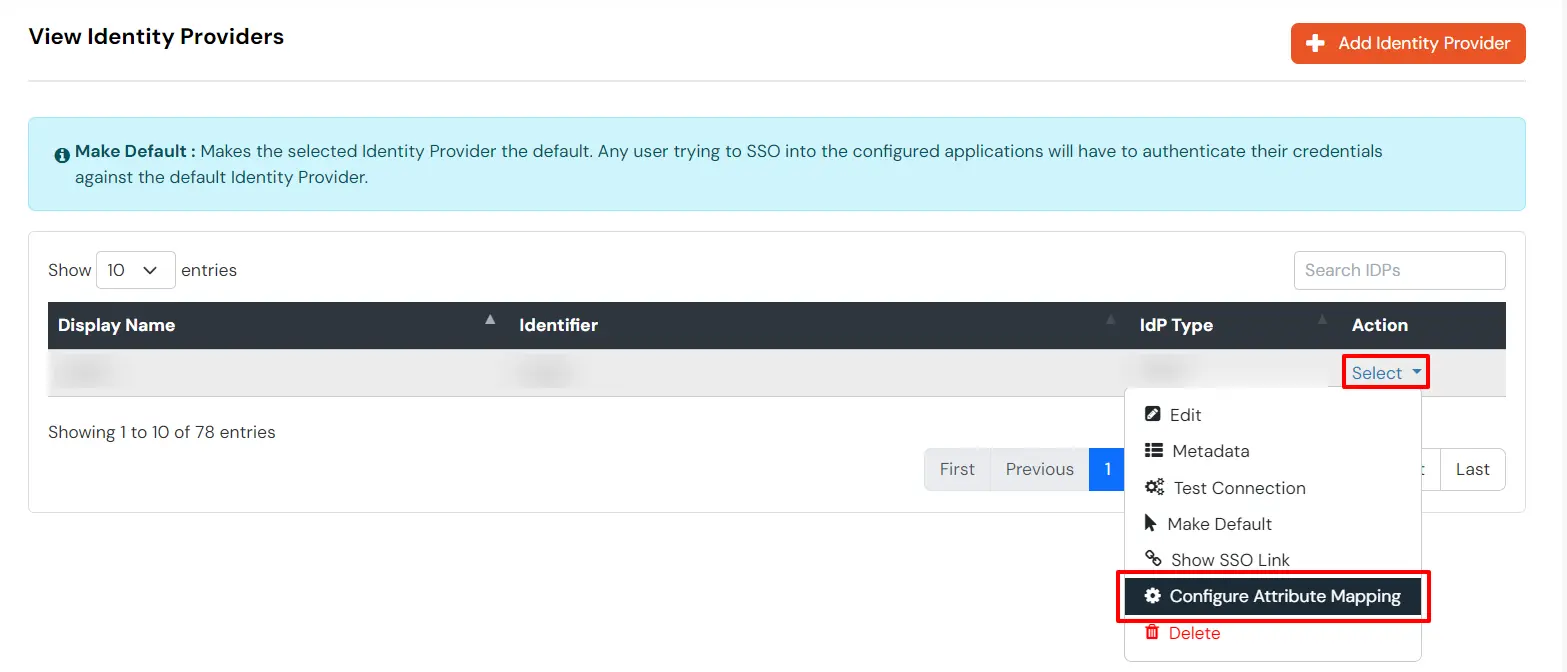
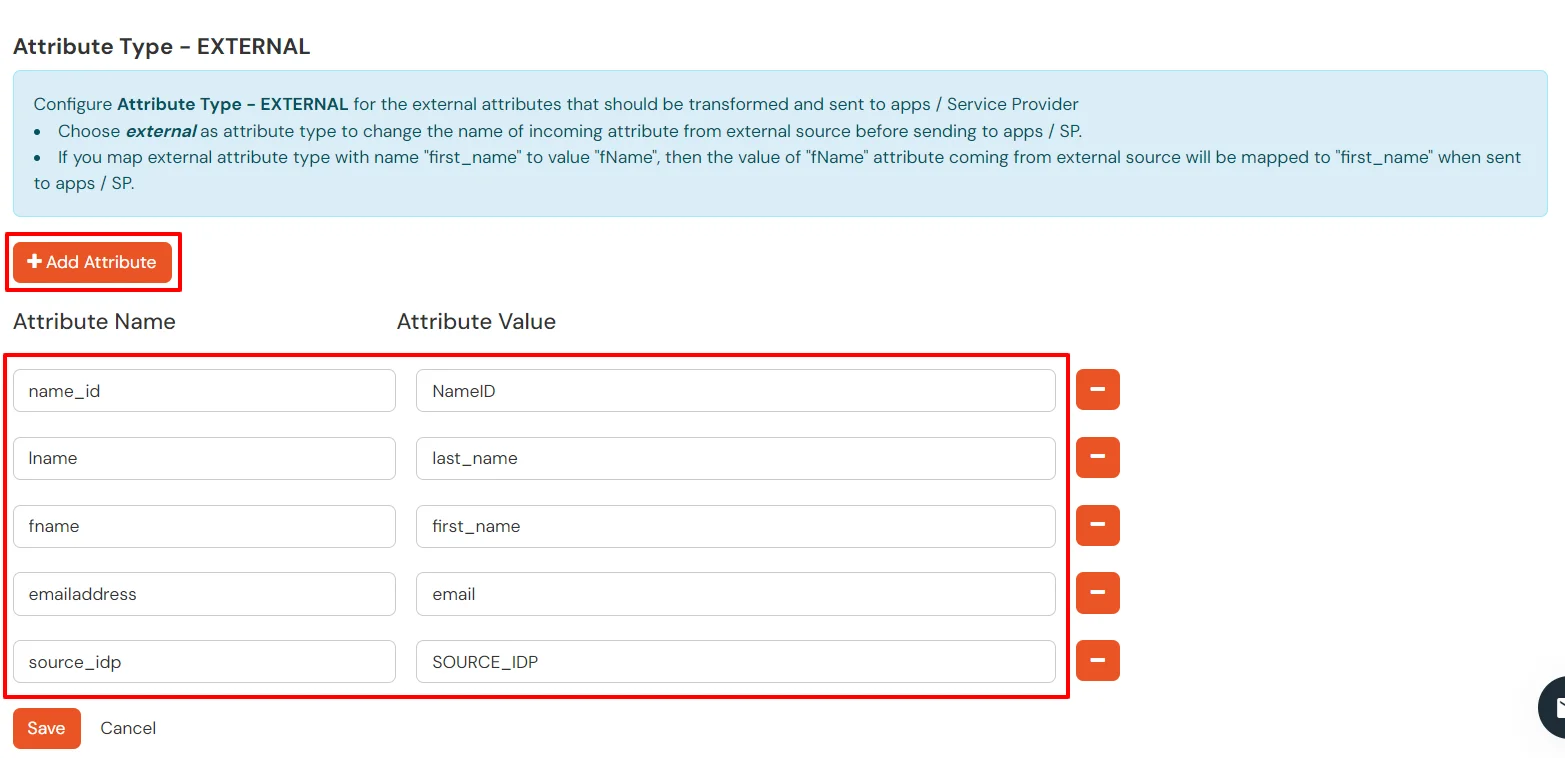
To learn how to customise the SAML attribute claims sent to your application, see Claims mapping in Microsoft Entra ID (Formerly Azure AD). And also, see below the attribute mapping in miniOrange.
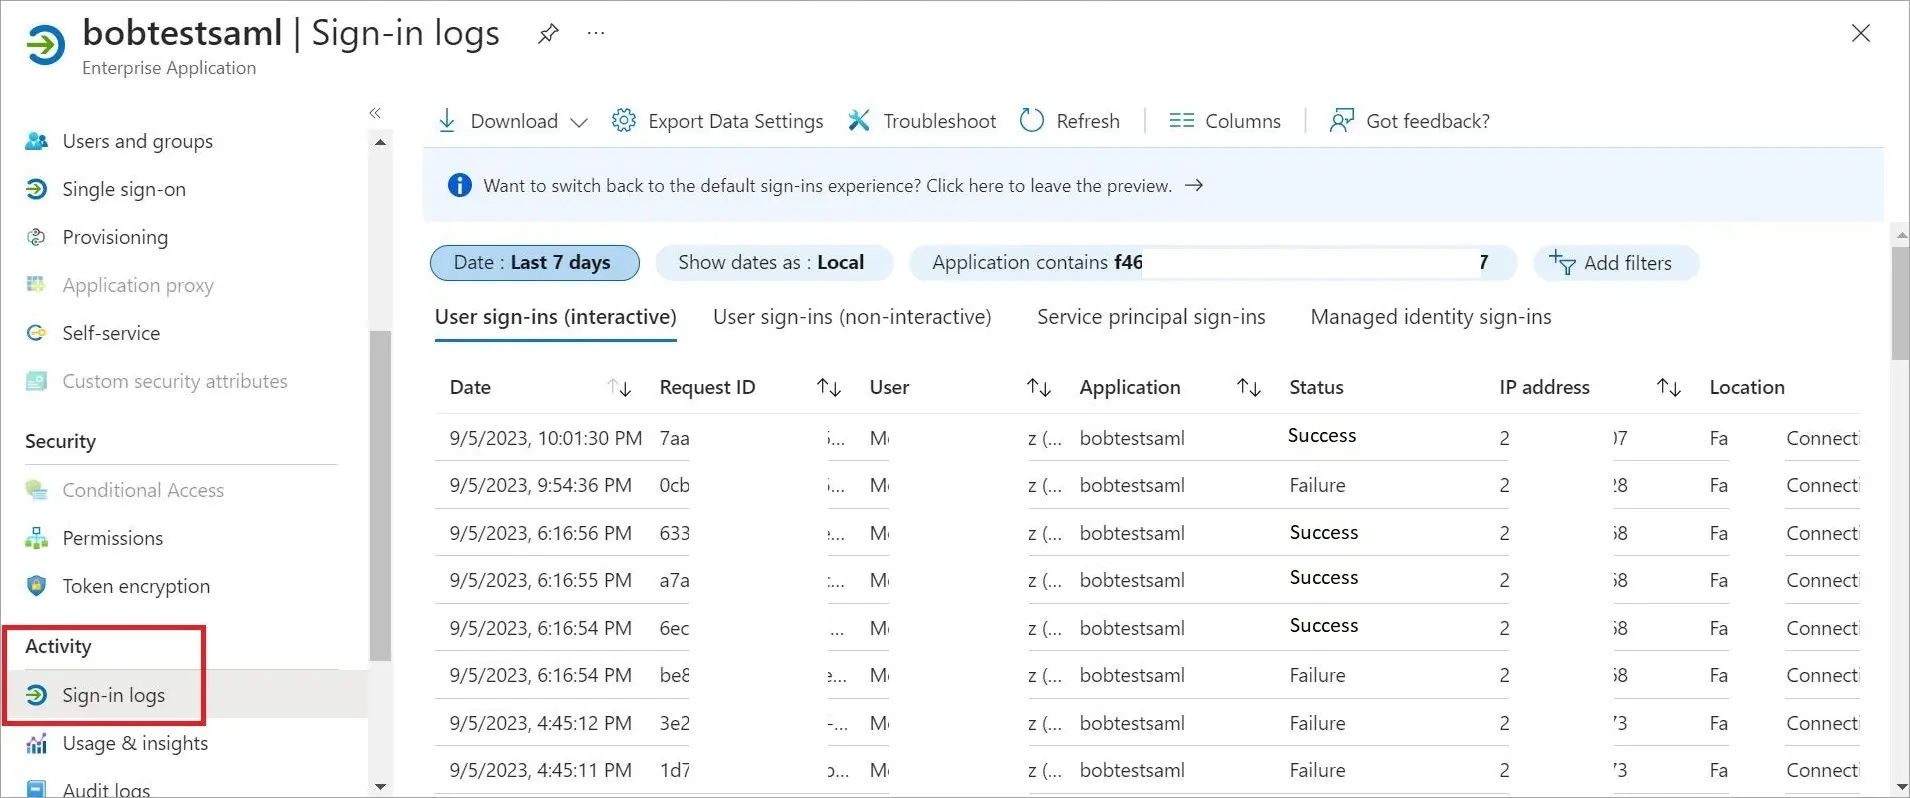
In Azure portal, you can access the logs to verify successful logins. This will help establish a baseline for successful authentication. Whenever login access is denied, closely review the login attempts in the logs.
Addressing Login Issues Without Azure:
You can use the SAML-tracer extension for Chrome to diagnose and resolve SAML-related problems in Operations Hub. Follow these steps:
Retrieving Azure Login Screen:
In case you encounter a situation where the Azure login screen does not appear, then do the following to address this issue:

Our Other Identity & Access Management Products