How to add a Group
What is a Group in miniorange PAM?
In miniorange PAM, a group refers to a collection of multiple users. Its main function is to associate an application or asset with a specific set of users. Groups serve various purposes within miniorange PAM, including:
- Differentiating users based on their departments
- Granting access to an application or asset to a particular group of users
So, a group in miniorange PAM is a way to group together multiple users and assign them access privileges based on their department or specific user sets.
The DEFAULT Group:
- The DEFAULT group is automatically generated upon completing the admin configuration. It encompasses all users under your admin account, and each newly created user is automatically assigned to this group.
- The default group serves the purpose of granting access to applications or assets for all users within your account.
Creating a Group:
How will admins create groups and assign users to groups in miniorange PAM?
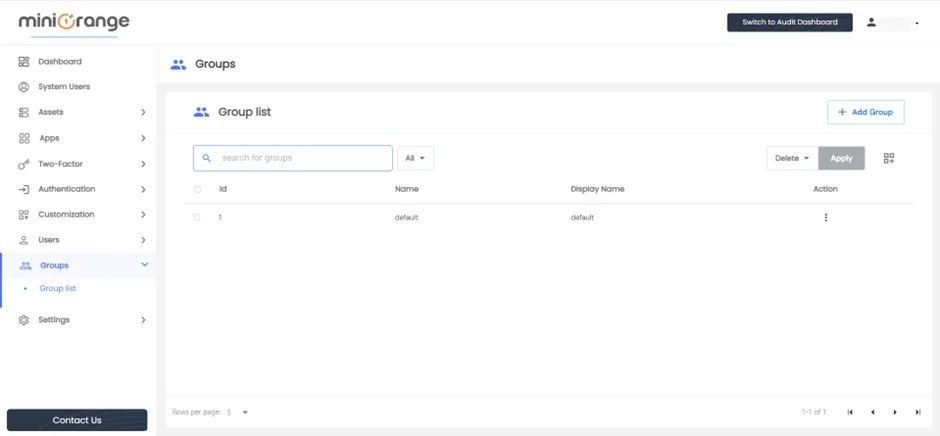
- Go to Groups > Group list from the left menu and click on Add Group on the top right corner of the page.
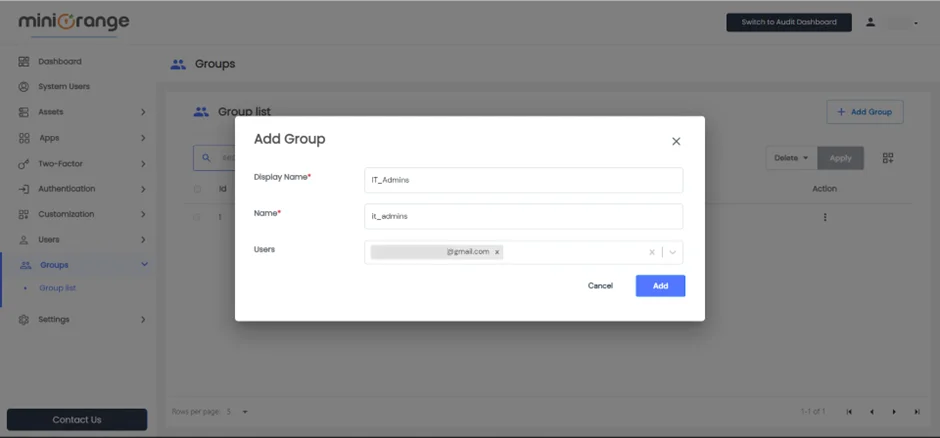
- Enter the following details in the form:
| Display Name |
Any Identifier that specifies Group name. |
| Name |
Group name used by PAM Dashboard. |
| Users |
You can select multiple users who will be added to a group. |
- After configuring the details provided above, Click on Add button.
How to Add Users to a Group.
To add users to a group, follow these steps
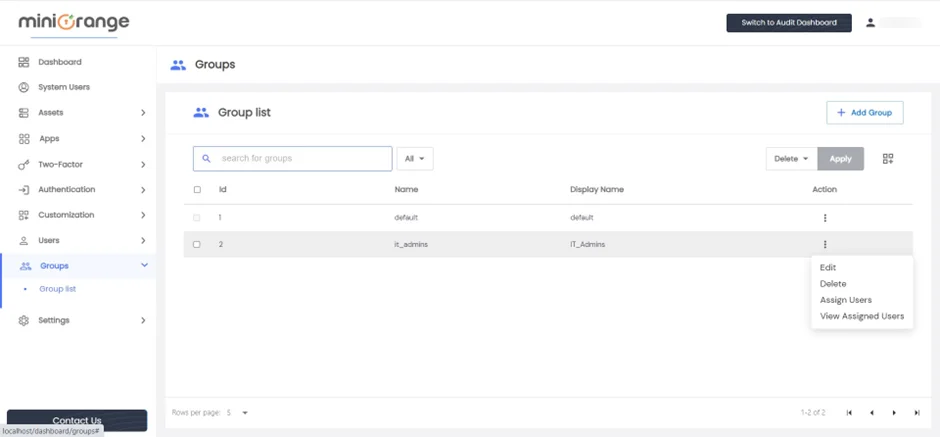
- Navigate to Groups > Group list from the left menu.
- Click on the "Assign users" option next to the group to which you wish to add users.
- On the Assign Users to Groups page, you will find a list of all users who are not yet assigned to the selected group.
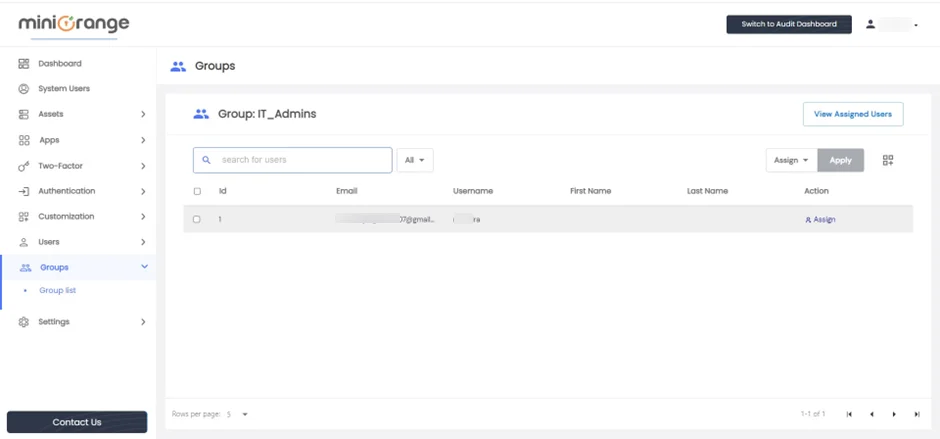
- Select the radio button next to each user you want to assign to the group.
- Click on the Select Action Dropdown and choose the "Assign" option.
- Finally, click on Apply to add the selected users to the group.
By clicking on "View Assigned Users," you can see the members who are currently part of that group.
How to remove Users from Group.
- Go to Groups > Group list from the left menu and click on View Assigned Users option against the group to which you want to add users.

- This will open the assigned user page showing a list of all members of the Group.
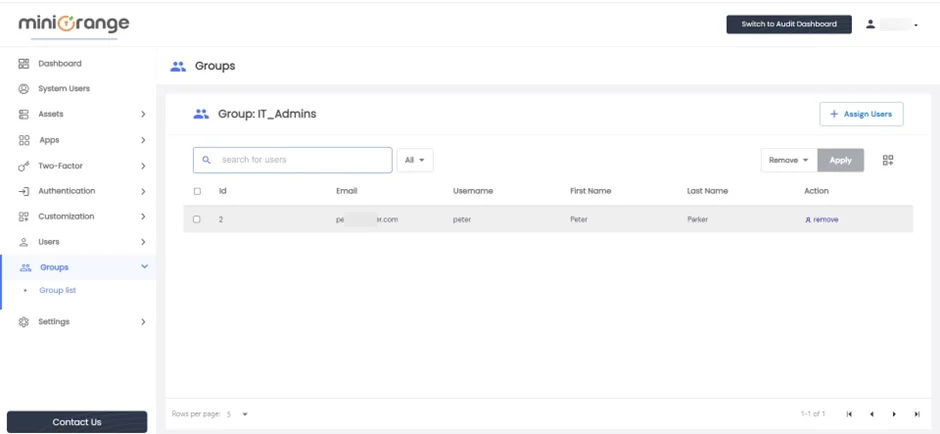
To remove users from the group, follow these steps:
- Check the checkbox for each user you wish to remove from the group.
- Click on the Select Action Dropdown and choose the "Remove" option.
By clicking on "Assign Users", you can view a list of users who are not currently members of the group.


