External Identity Provider
The miniOrange PAM solution offers Single Sign-On functionality, which requires the administrator to configure the identity provider within the PAM solution. To enable Single Sign-On, the miniOrange PAM solution utilizes the OAuth 2.0 protocol and openID Connect (OIDC) protocol.
Within the Single Sign-On section of the PAM dashboard, the administrator can configure various identity providers such as Github, Microsoft Entra ID, Okta, Google Apps, Salesforce, Linkedin, Facebook, Apple ID, and more.
In this guide, we will demonstrate the configuration of Azure Active Directory with the miniOrange PAM application. If you have already created an application in Azure Active Directory, you can skip the step for setting up the Azure Active Directory application.
Setup Azure Active Directory application
- Create an application in Azure Active Directory using App registration.
- Fill name, choose Supported Account Types, for now don’t fill Redirect URI (optional) field.
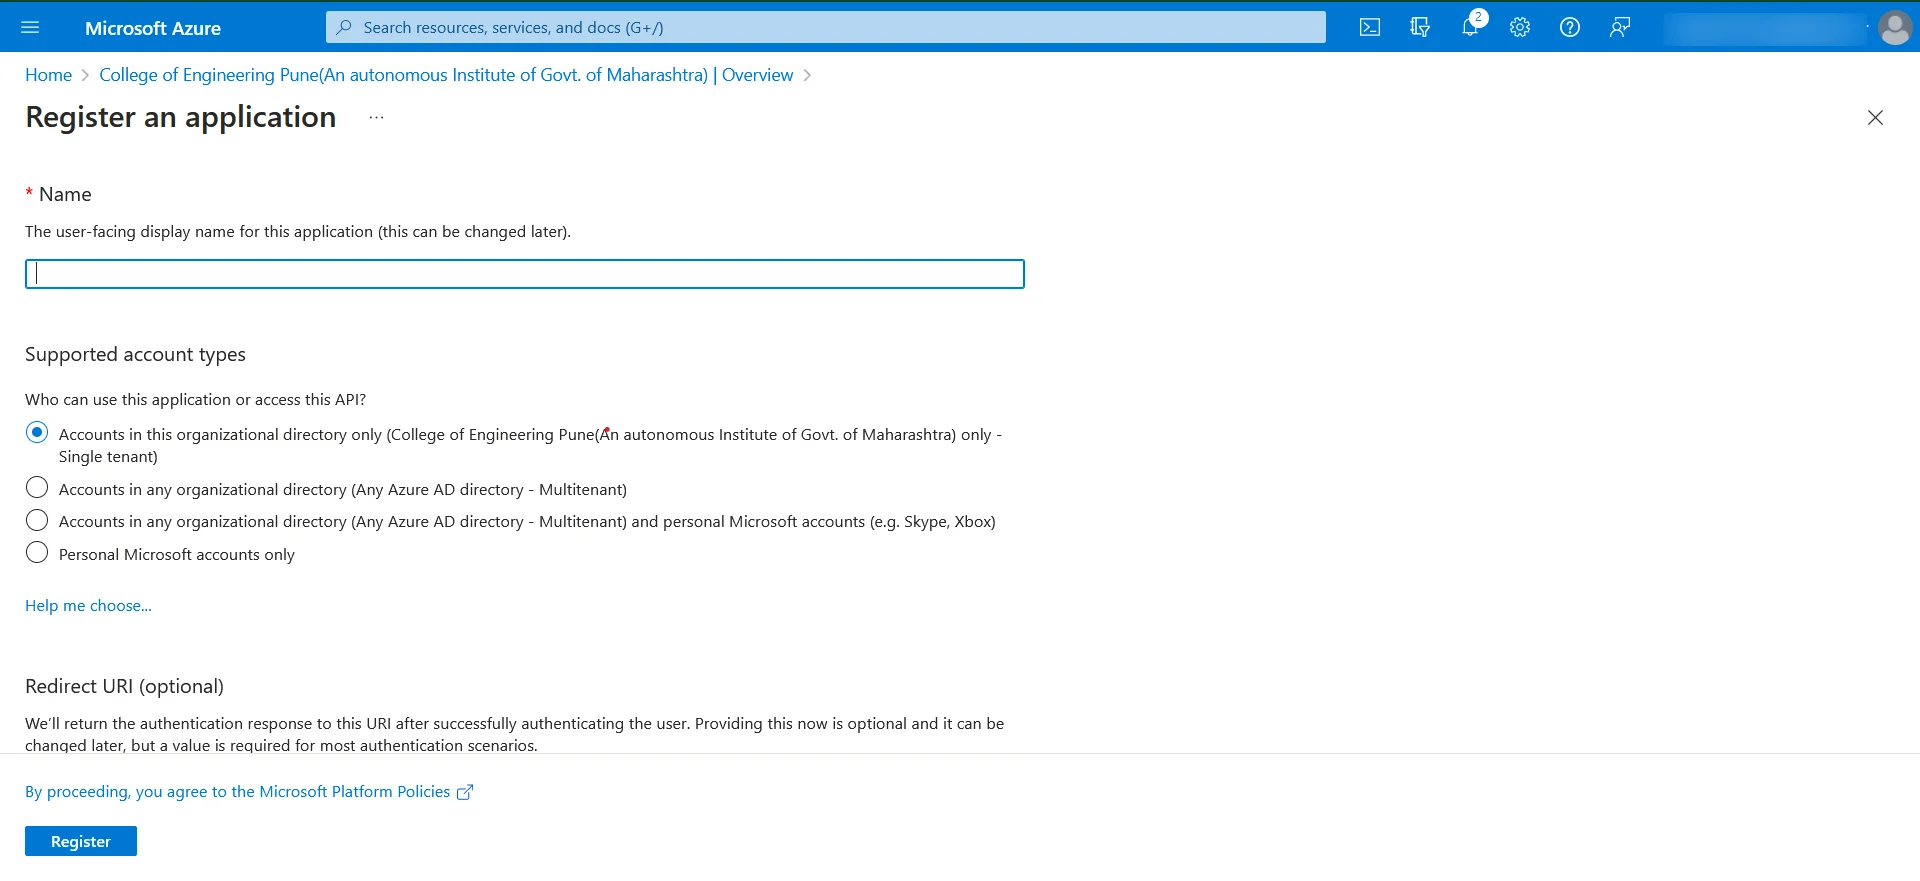
- Register application.
- Click on Add a certificate or secret in overview.
- Create New client secret. Enter description. Add a new client secret.
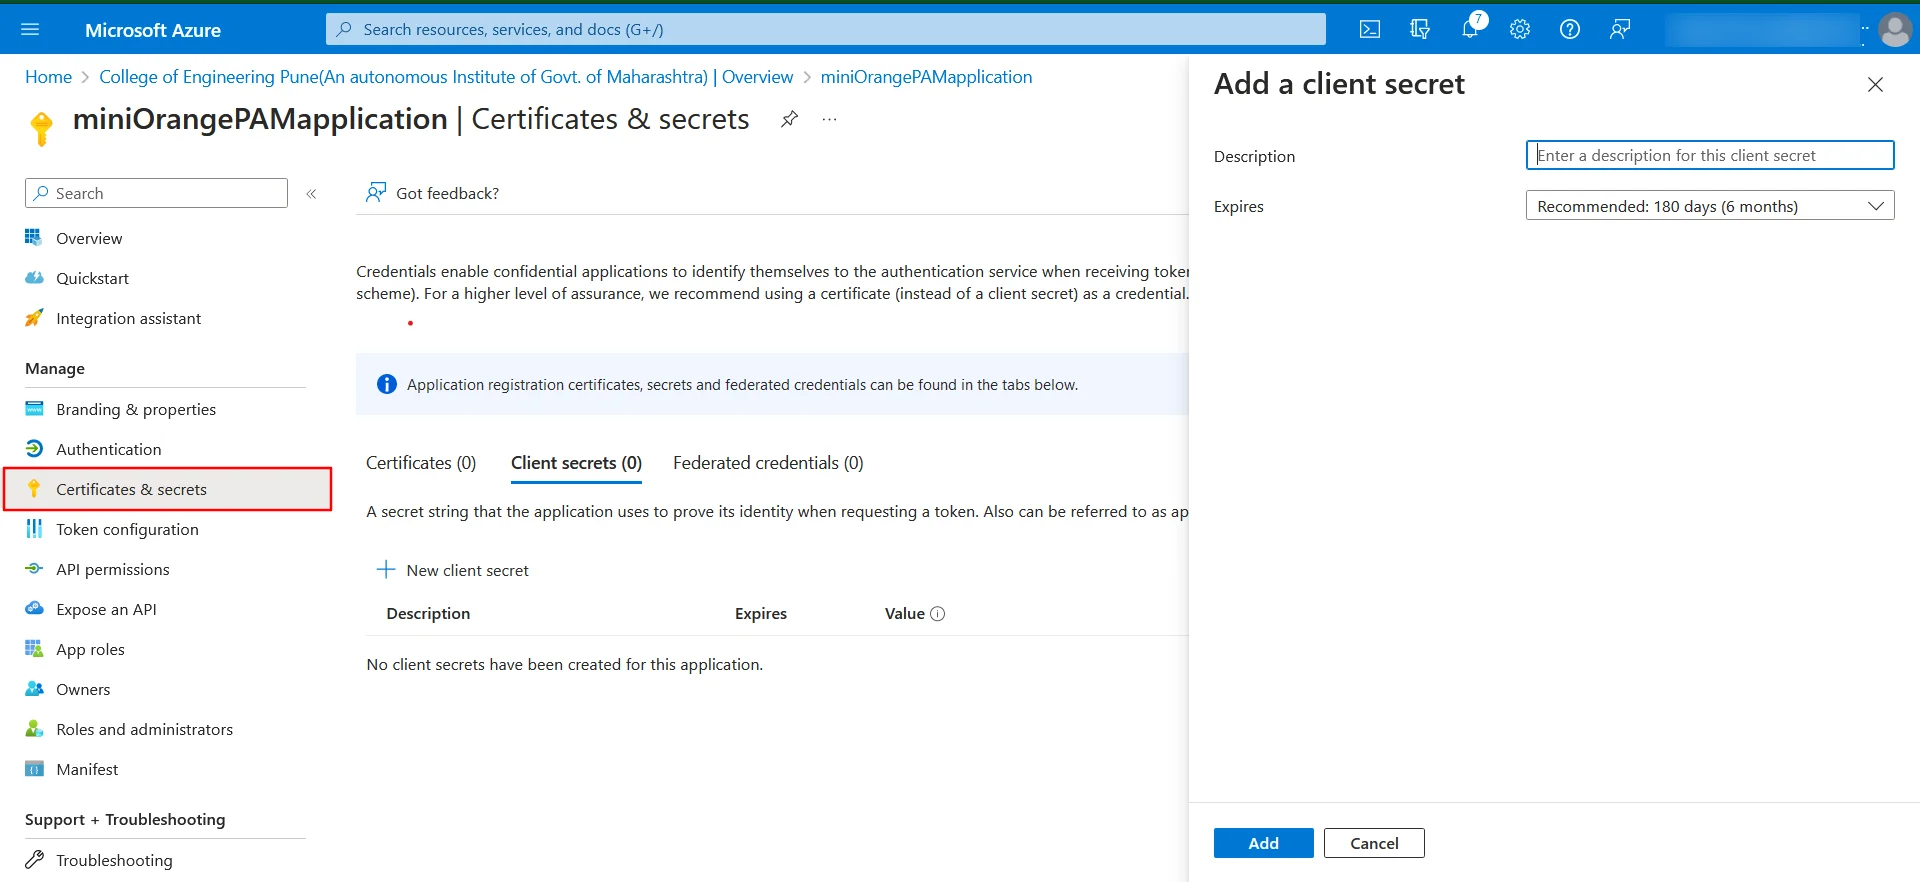
- Click on the Authentication sidebar menu. Click on Add a platform in Platform configurations option.
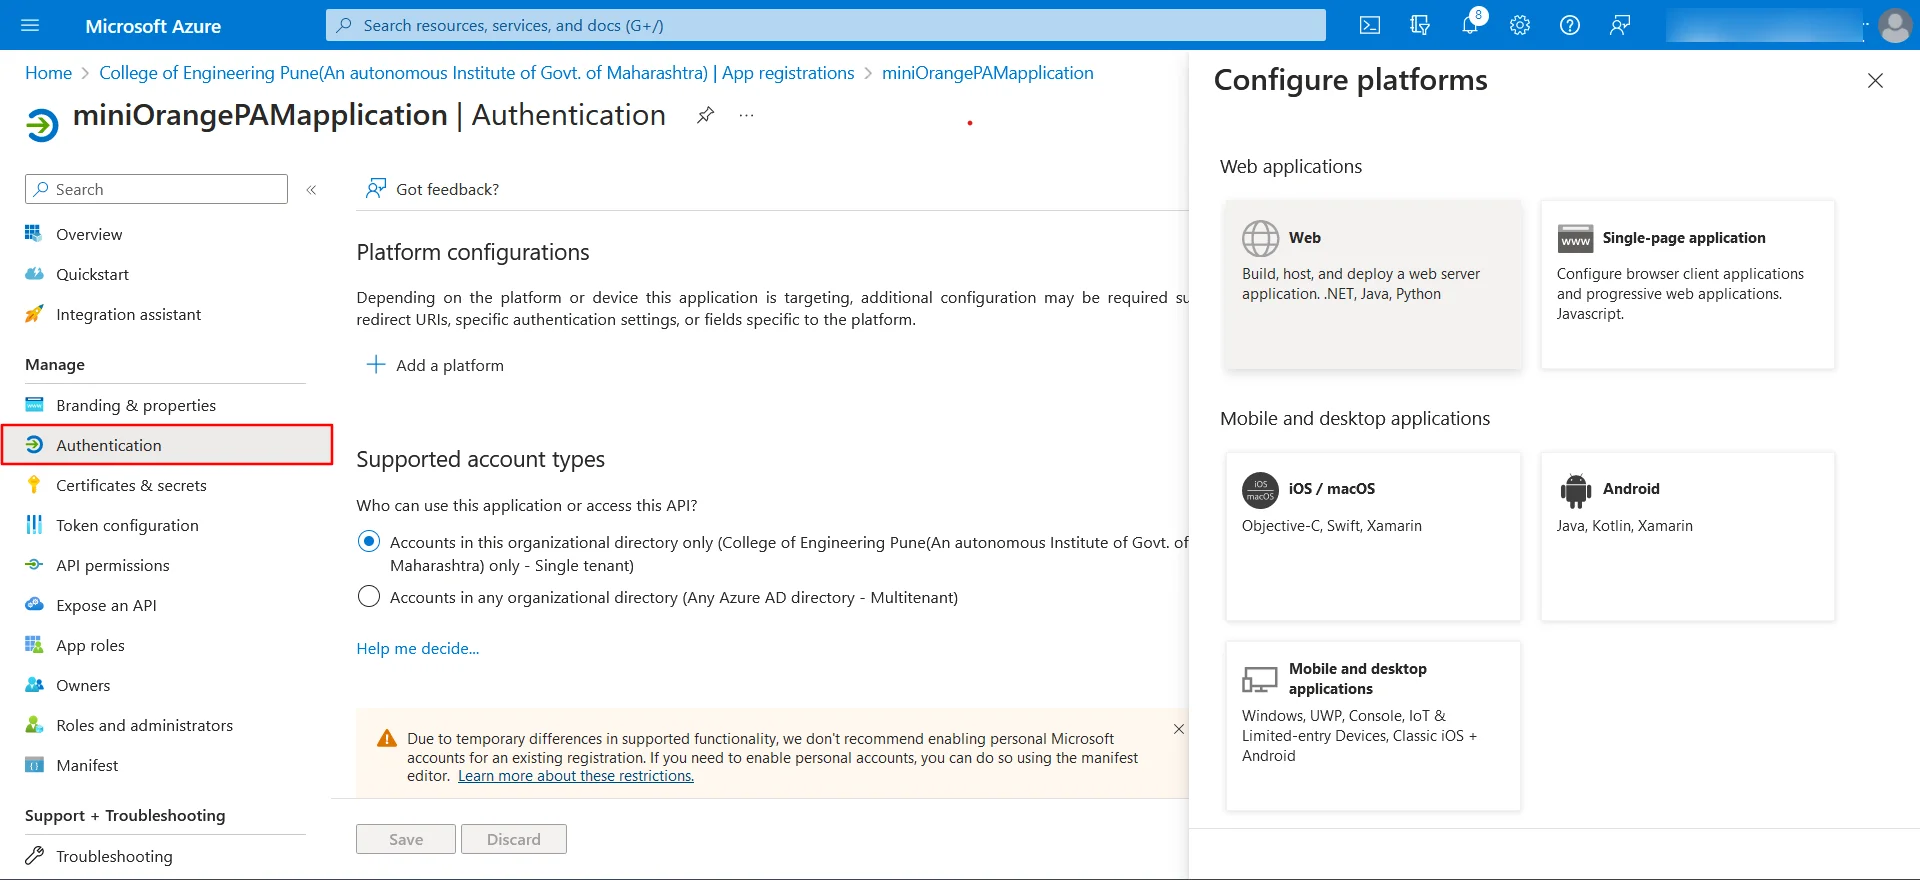
- Select Web from Web applications.
- For now input http://localhost/ in Redirect URIs field. Click on Configure.
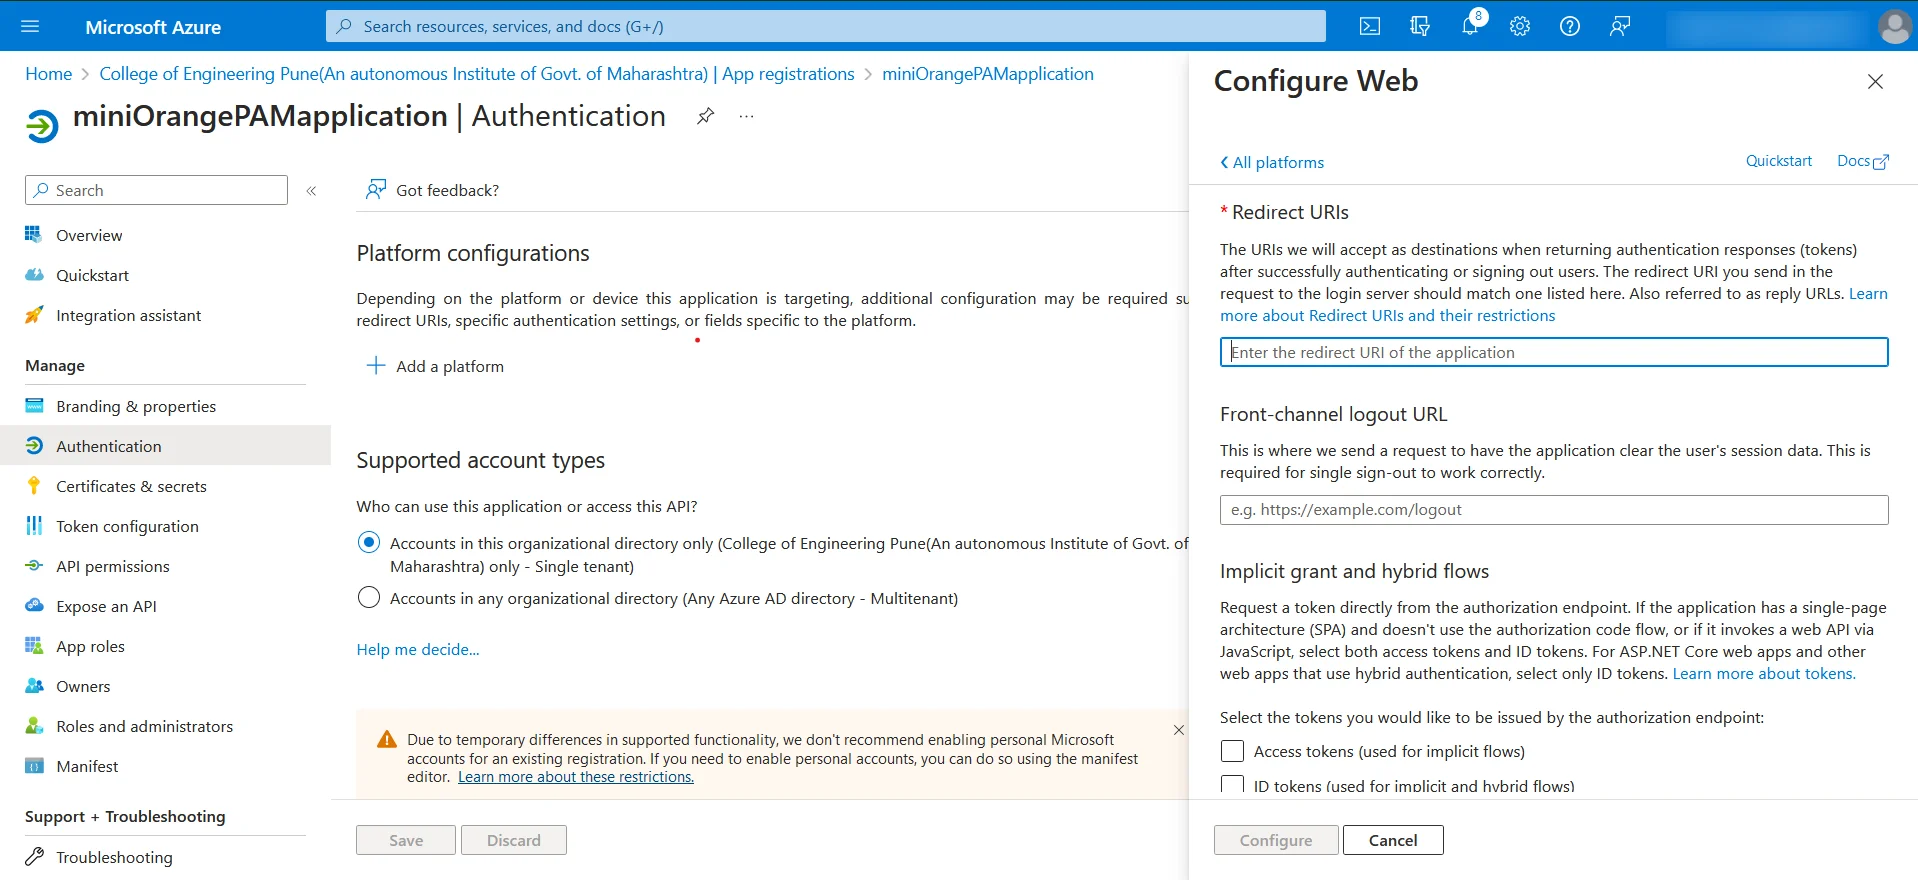
Once you have created the Azure Active Directory application, proceed to the next step, which is to set up the OAuth application in the PAM dashboard. This step will allow you to create a single sign-on application within the miniOrange PAM dashboard.
Setup OAuth application in PAM dashboard
- Log in to the miniOrange PAM dashboard.
- Navigate to the Authentication section in the sidebar and click on the Single Sign-On tab.
- If no Identity Provider is configured, you will see the following screen.
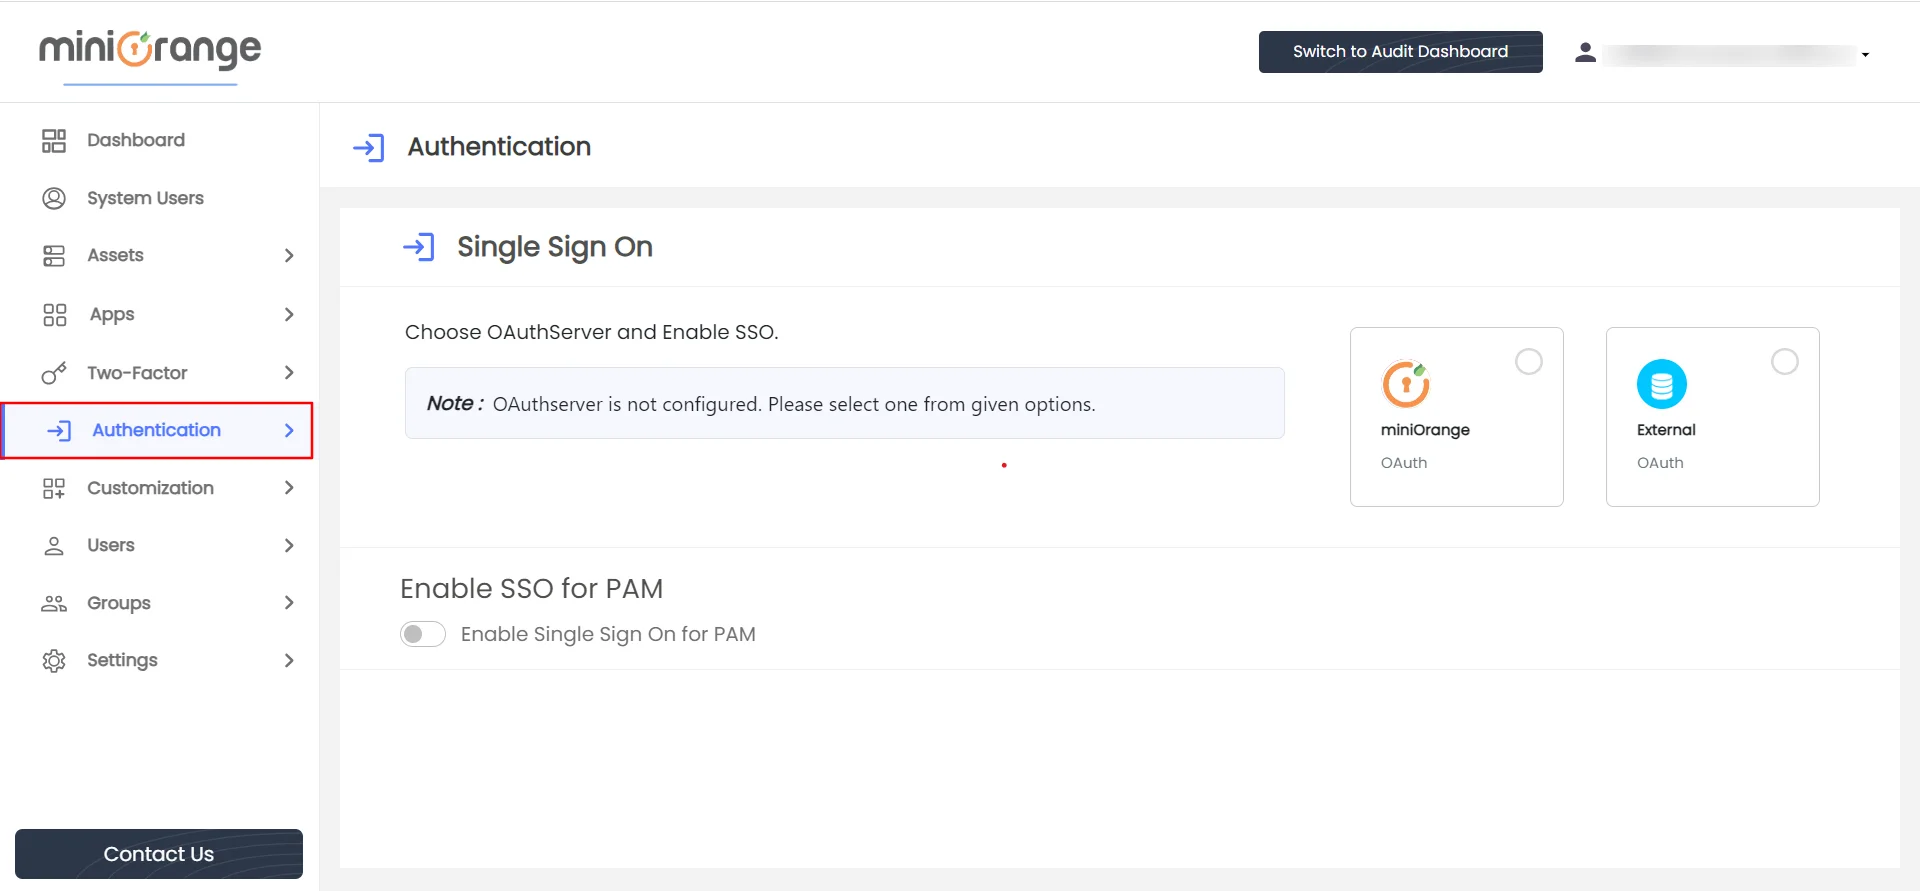
- Click on External box.
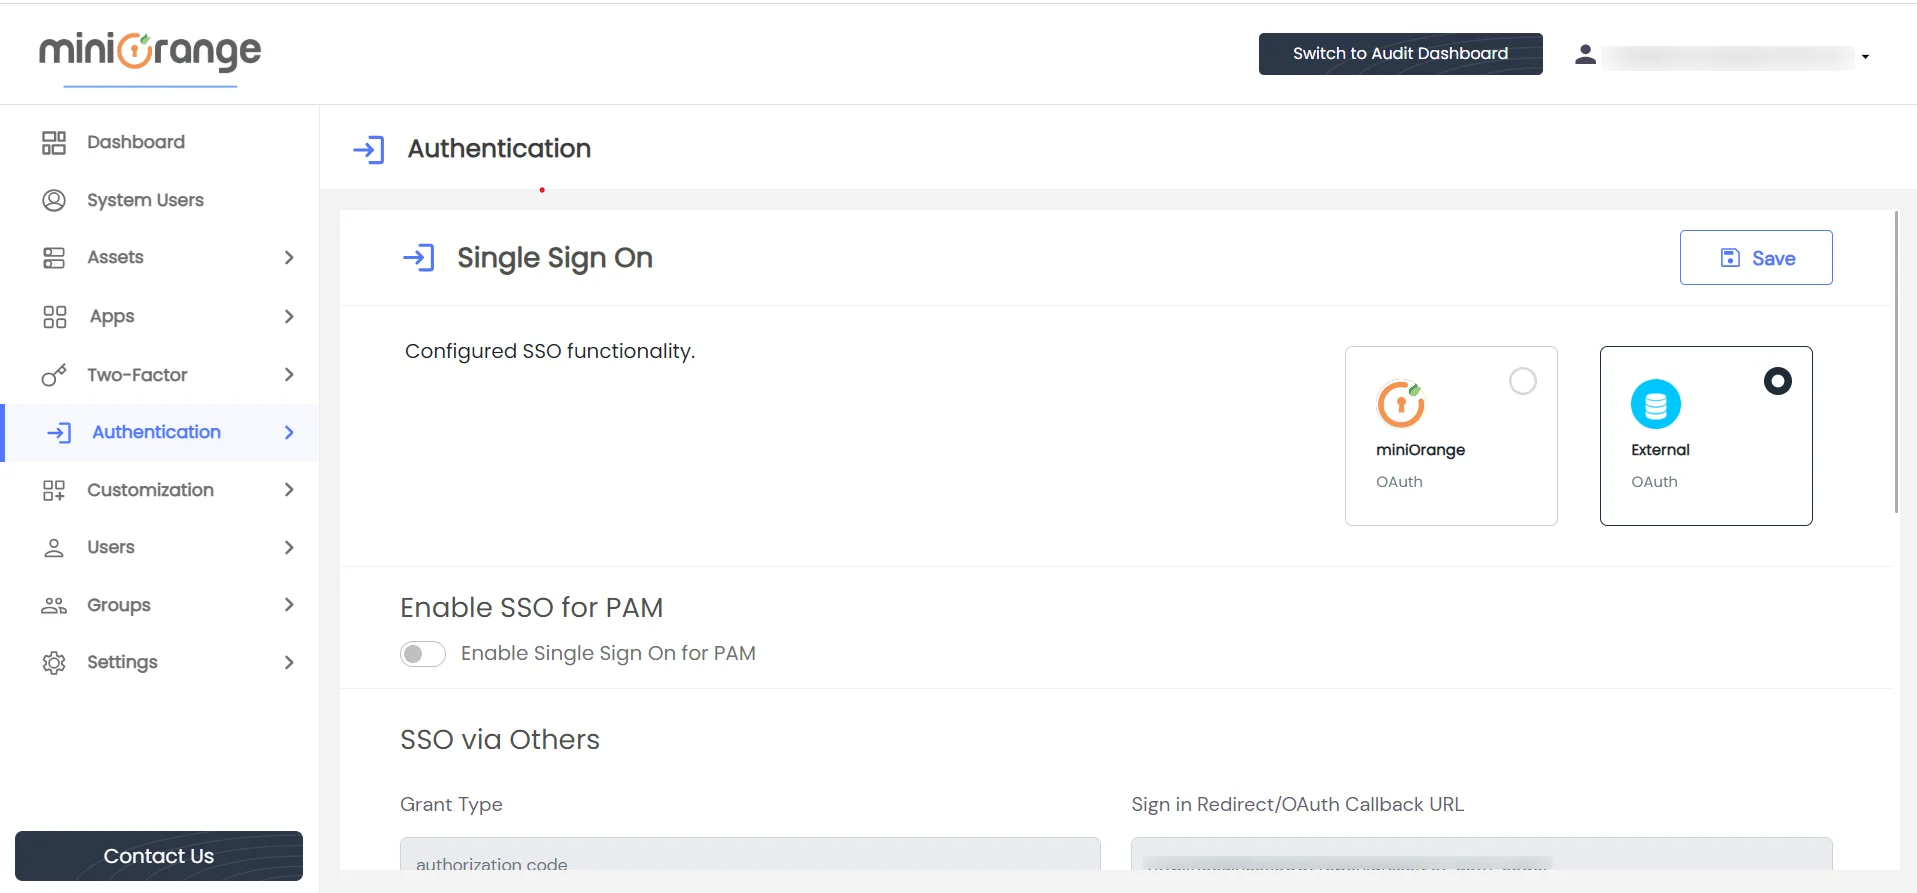
Upon viewing the form fields below, please utilize the provided Microsoft Entra ID information to complete the corresponding fields :
- Grant Type: This field is disabled and is utilized in the SSO flow.
- Sign in Redirect/OAuth Callback URL: This field is disabled and displays the authorization callback URL.
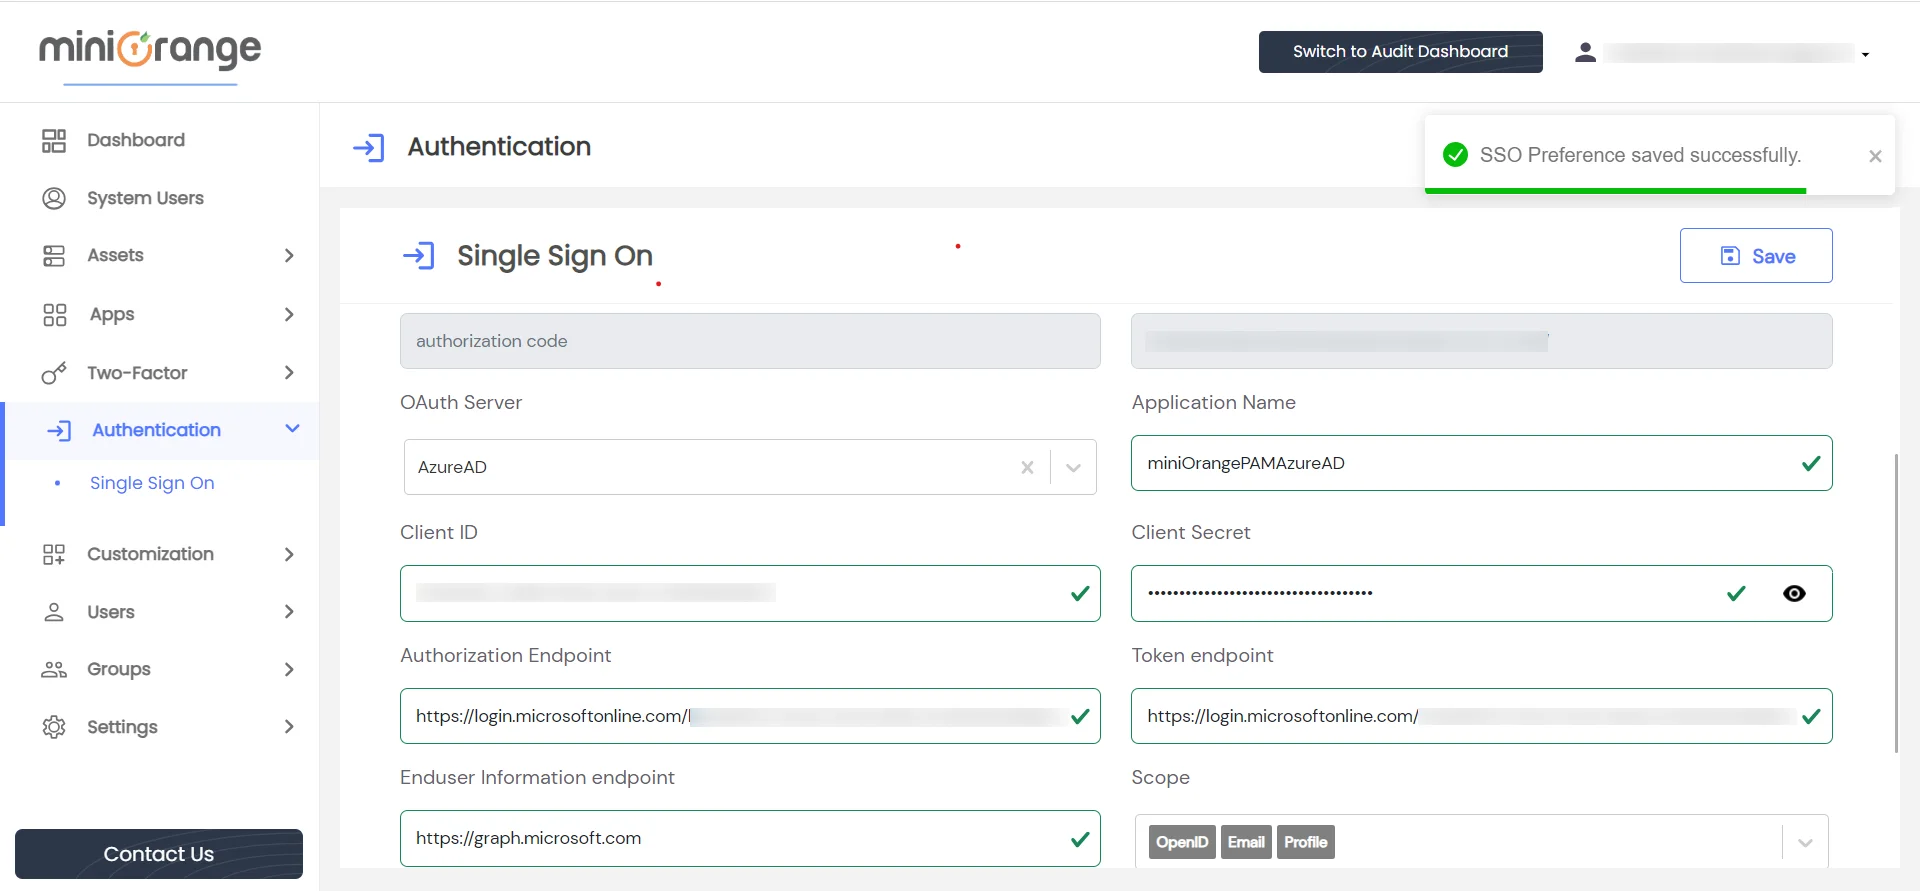
- OAuth Server: Choose from the given options if it is not present in list, input your identity provider name and it will be created as option.
- Application name: Enter a relevant name for your application, such as AzureADminiOrangePAM.
- Client ID: Provide the client ID of your identity provider.
- Client Secret: Specify the client secret of your identity provider. In the case of Microsoft Entra ID, it corresponds to the client secret (value).
- Token endpoint: Enter the token endpoint. In the case of Microsoft Entra ID, copy the OAuth 2.0 token endpoint (v2).
- Enduser information endpoint: Input the user info endpoint. For Microsoft Entra ID, use https://graph.microsoft.com/oidc/userinfo.
- Scope: Specify the scopes to be authorized, if required. Three scopes (openID, Profile, Email) cannot be deleted.
- Save the form by clicking on the Save button.
- A success message will be displayed in the right corner.
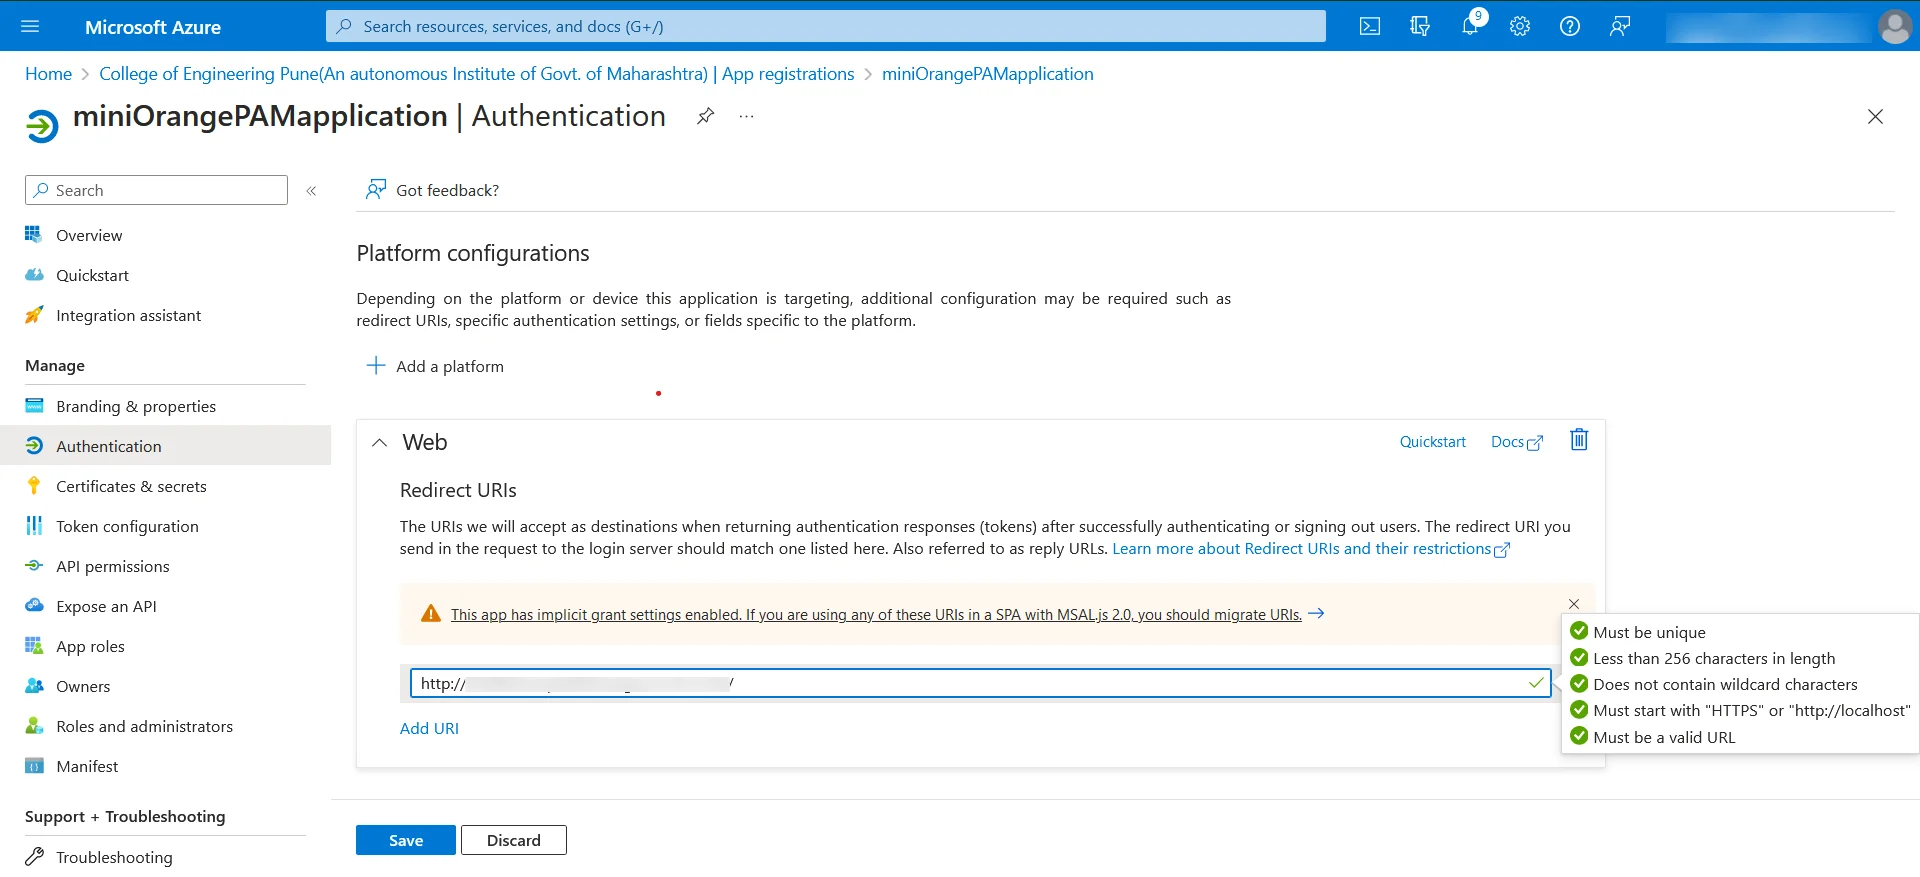
- Copy the value from the Sign in Redirect/OAuth Callback URL field.
- Next, log in to the Azure Active Directory service and navigate to the application within Azure Active Directory that will be utilized for authentication with PAM.
- Within the Authentication sidebar menu, locate the Web option and input the previously copied URL into the Redirect URIs field.
- As soon as we save the form, the Test Connection button will be displayed.
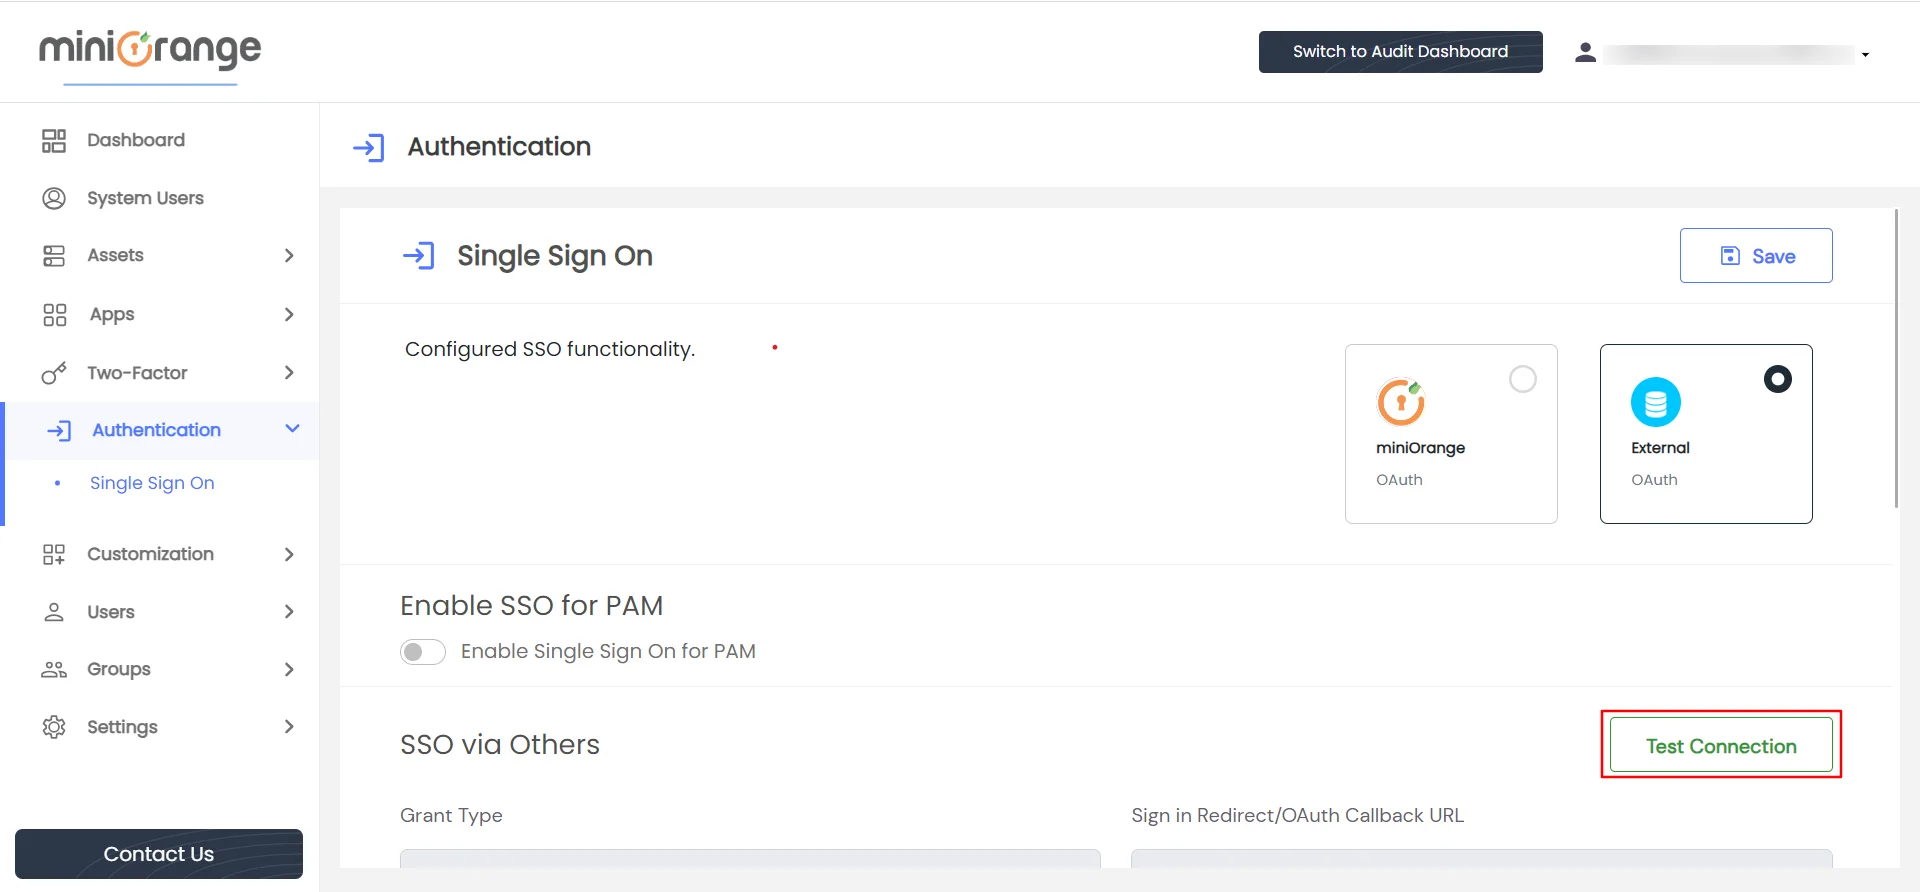
- To check if the installation was successful, click the Test Connection button.
- The link will open in a new window.
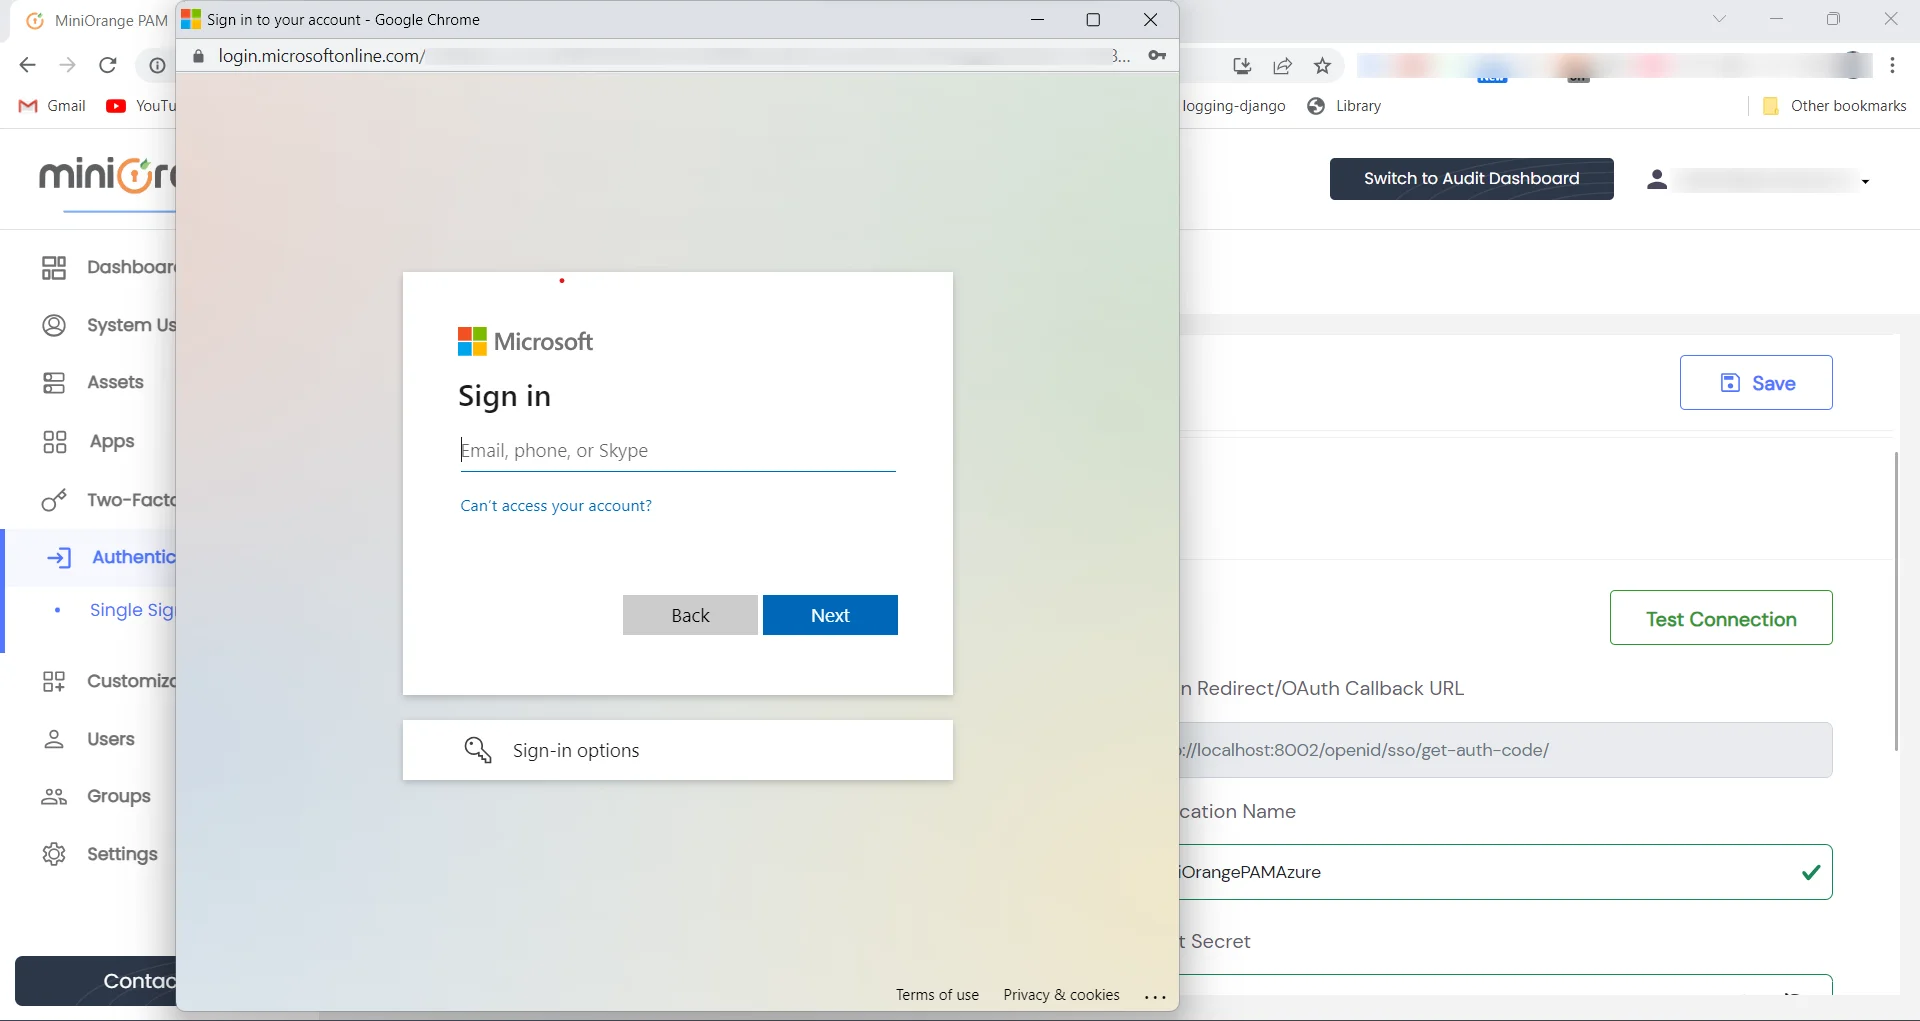
- Provide your Azure Active Directory credentials.
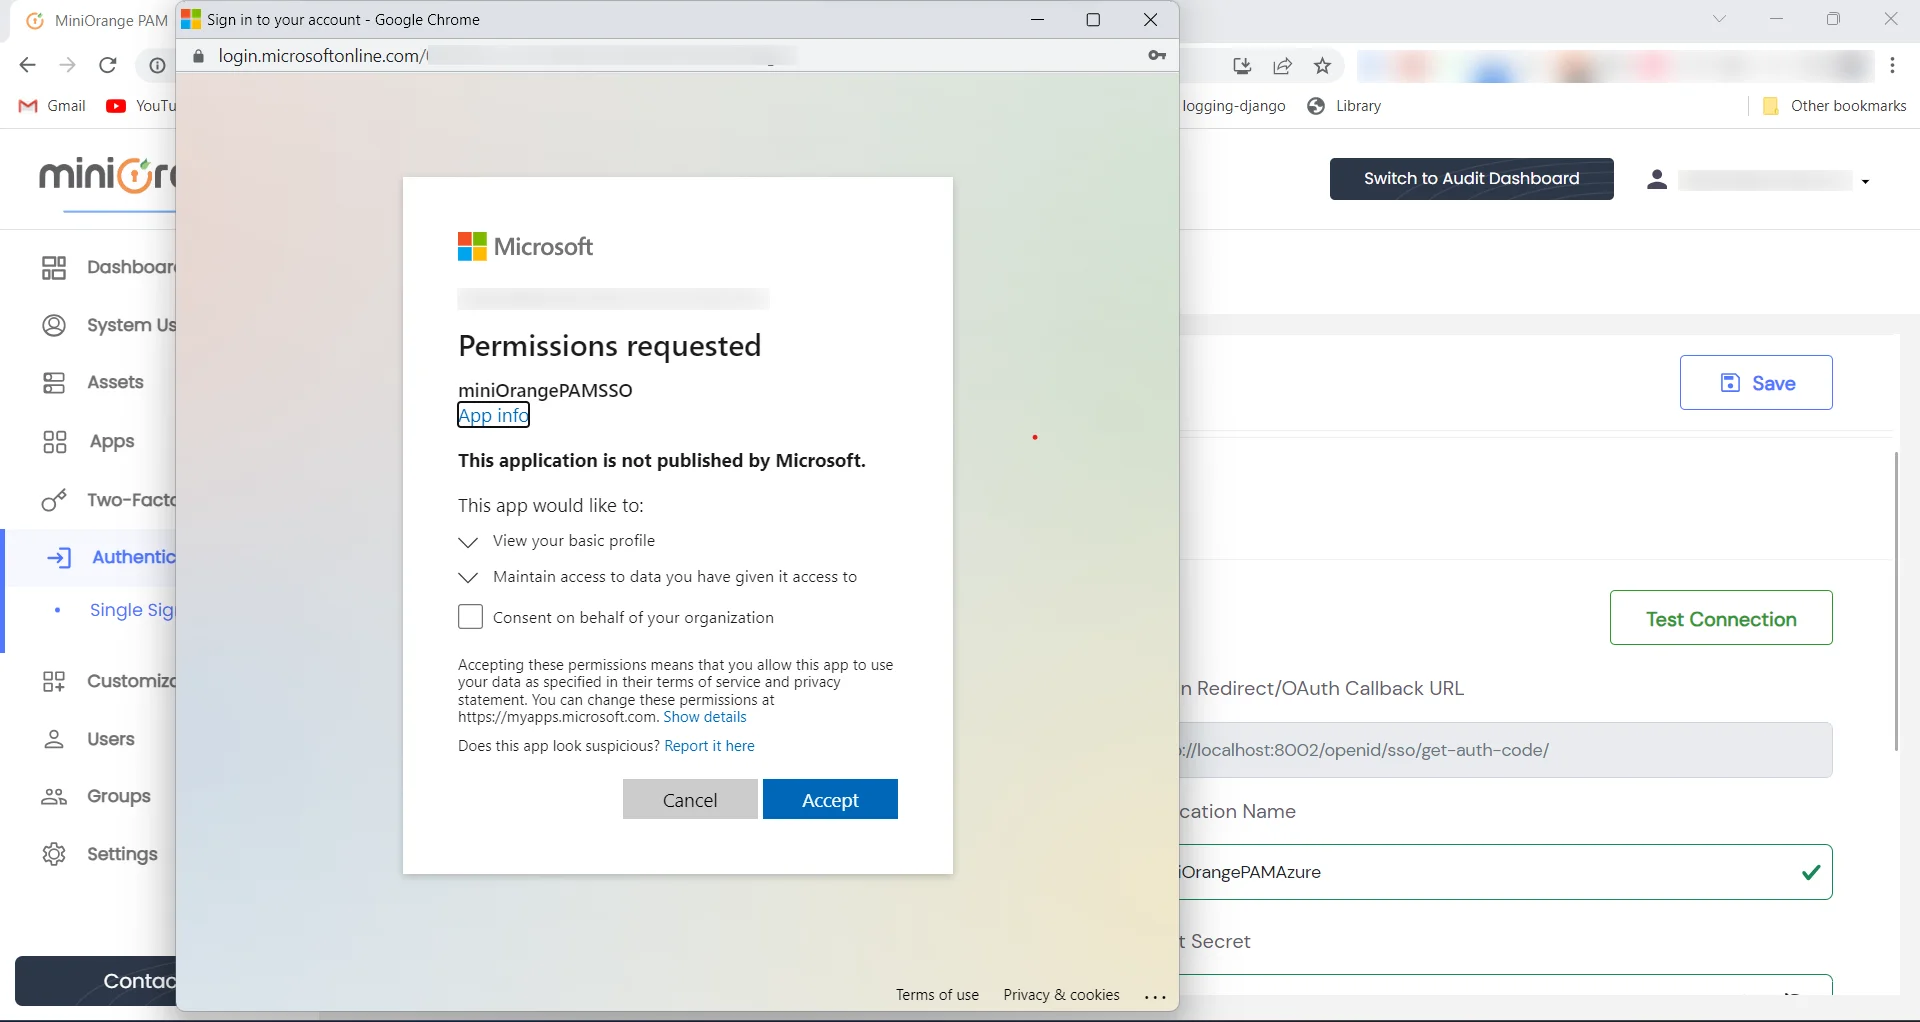
- Give read permissions.
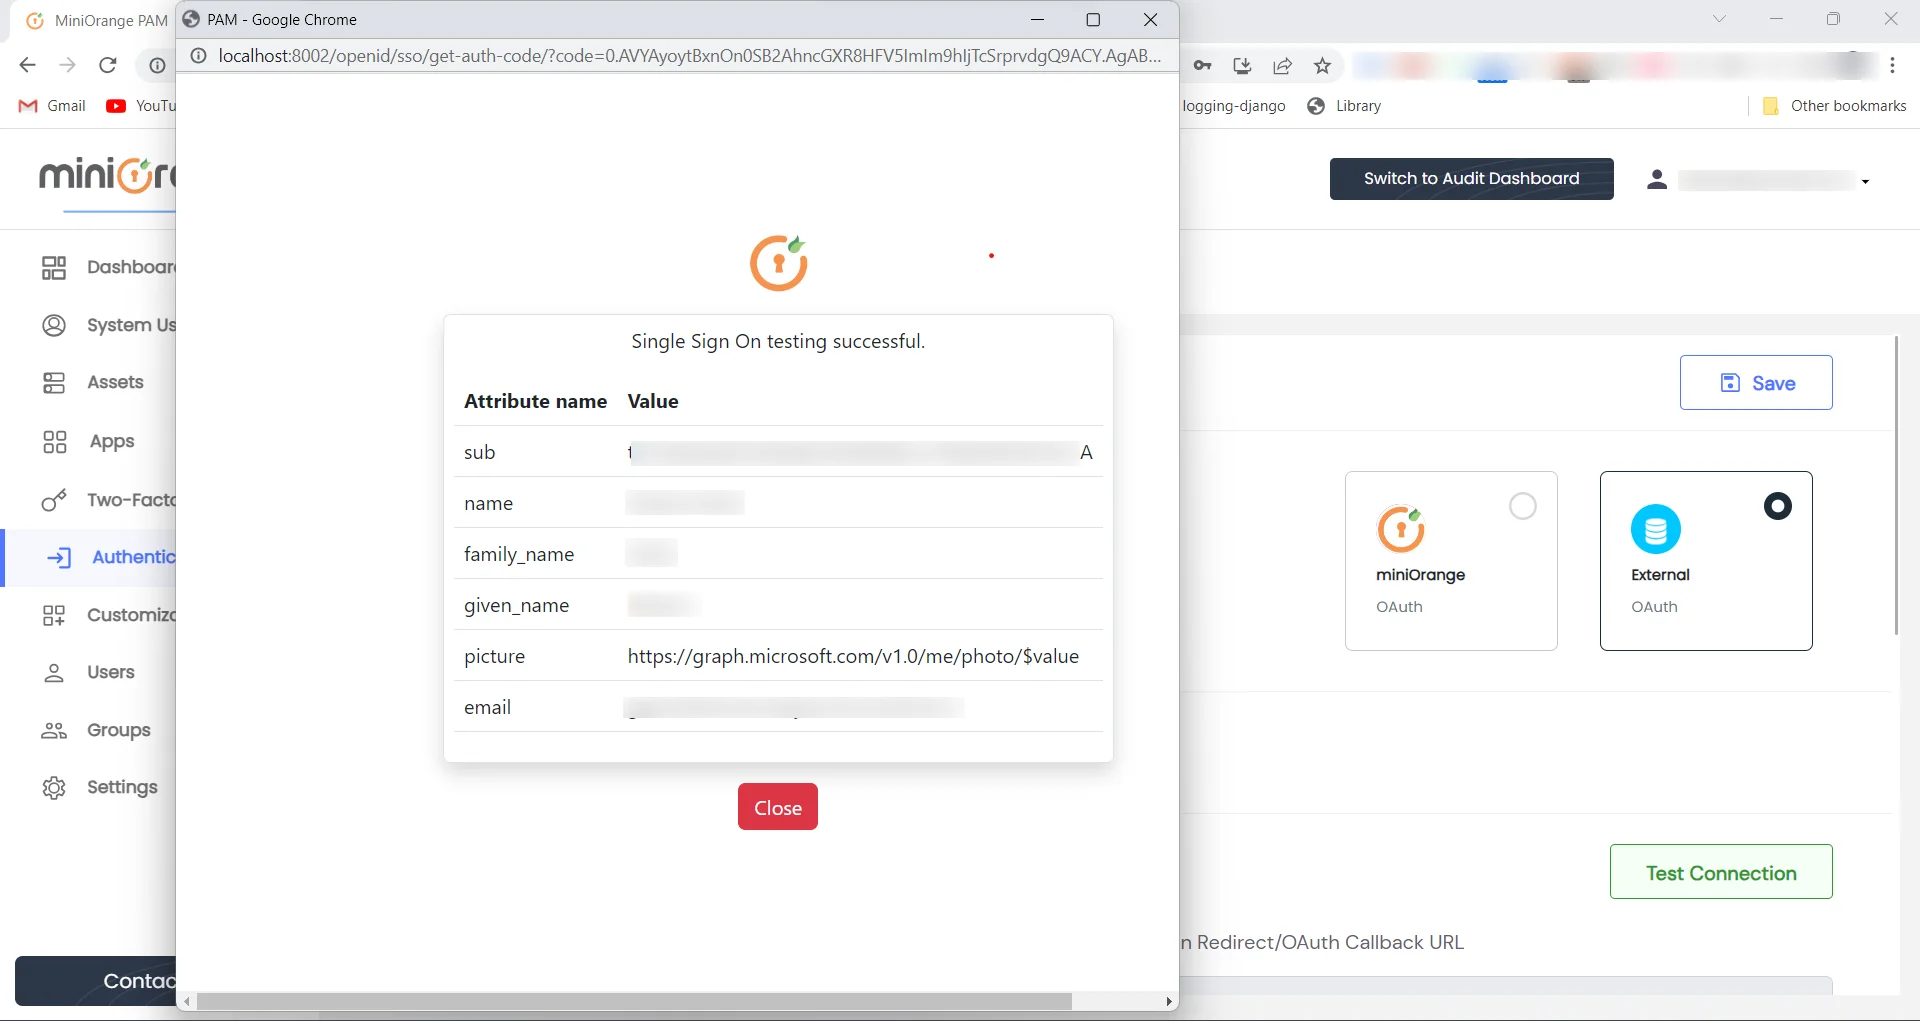
- User information will appear after successful confirmation.
- The configuration on both sides, including the miniOrange PAM solution and Azure Active Directory, is complete.
- To enable Single Sign-On (SSO) for PAM, simply toggle the "Enable Single Sign On for PAM" button.
- After enabling the "Enable SSO" button, the Single Sign-On button will be displayed.

- Click on Continue with azuread button.
- Azure Active Directory login page will be displayed.
- After successful user verification, the user will be logged in to the PAM application.
Guide to Setting Up Attribute Mapping Functionality for the External Identity Provider :
- To establish attribute mapping between PAM and the external identity provider, follow the steps outlined below.
- Note - these steps should be followed after saving the configuration for the external identity provider.
- Navigate to the Single Sign-On page, which can be found under the Authentication section in the sidebar dropdown menu.
- Ensure that you have performed a test connection and verified that the user information is being successfully displayed for attribute mapping purposes.
- The information pertaining to the external identity provider will be presented on this page.
- To proceed with attribute mapping, click on the plus icon located below the provided note.
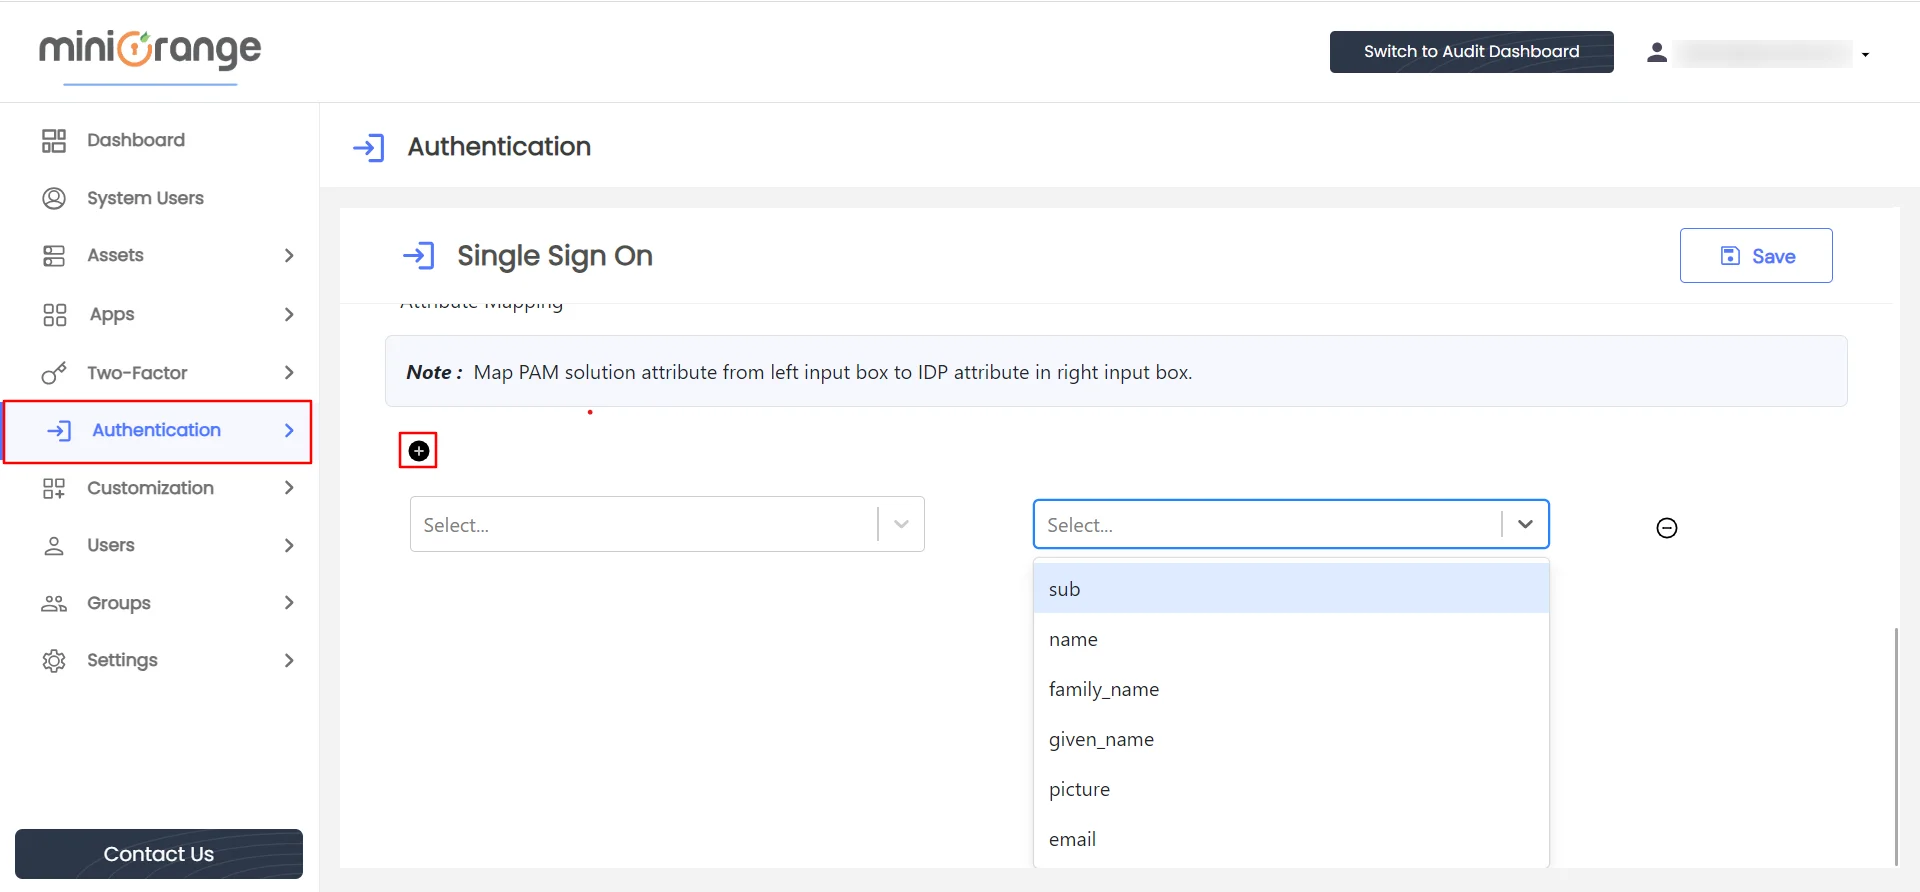
To map PAM attributes (Email, Username, Phone number, First name, Last name, User groups) to external identity attributes, follow these steps :
- In the left input box, select the desired PAM attribute. If you want to create your custom attribute that is not present in list, input the attribute name and press enter, new attribute will be created in list.
- In the right input box, select the corresponding attribute value from the external identity source.
When an end user performs Single Sign-On to the PAM application and undergoes user verification,
the user information will include a dictionary consisting of key-value pairs. The key is external attribute name, while the value is external attribute value. The key value will be used to find mapped PAM attribute. Value of that key will be saved in mapped PAM attribute.
For Example: If the administrator wishes to assign the value of the external identity's username
attribute to the First name attribute in the PAM solution, select "First name"
as the PAM attribute from the left box and
choose the username field from external attribute list from the right box.
Once the attribute mapping is completed, click on the Save button. This will update the configuration for the attribute mapping of the external identity provider.
IMPORTANT: If attribute mapping is done, then it is mandatory to map email attribute.


