Hello there!

Need Help? We are right here!

Support Icon
miniOrange Email Support
success

Thanks for your Enquiry. Our team will soon reach out to you.

If you don't hear from us within 24 hours, please feel free to send a follow-up email to info@xecurify.com

Search Results:

×

miniOrange Identity Provider


The miniOrange PAM solution provides Single Sign-On (SSO) functionality, implemented using the OAuth 2.0 protocol and openID Connect (OIDC) protocol. To configure the miniOrange identity provider in the PAM dashboard, follow the steps below.

In the miniOrange Single Sign-On section, you can perform the following operations:

  • Set up the miniOrange identity provider
  • Perform attribute mapping with the identity provider
  • Reset the saved miniOrange cloud configuration

To learn the detailed steps for performing these operations, refer to the provided guide.

Configure miniOrange identity provider

To configure the miniOrange identity provider, follow these steps:
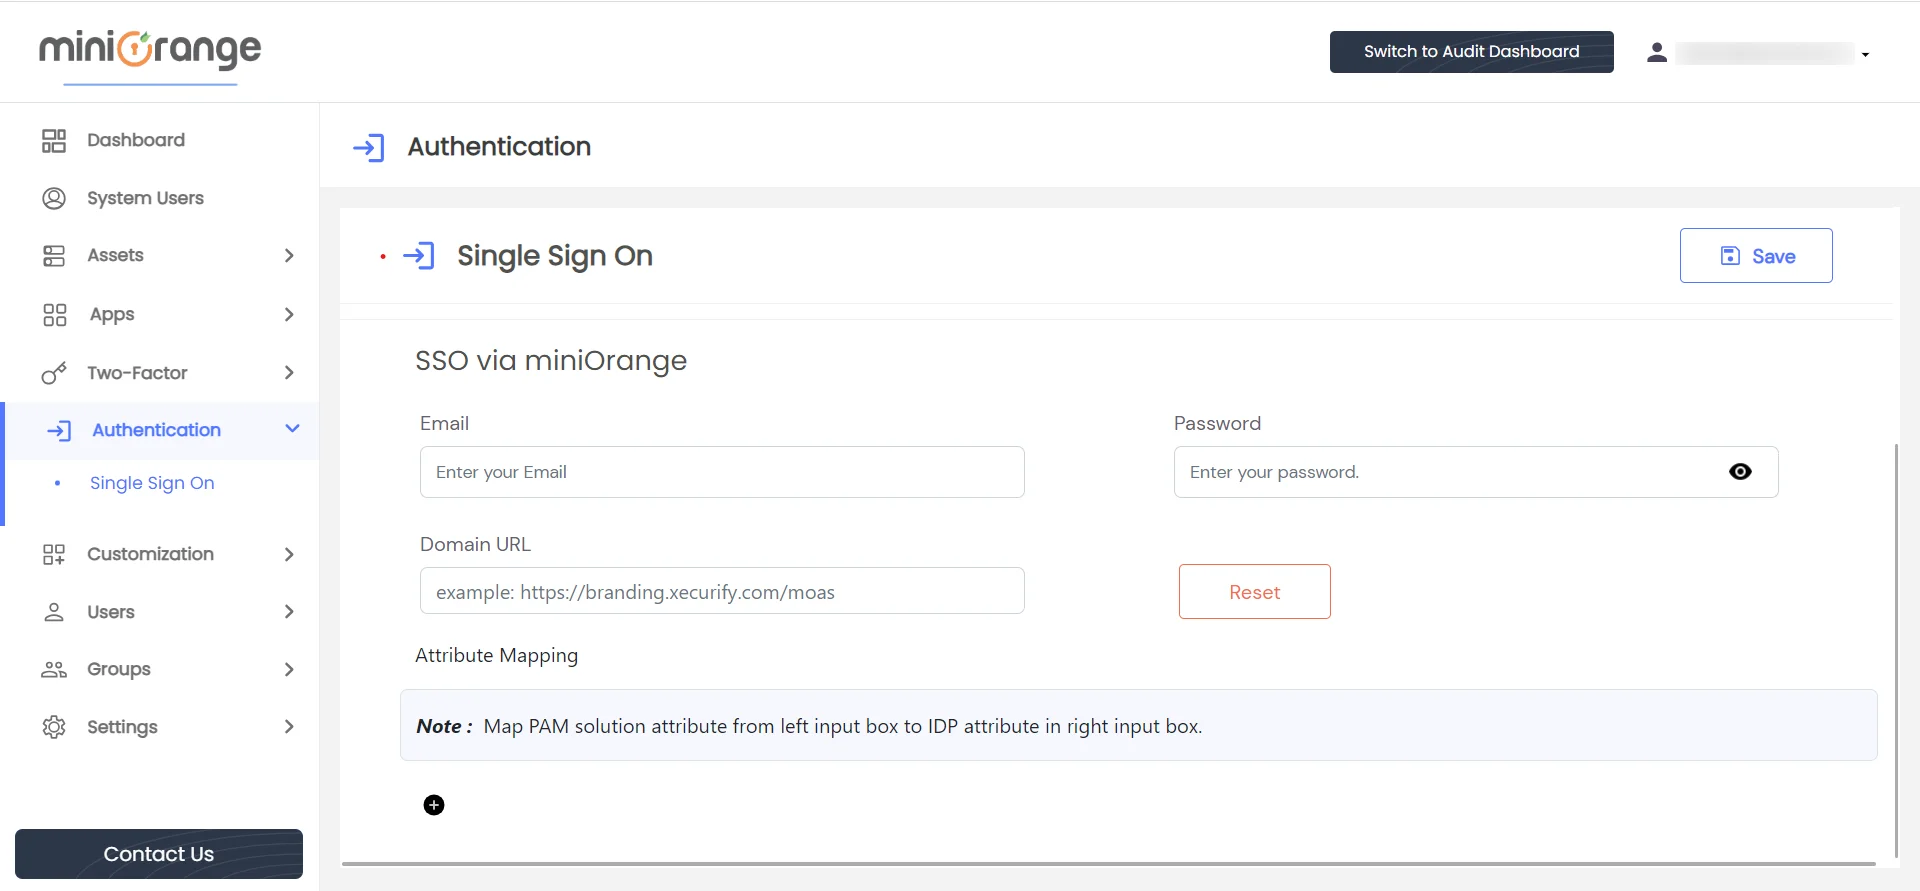
  1. Log into the miniOrange PAM dashboard.
  2. Configure it through form submission on the Single Sign-On page under the Authentication sidebar dropdown menu.

  3. Privileged Access Management Admin Handbook: Login into miniOrange PAM

To configure the miniOrange identity provider, fill in the following form fields:

  • Email: Enter the email address associated with your miniOrange account.
  • Password: Provide the password for your miniOrange account.
  • Domain URL: If you are using a miniOrange cloud account, include the branding URL with "/moas" appended. For on-premise miniOrange identity provider, exclude "/moas" from the branding URL.

After completing the form, submit it. The status of the operation will be displayed in the right corner.
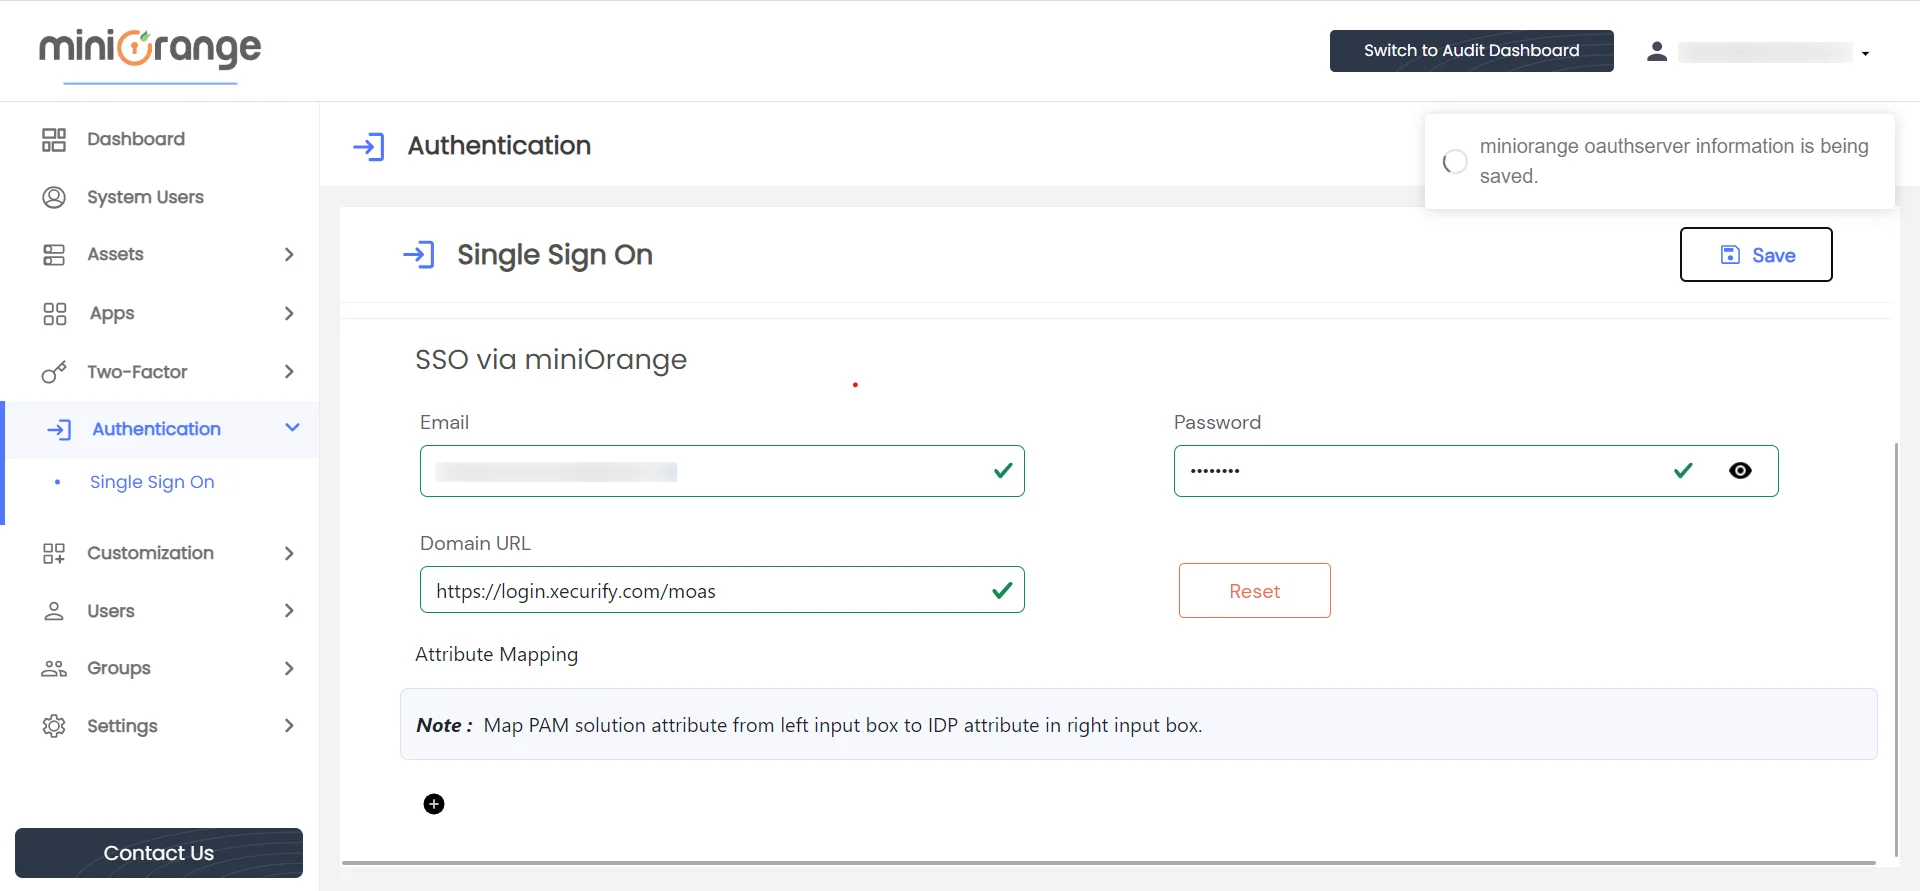
Privileged Access Management Admin Handbook: Provide the required details into the form

After successful submission of form, form fields will become disabled.
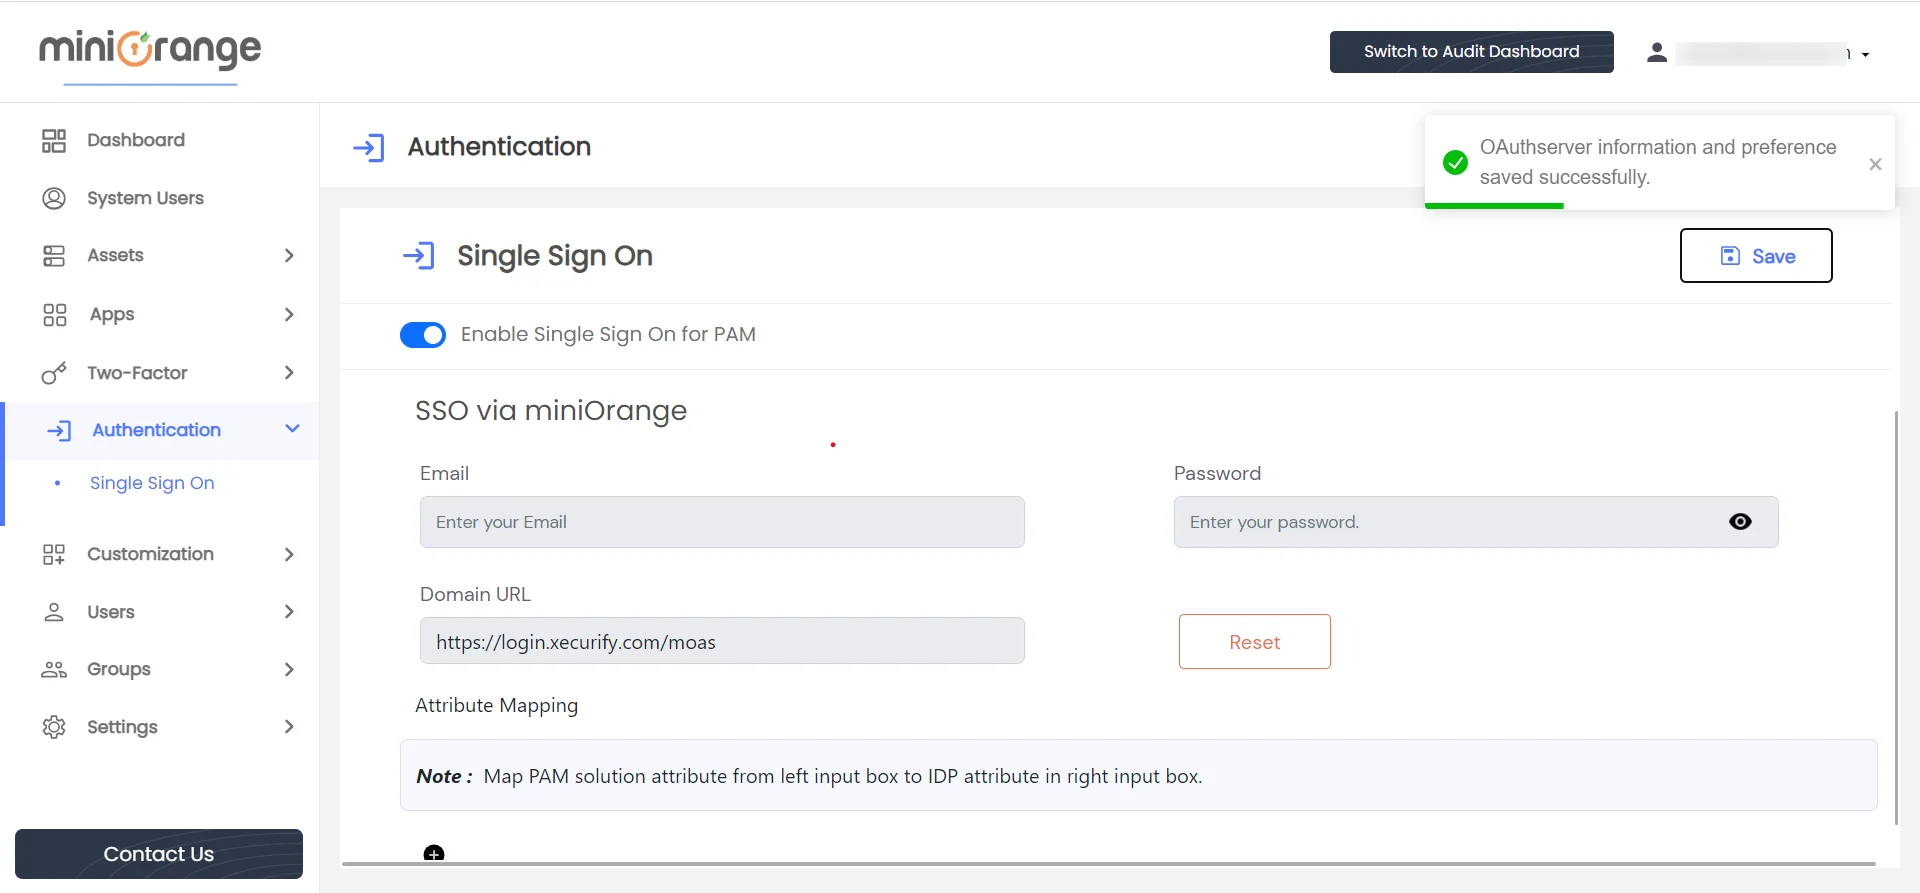
Privileged Access Management Admin Handbook: Once the form submission is successful, the following details are disable

miniOrange Identity Provider is configured.

Attribute mapping functionality setup guide

To set up the attribute mapping functionality between PAM and the miniOrange Identity provider, follow these steps:
  1. Ensure that you have already saved the configuration for the miniOrange identity provider.
  2. Navigate to the Single Sign-On page by selecting it from the Authentication sidebar dropdown menu.
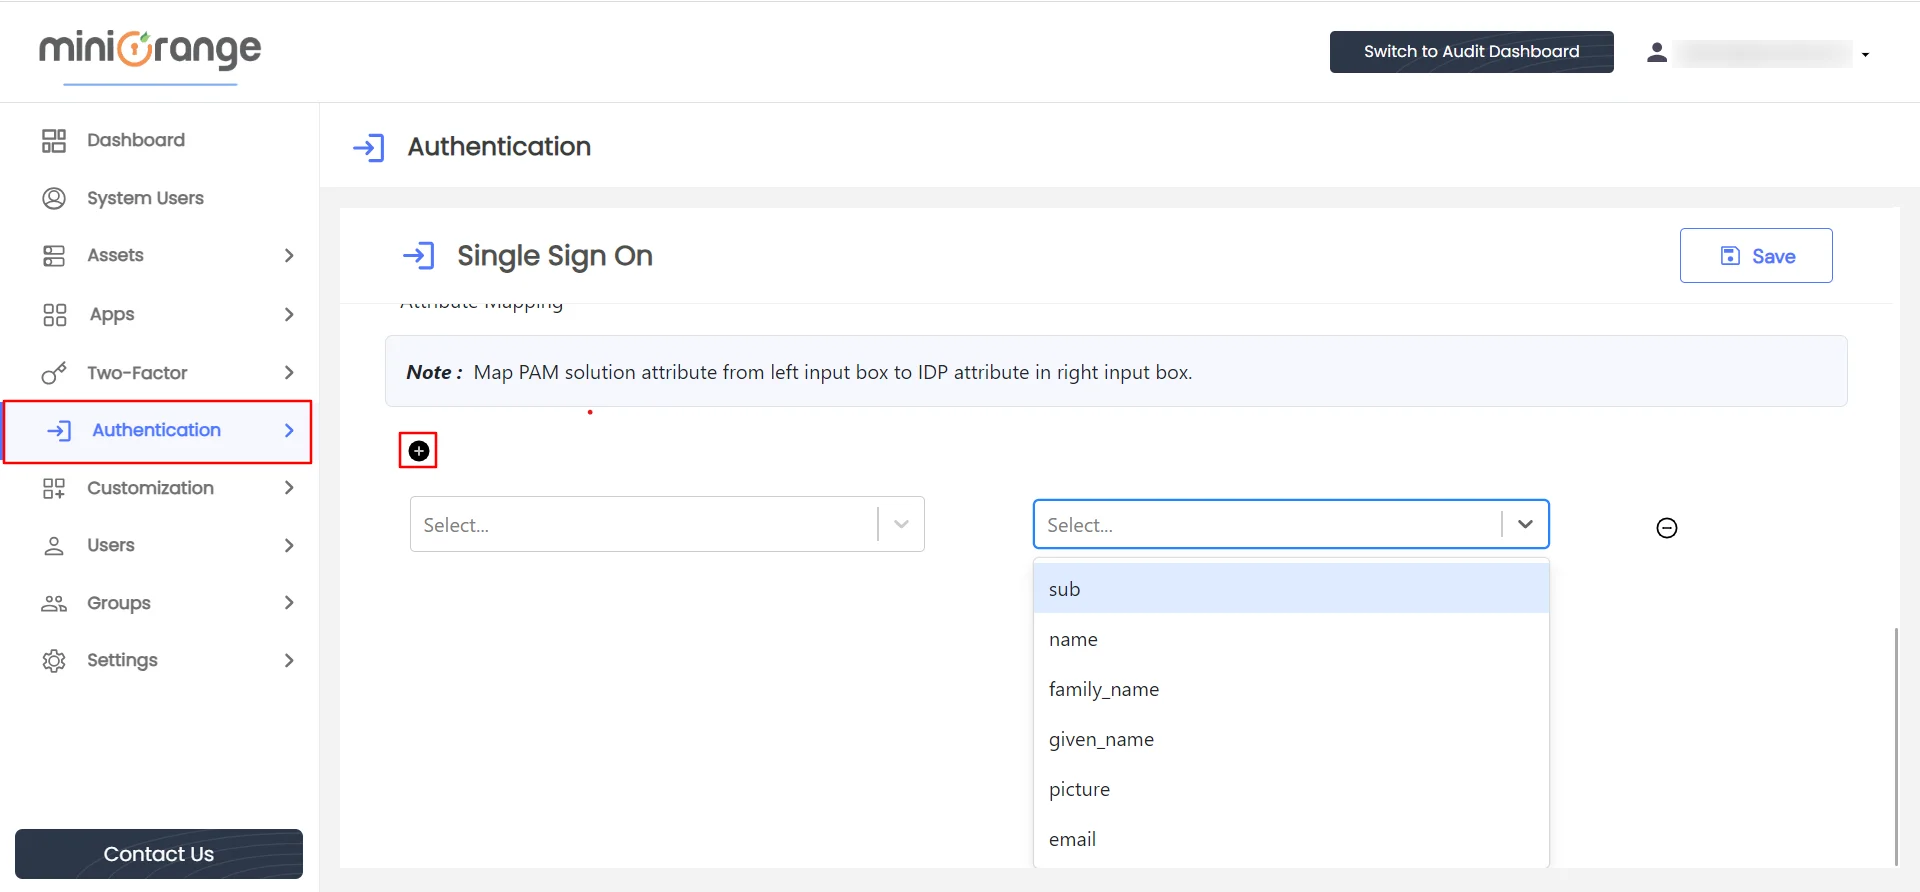
  3. Look for the plus icon located below the note and click on it.

  4. Privileged Access Management Admin Handbook: Click on Plus icon from the Single Sign-On page

To map PAM attributes (Email, Username, Phone number, First name, Last name, User groups) to miniOrange attributes, follow these steps:

  1. On the left input box, select the desired PAM attribute, if attribute is not present, in list, input the attribute name and press enter, new attribute will be created in list.
  2. On the right input box, select the corresponding attribute value from miniOrange.
  3. When an end user performs Single Sign-On to the PAM application and undergoes user verification, the user information will contain a dictionary with the PAM attribute as the key and the mapped miniOrange attribute value as the value.

For example, if the admin wants the "First name" attribute in the PAM solution to have the value of the "Username" attribute from the miniOrange identity source, select "First name" as the PAM attribute from the left box, and choose "Username" as the miniOrange attribute from the right box.
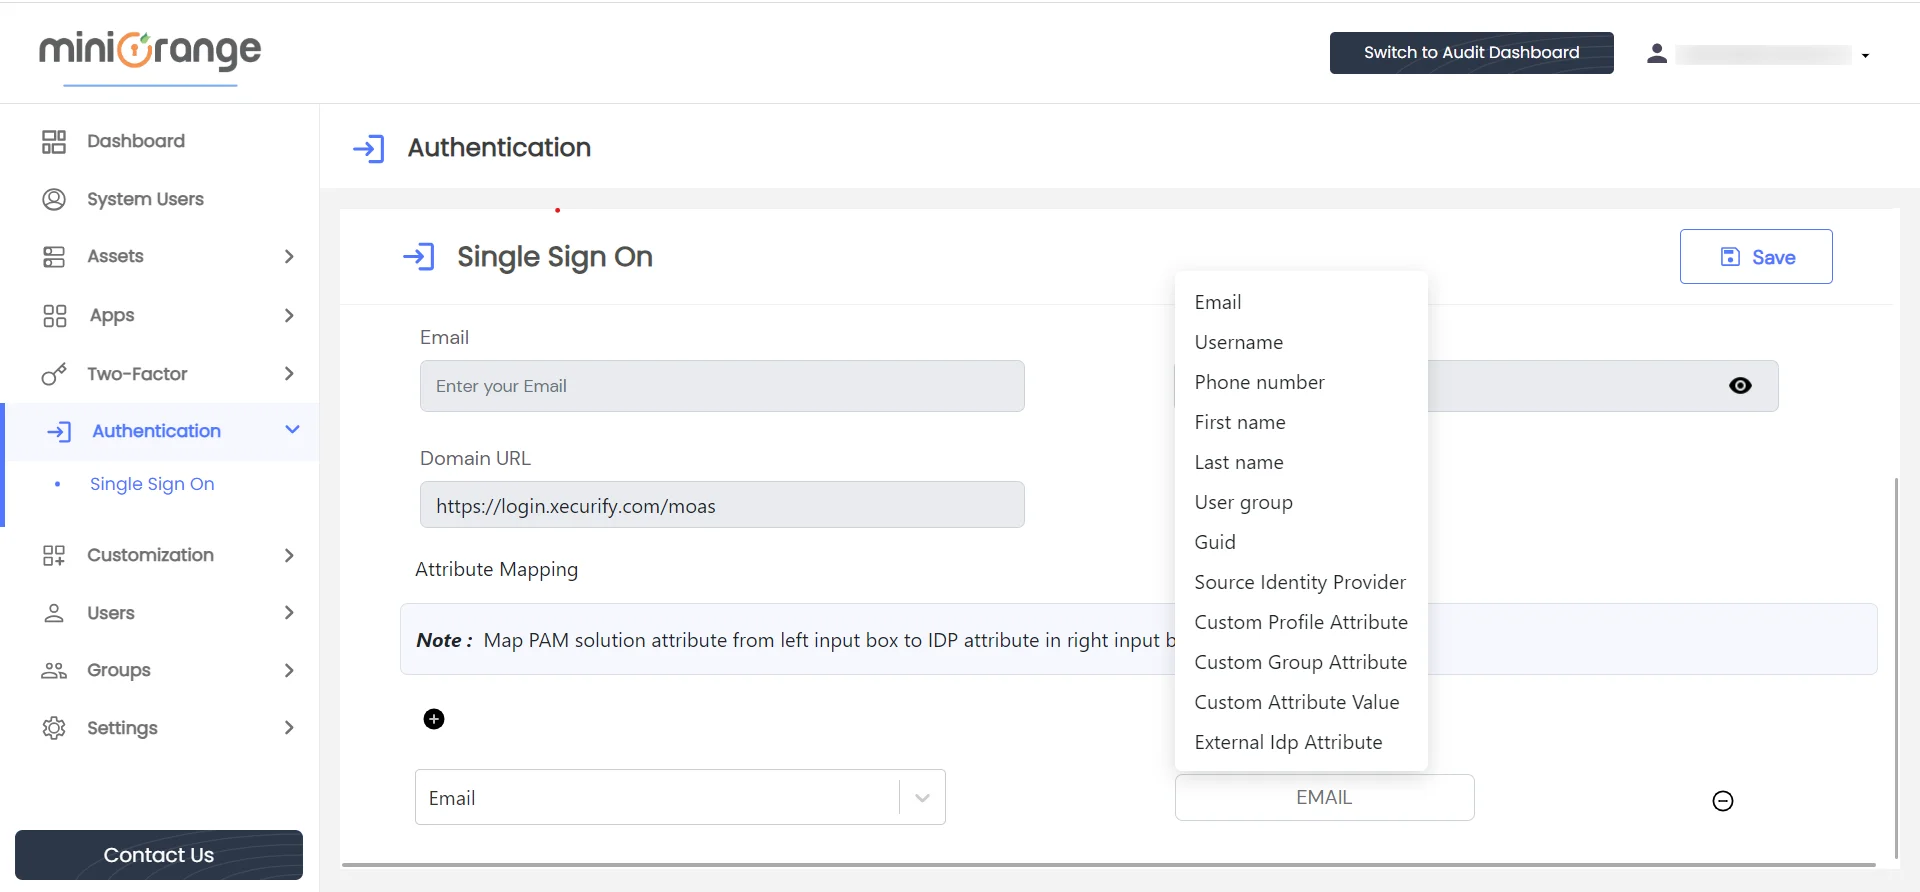
Privileged Access Management Admin Handbook: Select desired PAM Attribute

  • After attribute mapping is completed, click Save button.
  • miniOrange Identity provider configuration will be updated.

IMPORTANT: If attribute mapping is done, then it is mandatory to map email attribute.

Reset miniOrange identity provider configuration:

To reset the miniOrange identity provider configuration, follow these steps:
  1. Ensure that you have already saved the miniOrange identity provider configuration.
  2. To delete the miniOrange Identity provider configuration, navigate to the Single Sign-On page by selecting it from the Authentication sidebar dropdown menu.
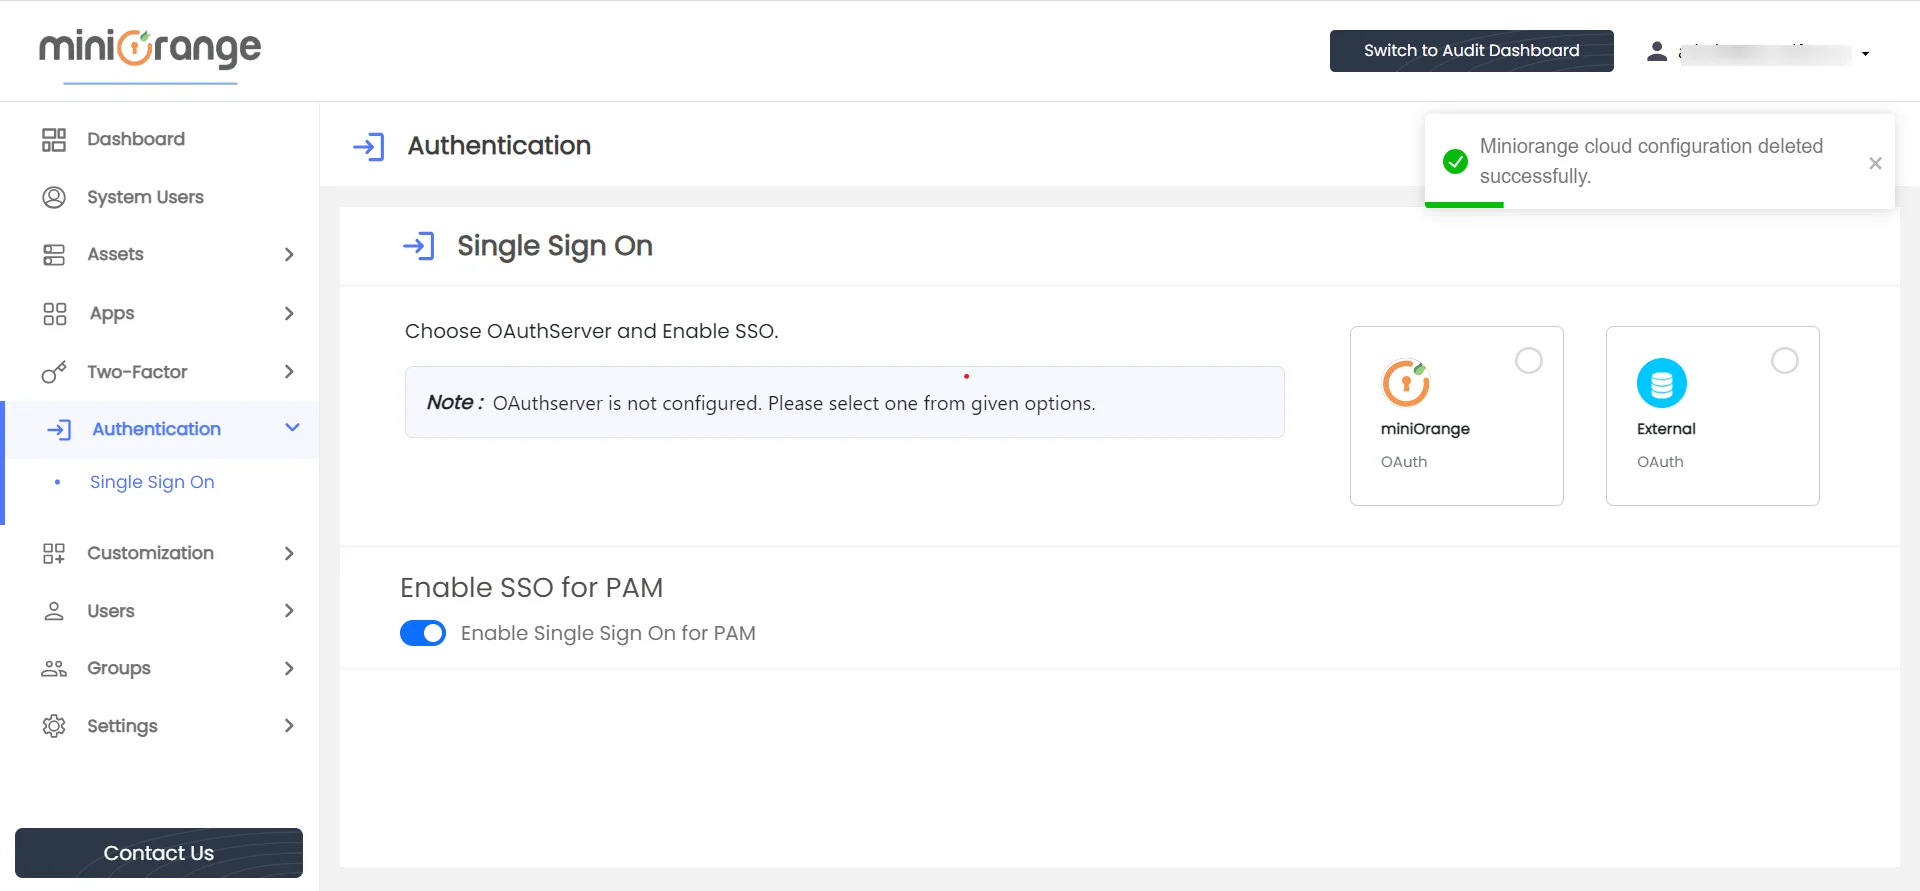
  3. Click on the Reset button. This action will delete the miniOrange identity provider information.
  4. Users will be redirected back to the Single Sign-On page after the reset process.
  5. Privileged Access Management Admin Handbook: After Reset Process Users will be redirected on Single Sign-On page

After clicking on the miniOrange box, form fields will become editable again.