Manage Users
miniOrange PAM offers a comprehensive user management feature, allowing users to conveniently add, edit, and delete users, along with their configurations. After completing the registration process, the PAM system initially consists of only the admin user. To access user details within PAM, please follow the steps outlined below:
- Log in to the admin dashboard.
- On the left sidebar, locate and click on the "Users" menu option.
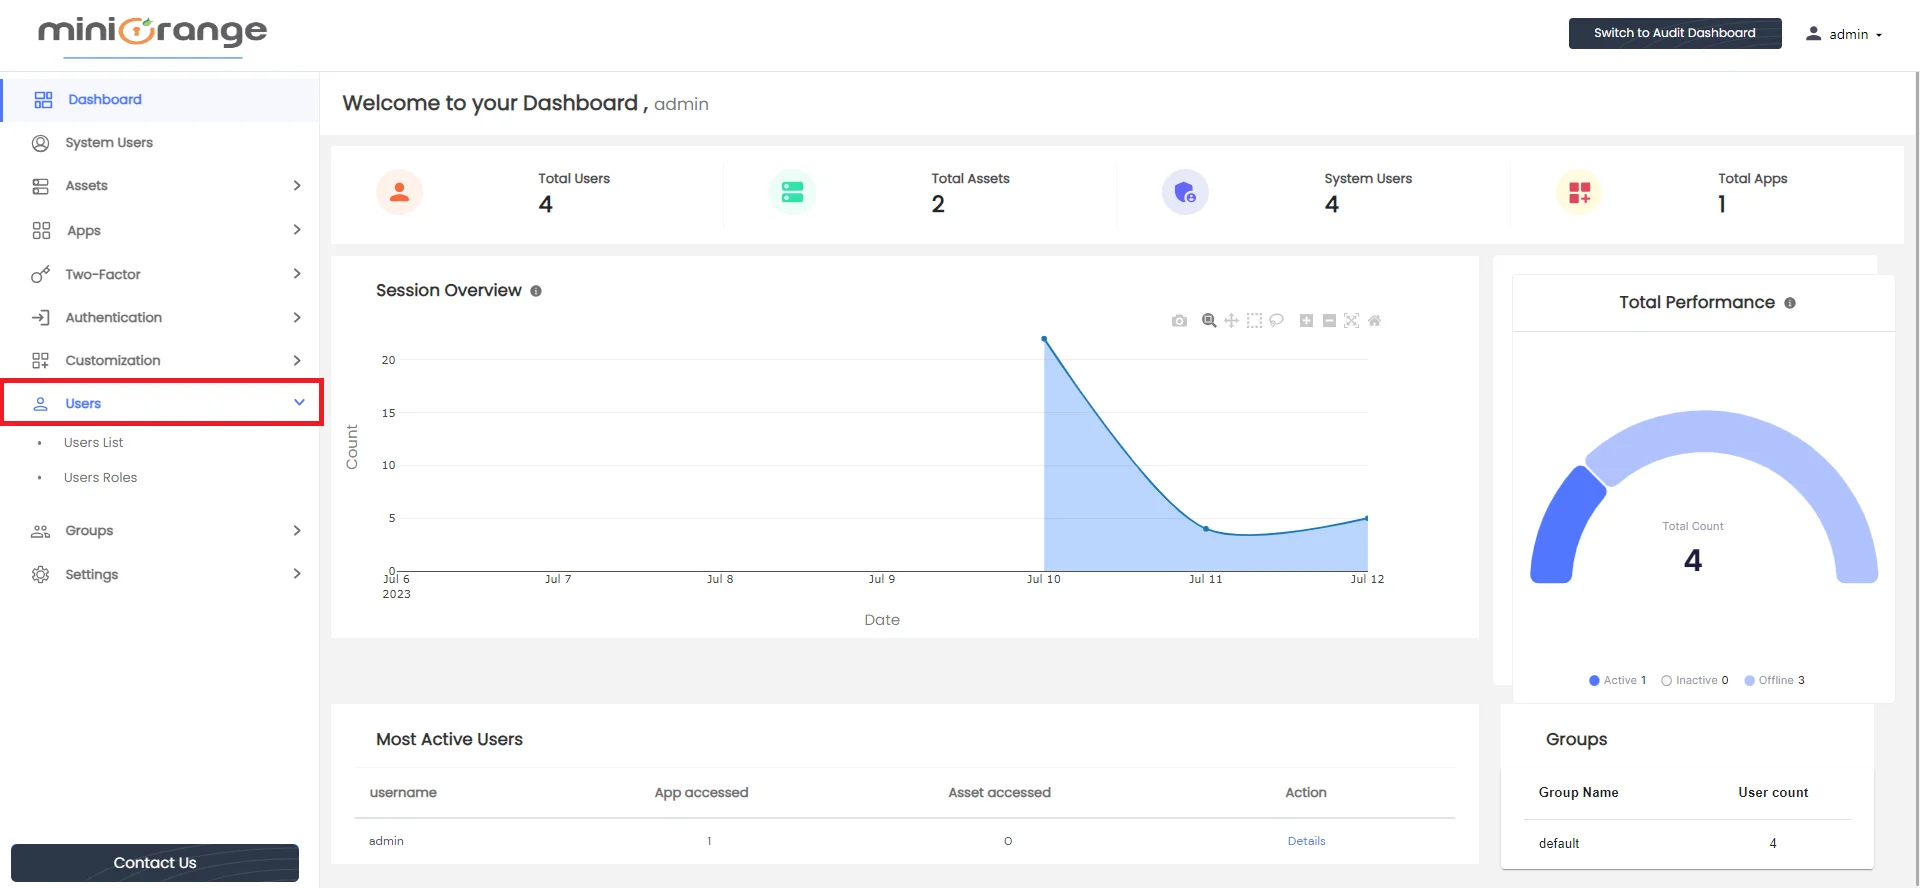
- To access the list of current users in PAM, click on the "Users List" option from the dropdown menu. This action will update the dashboard and display the "User List" page, showcasing the users in PAM, as illustrated below.
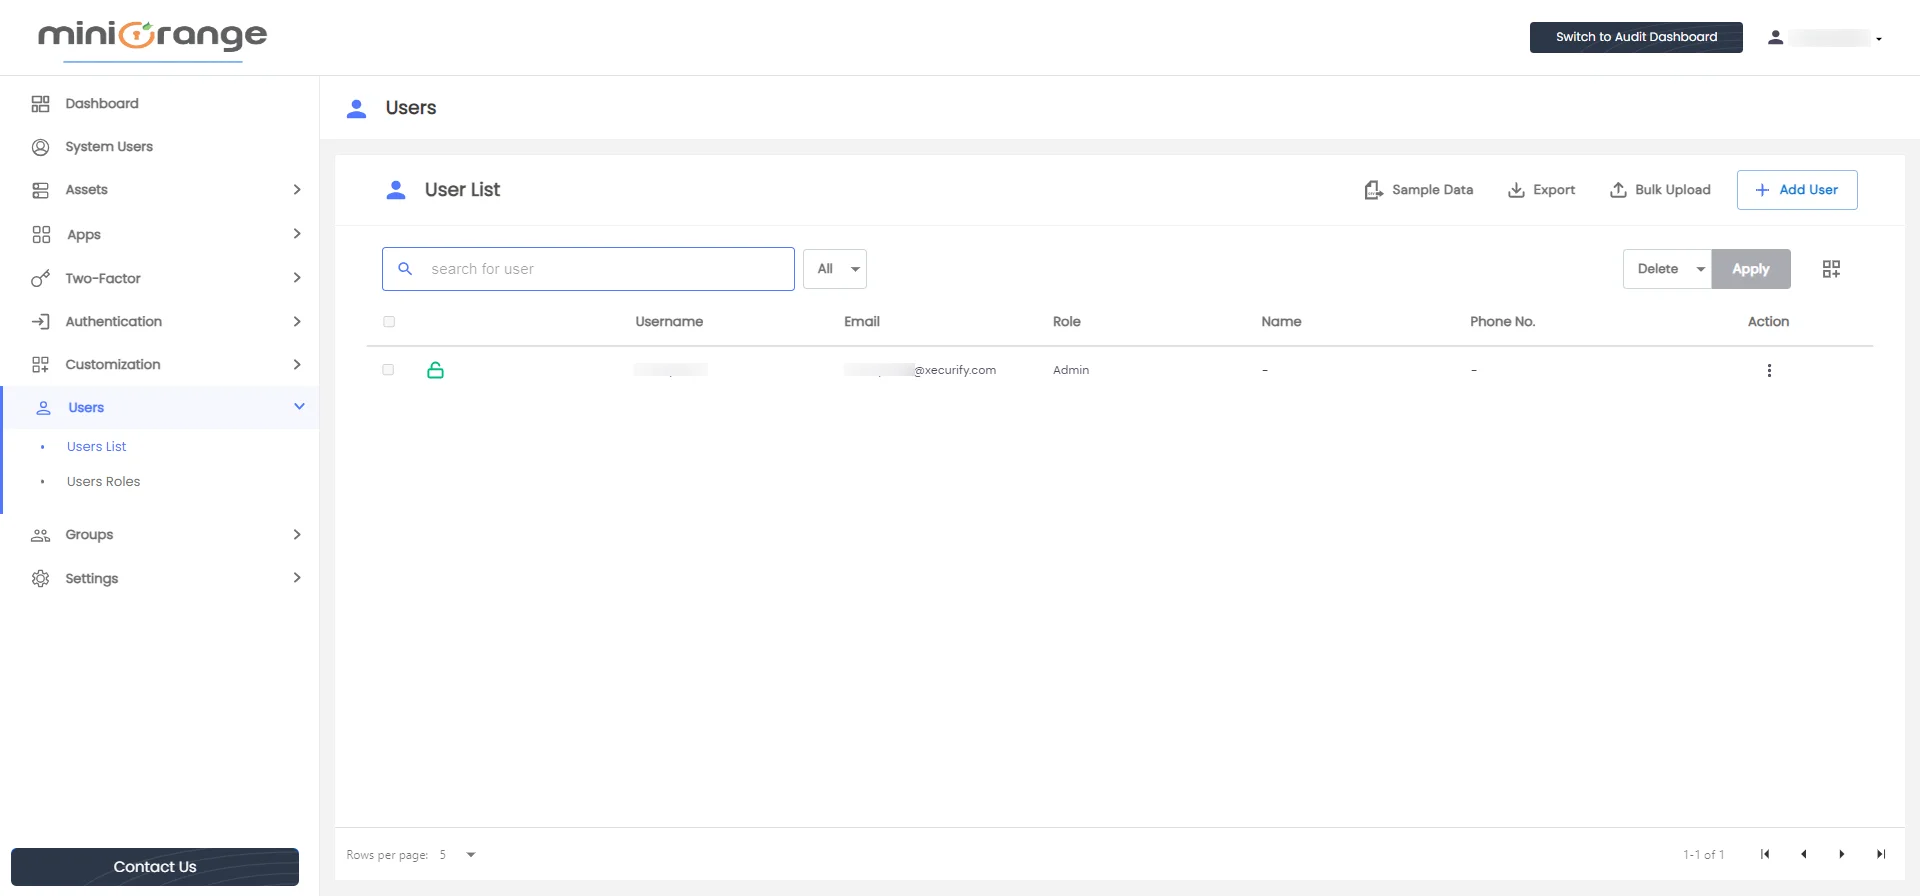
- The user table is composed of the following columns: user locked status, username, email, role, name, phone number, and action. Each column provides specific details regarding the users.
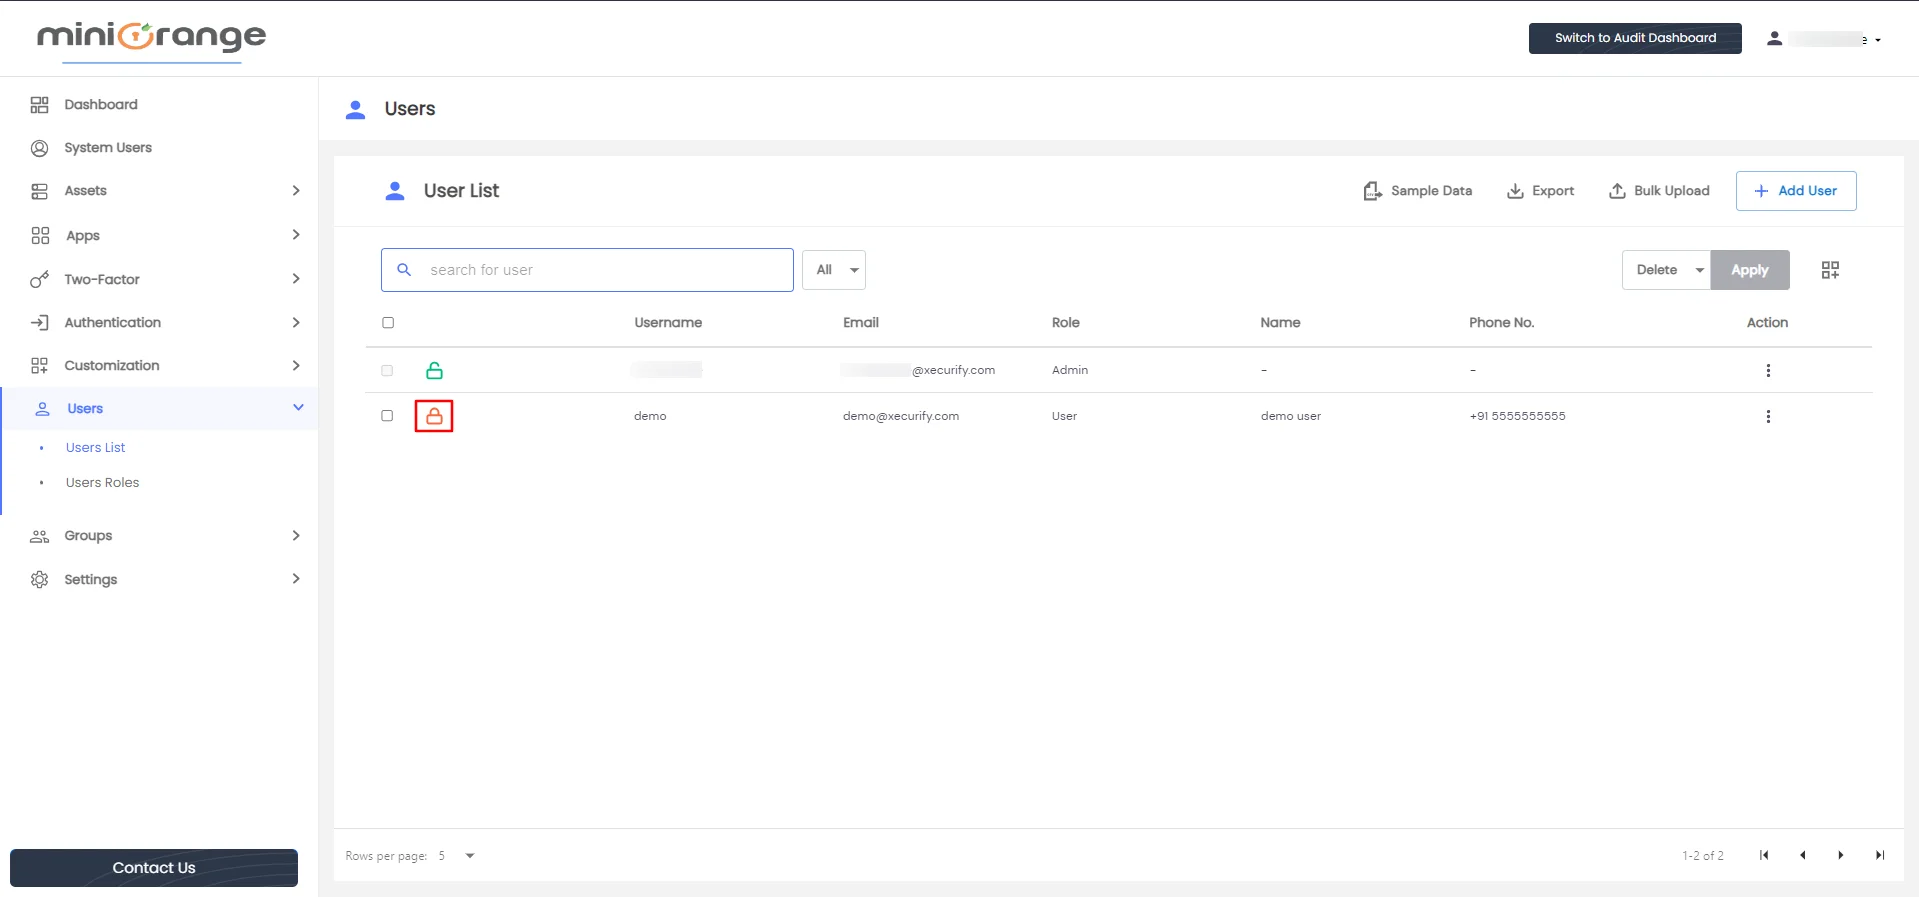
- The user locked status is indicated by an icon, representing whether the user can log in or not. A Green unlocked icon signifies that the user can log in, while a Red locked icon indicates that the user is locked and unable to log in.
- In the Role column, the displayed data corresponds to the user's assigned role, which can be modified according to the requirements on the "Users Roles" page.
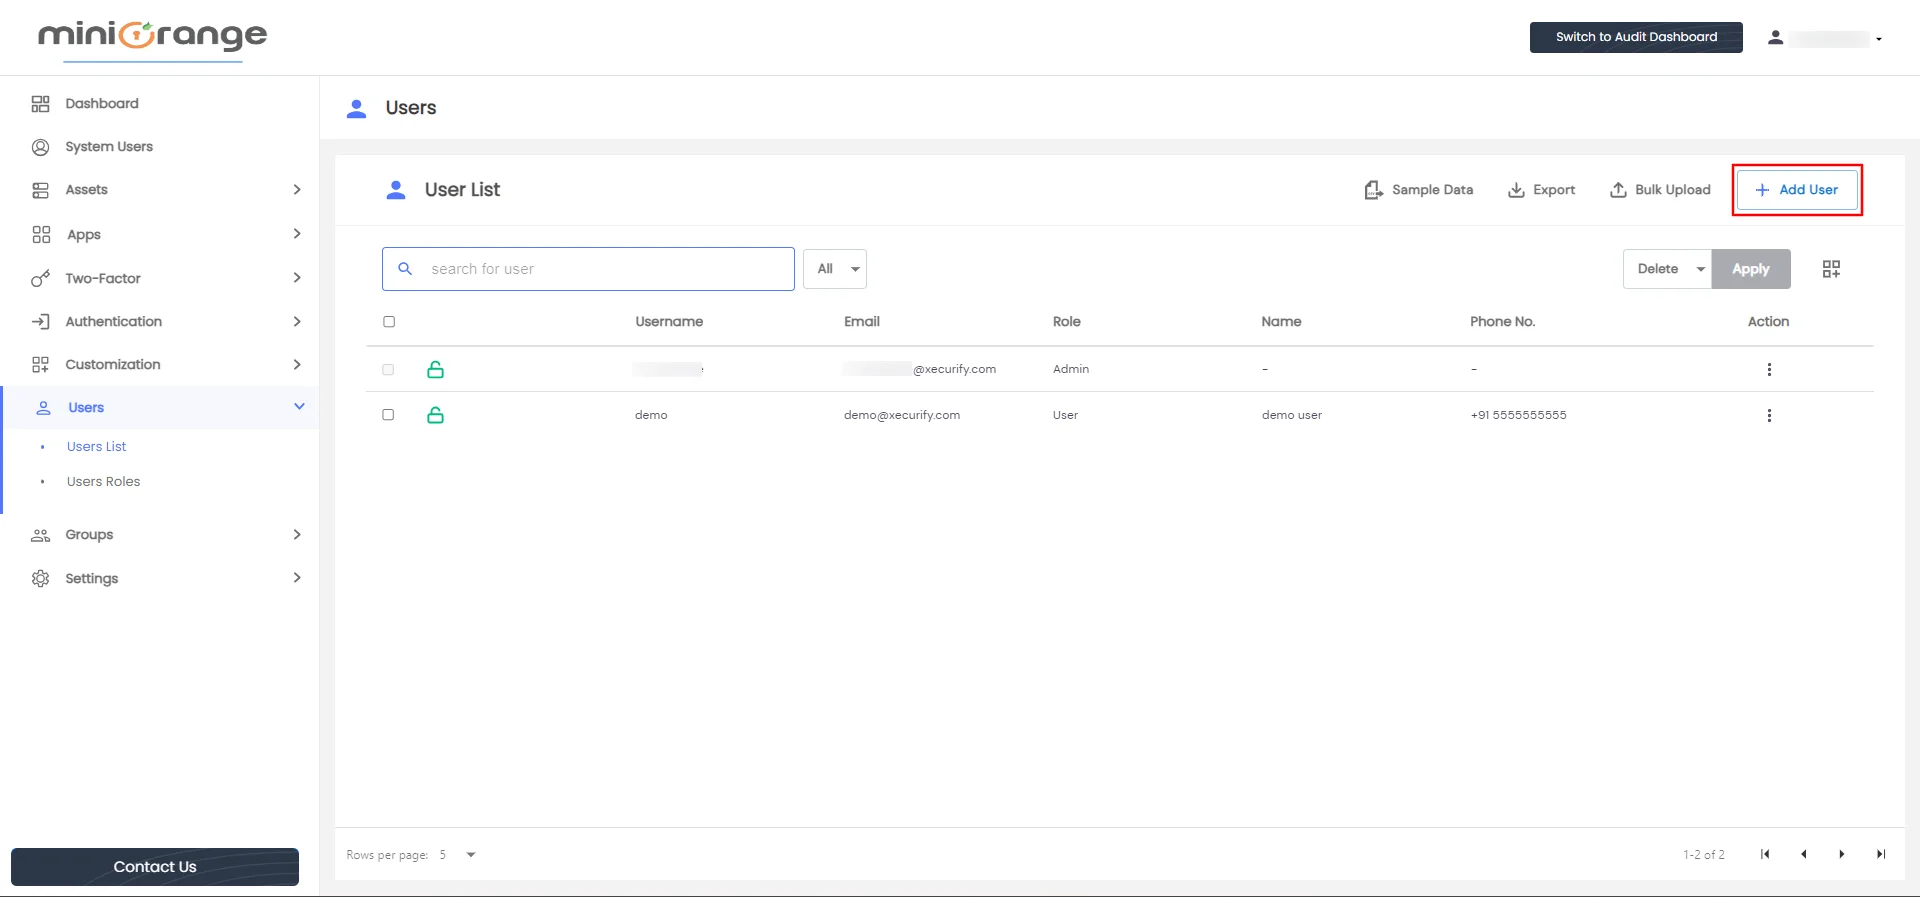
- To add a new user, locate the "Add User" button situated at the top right corner of the user table. Clicking on this button will prompt you to provide the necessary details of the new user, as demonstrated below.
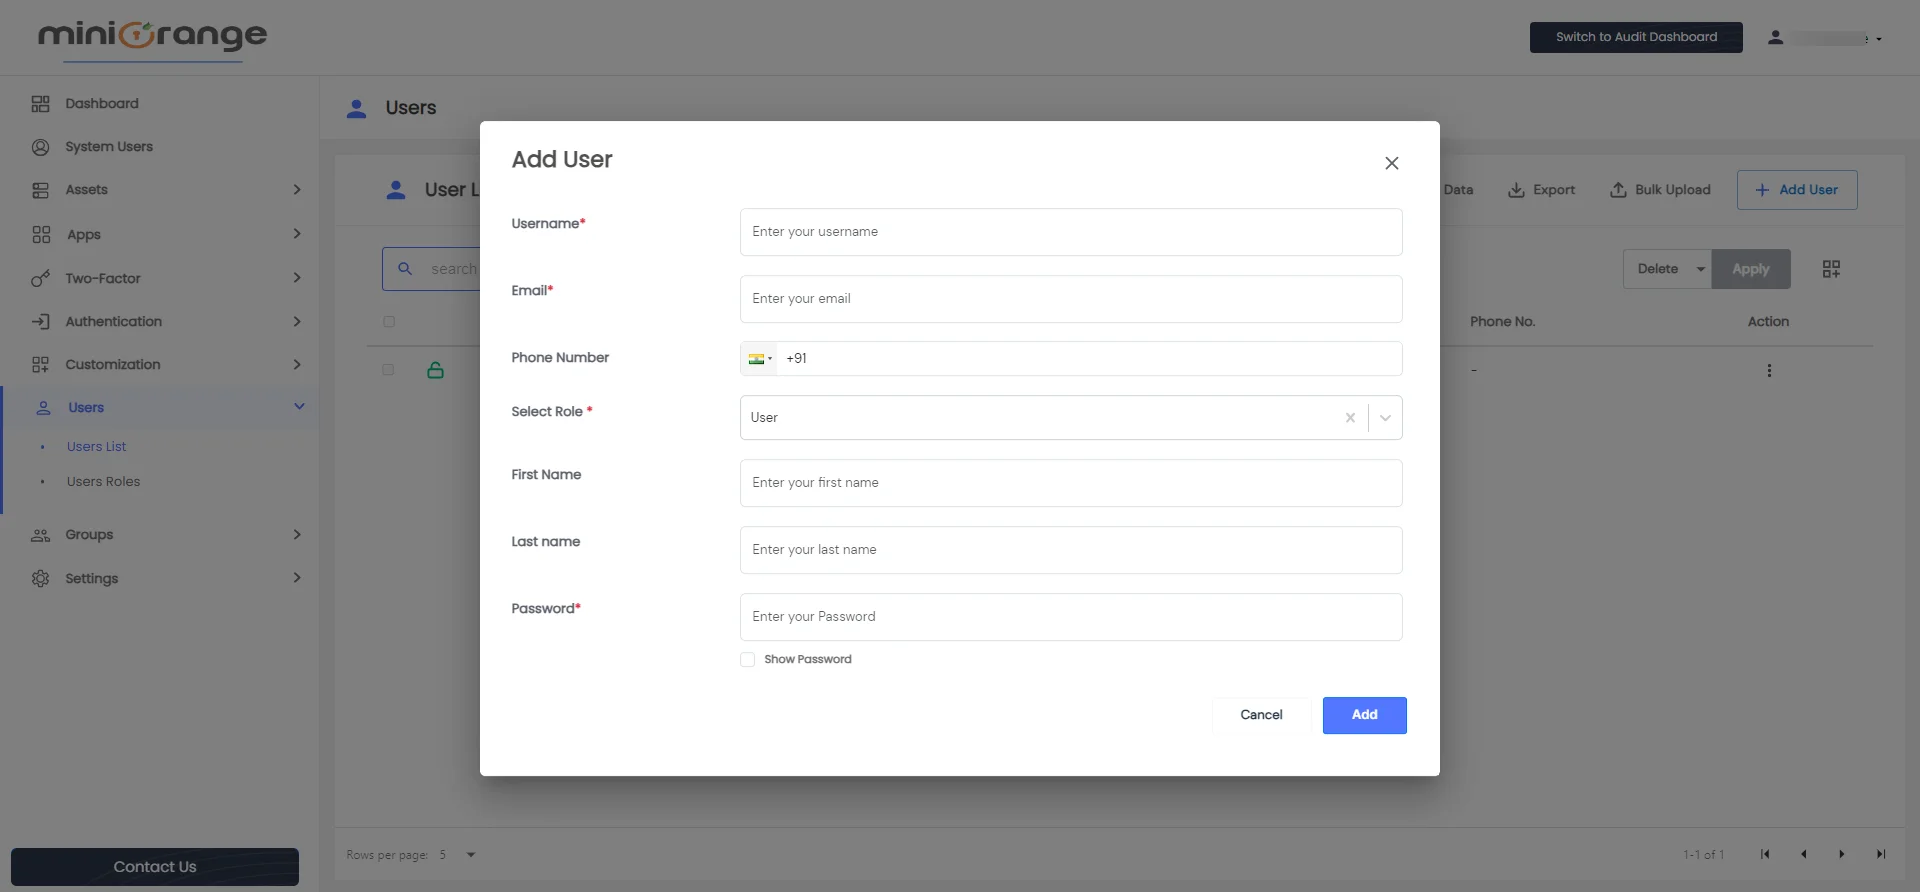
- The necessary fields for adding a new user include:
- Username: The username of the new user, which can be used for login purposes.
- Email: The email address of the new user, which can also be used for login.
- Phone Number: The phone number of the user, including the country code.
- Select Role: The role assigned to the new user. In release 1.0, any role other than the admin role will have the same capabilities and dashboard.
- First Name: The first name of the new user.
- Last Name: The last name of the new user.
- Password: The password for the new user's account.
- To ensure successful user creation, the mandatory fields are indicated with a red asterisk. Fill these fields with appropriate data and click on the "Add" button. This action will create the user, and their details will be visible in the user table, as illustrated below.
- To edit a specific user, follow these steps:
- Locate the user you want to edit.
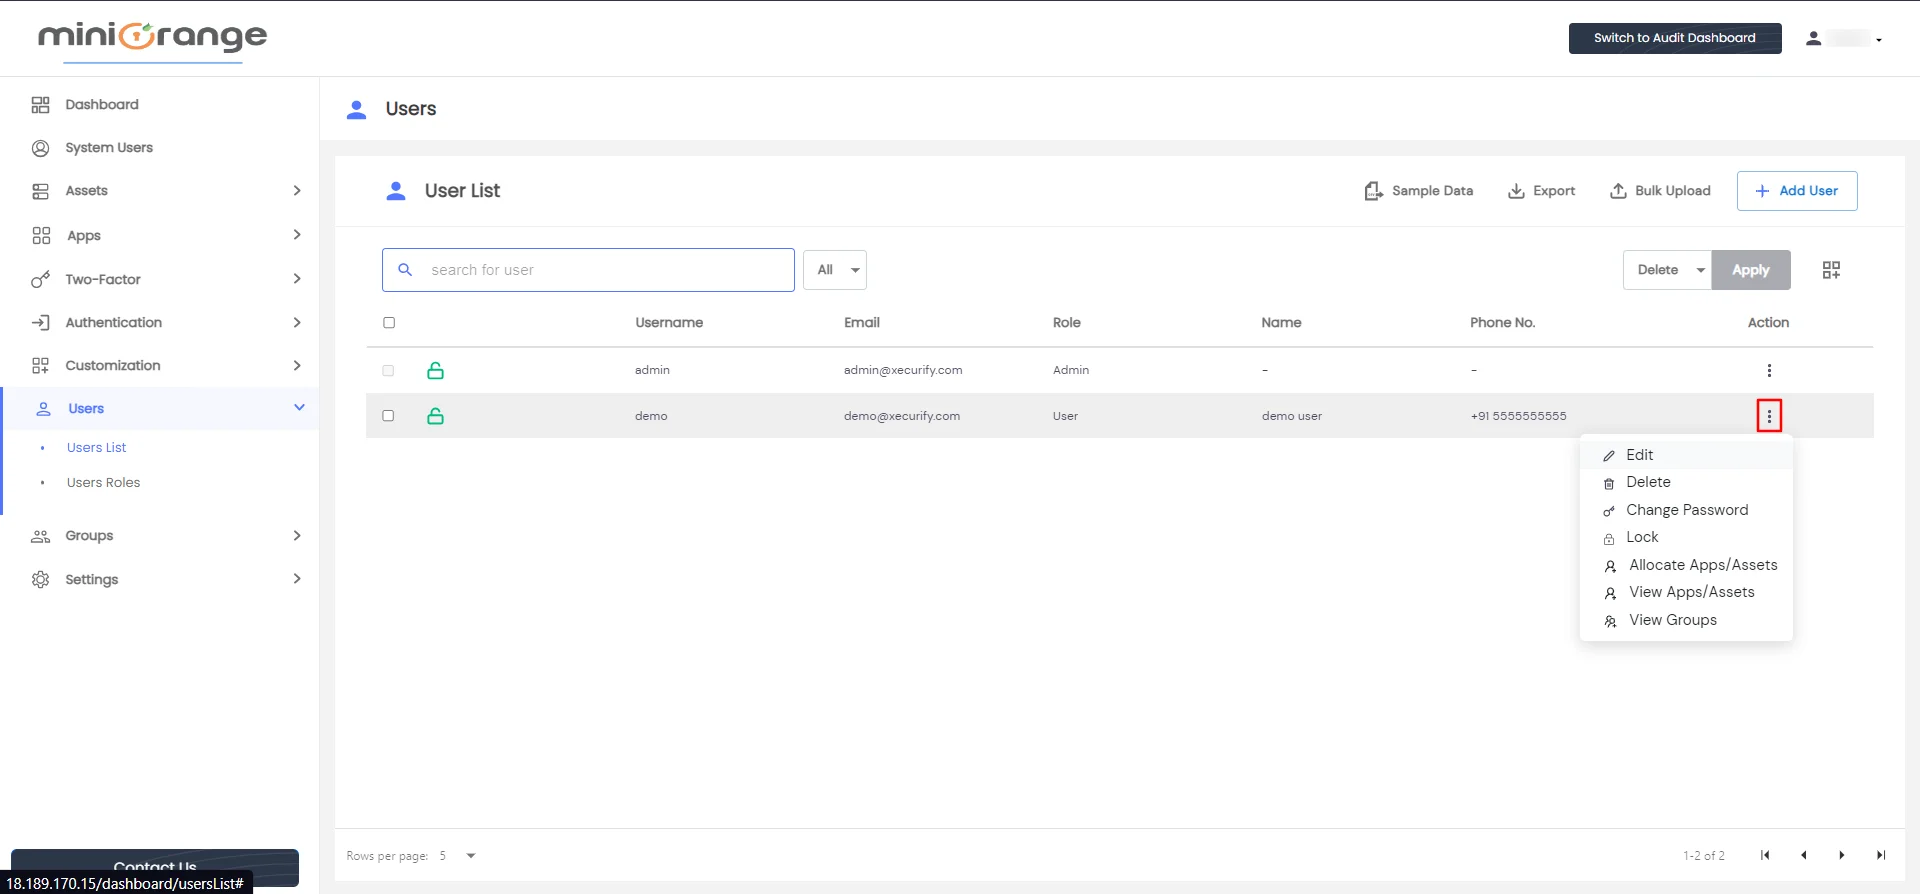
- Click on the three dots icon below the action column for that user.
- A dropdown menu will appear, as shown below.
- To edit user details, follow these steps:
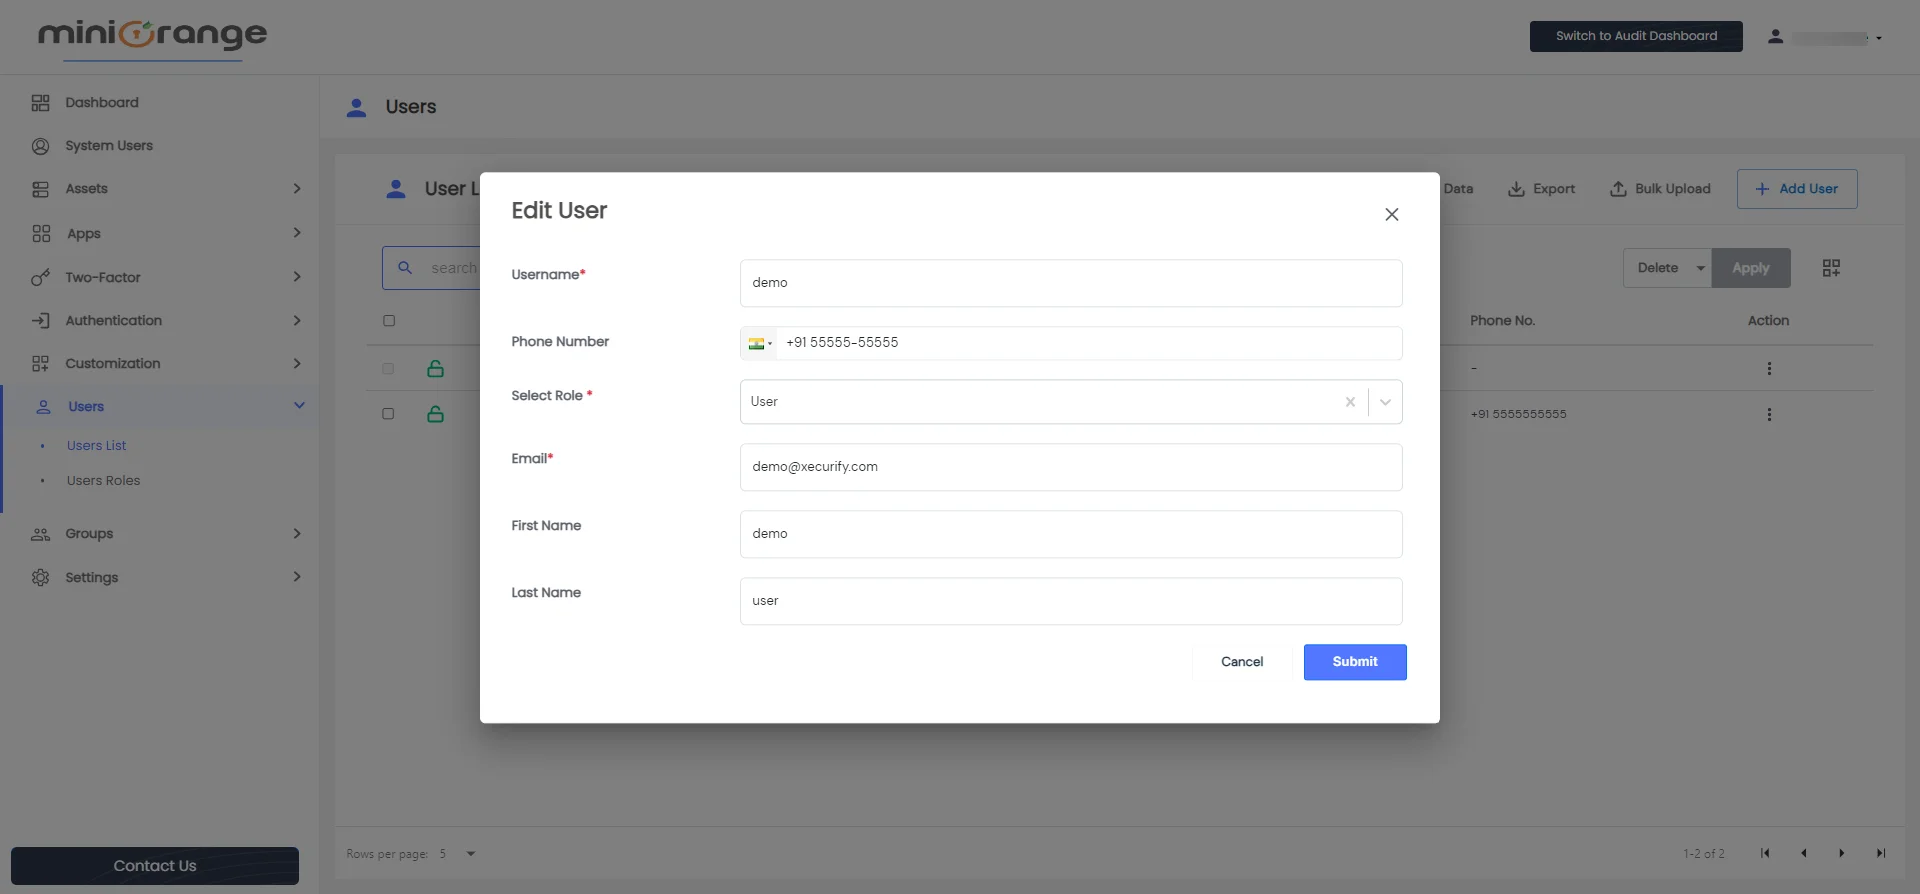
- Click on the "Edit" option. This will prompt you to modify the existing data related to the user.
- Edit the necessary fields and click on the "Submit" button, as illustrated below. The updated details will be displayed in the user table.
- To change the password, use the following steps:
- Click on the three dots icon located under the action menu for the desired user.
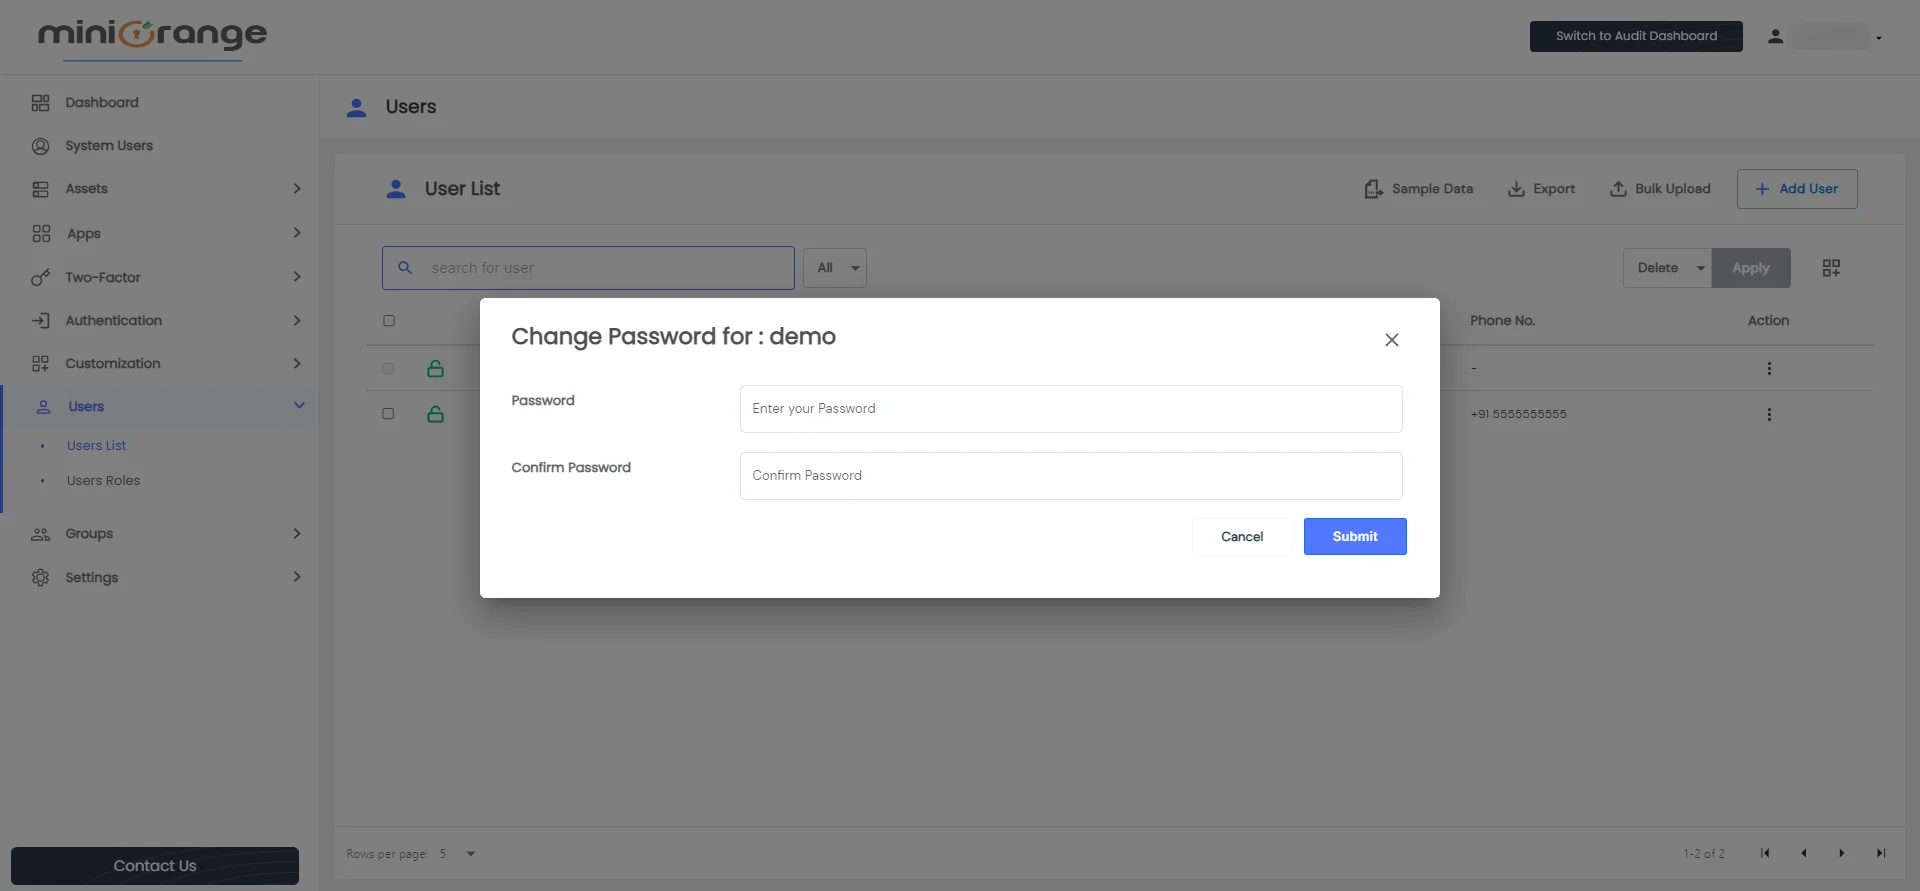
- Select the "Change Password" option. This will prompt you to enter new values for the "Password" and "Confirm Password" fields, as shown below.
- Add the required fields and click on the submit button.
For user locking, follow these instructions:
- Click on the three dots icon under the action menu.
- Select the "Lock" option. This will change the user locking icon to a red locked icon, preventing the user from logging in permanently.
To unlock a user, follow the same steps as mentioned above:
- Click on the Unlock option in the actions menu. This will change the locking status to a Green unlocked icon.
- Now, the user can log in to PAM.
- Please note that the admin user cannot be locked.
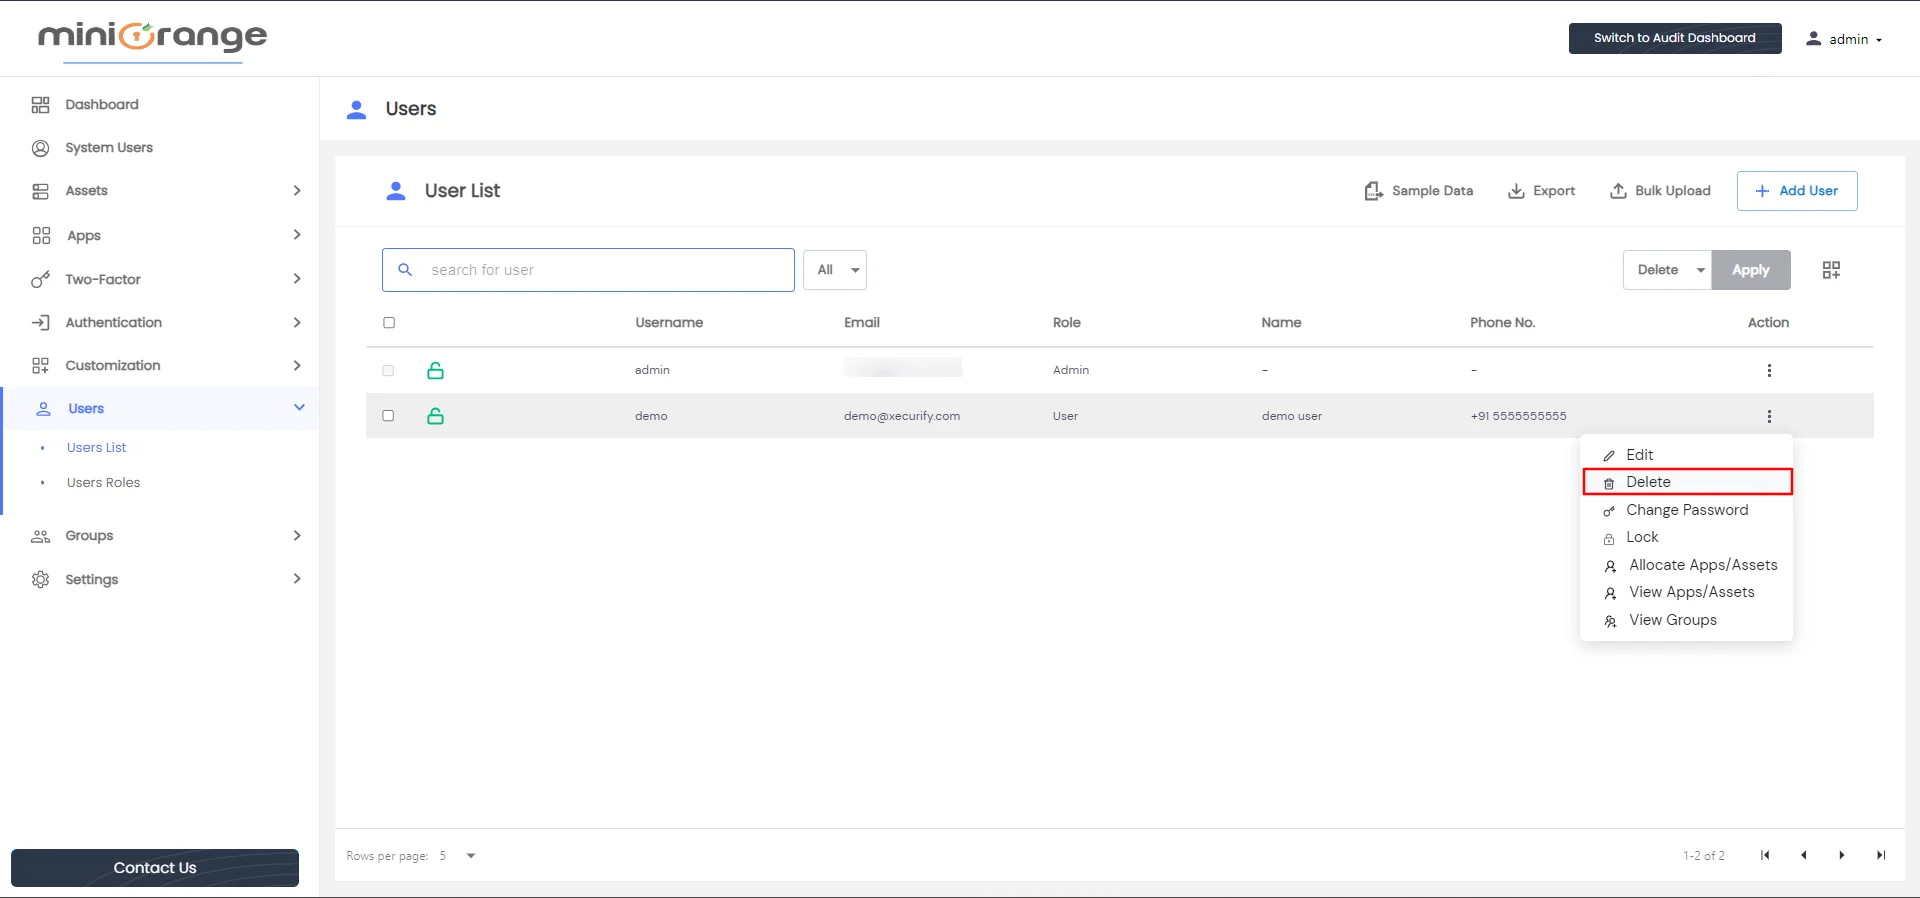
To delete a user, use the following steps:
- Click on the three dots icon under the action menu for the user you wish to delete.
- Select the delete option. The user will be deleted, as demonstrated below.
To delete multiple users, you can follow these steps:
- Select the checkboxes next to the desired users.
- On the top right side of the user table, you will find a dropdown menu with the "delete" option pre-selected, followed by a blue apply button, as illustrated below.
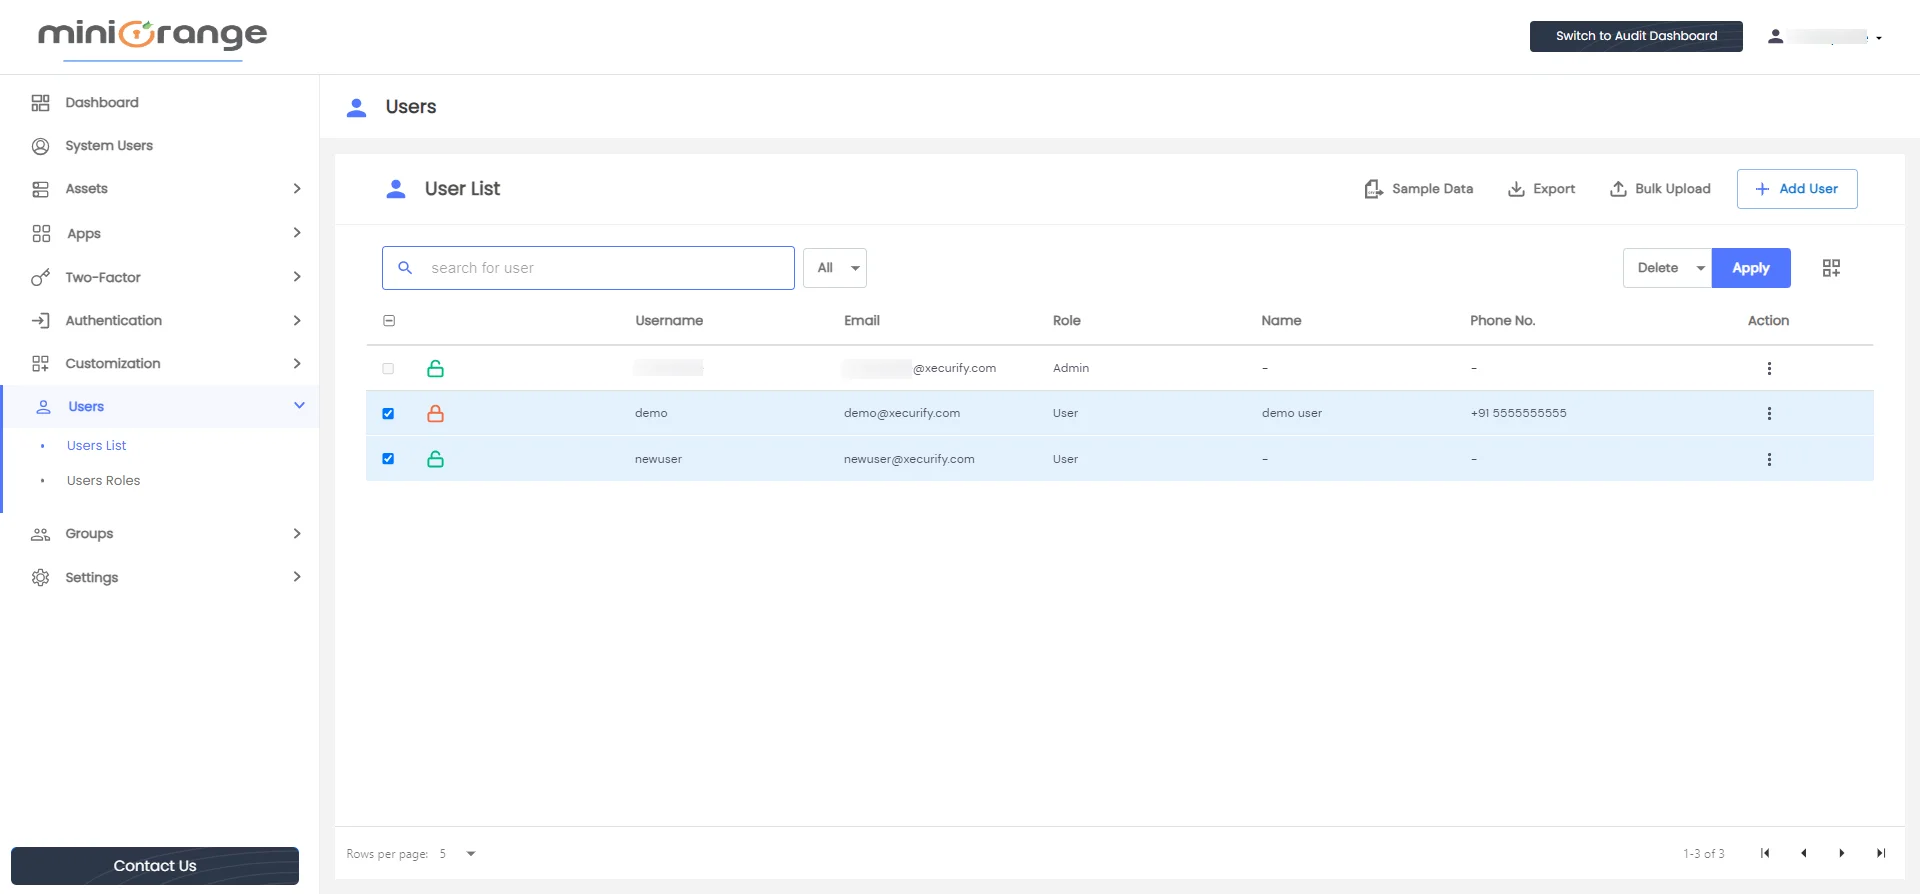
- Click on the Apply button to delete all the selected users
- You cannot delete the admin user


