BigCommerce User Sync & Provisioning
When you use BigCommerce Store Sync Integration, you're making sure that all your store's important information, like products, inventory, and orders,
stay the same and updated everywhere they're used. This helps avoid mistakes and makes things like managing products and orders easier.
User Provisioning is like managing who can do what in your online store. You can create new accounts for people, give them certain jobs,
and control what parts of the store they can use. This is important for keeping things safe, helping your team work together, and giving
users a customized experience if they have accounts on your site. Both of these things together make your online store work better, be safer,
and grow smoothly.
Prerequisites
- Prerequisites to provision users in BigCommerce
- Setup BigCommerce as an Authentication source in miniOrange using this link
Provisioning & Deprovisioning Scenarios
miniOrange provides Provisioning solutions for all scenarios of user management (provisioning), which includes AD Integration, LDAP Integration and automated provisioning for all External Applications such as BigCommerce, Google Workspace, Workday, etc
Follow the step-by-step guide given below to setup BigCommerce Provisioning
1. Setup Provisioning for BigCommerce
- Login into miniOrange Admin Console.
- Go to Users → User Profile Field option. Add an attribute with field name as id and field type as text box.

- Inorder to enable provisioning of Address attributes, also add the attributes with field name as address1, city, state or province, postal code and country code. Set field type as text box. Note the custom attribute number for later use.

- Go to Provisioning section. Inside Setup Provisioning, select BigCommerce from the Dropdown menu.
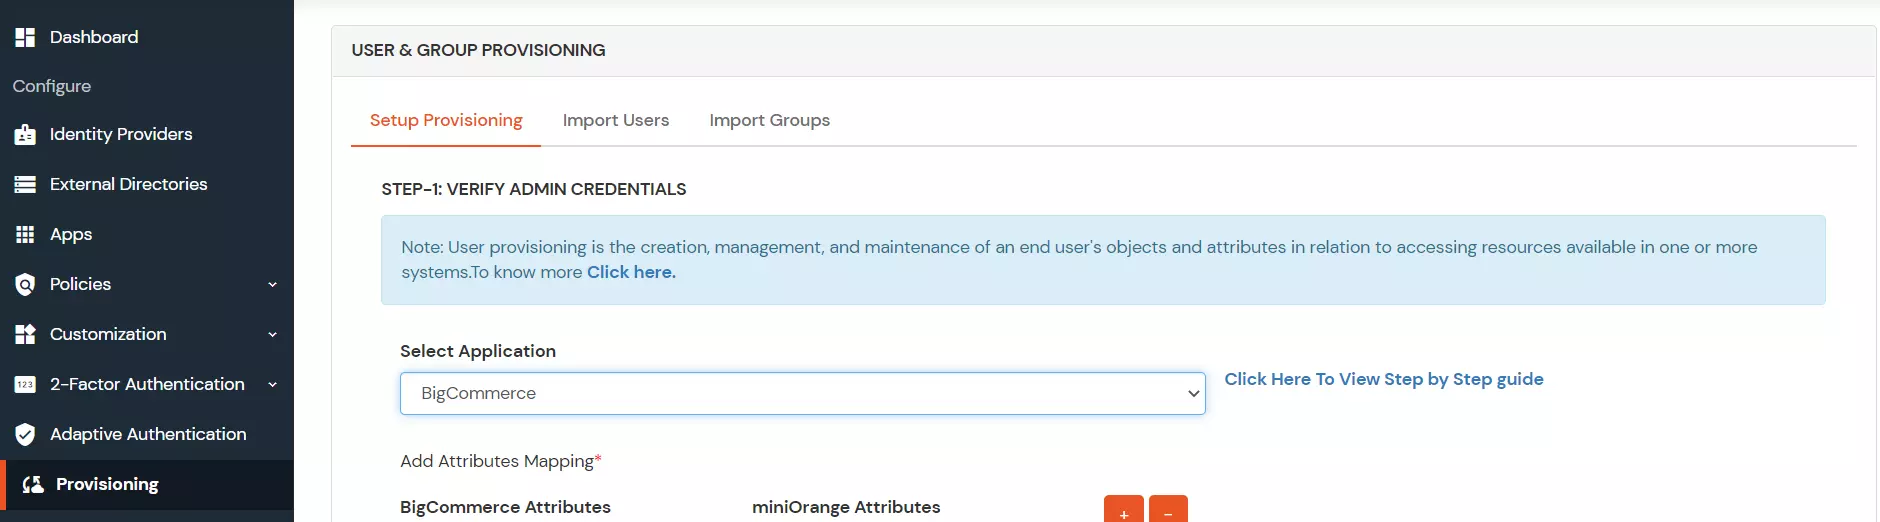
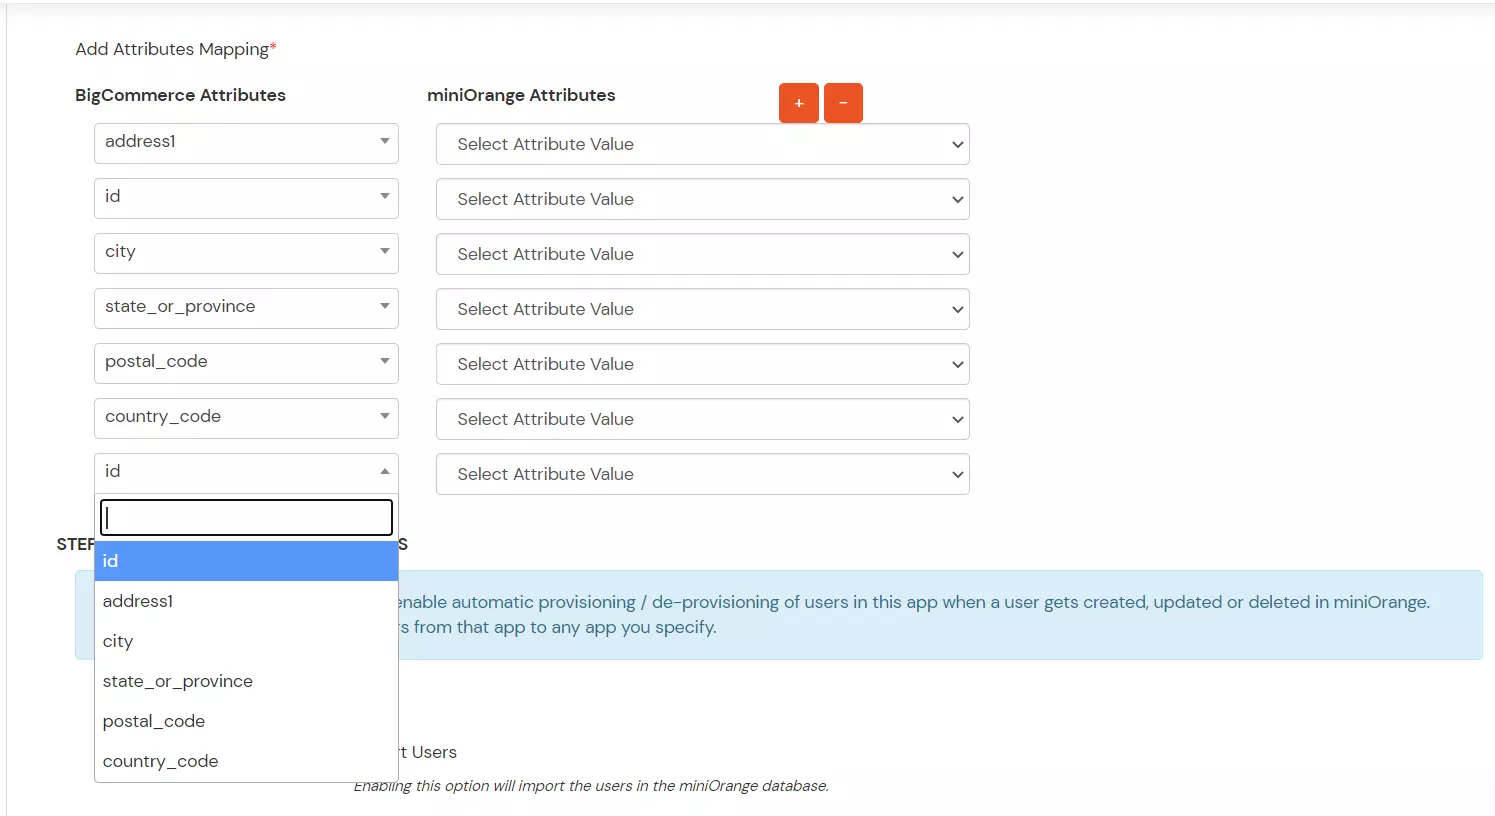
- For enabling Provisioning of BigCommerce, mapping of id attribute is mandatory. Additionally, for address provisioning; address1, city, state_or_province, postal_code and country_code attribute should also be mapped.
2. Import Users
- To import the users from BigCommerce, go to the Import Users tab.
- Select the BigCommerce from the drop-down menu and click on import.

- Once the import is done. You can view these users in Users >> User List
3. Create Users
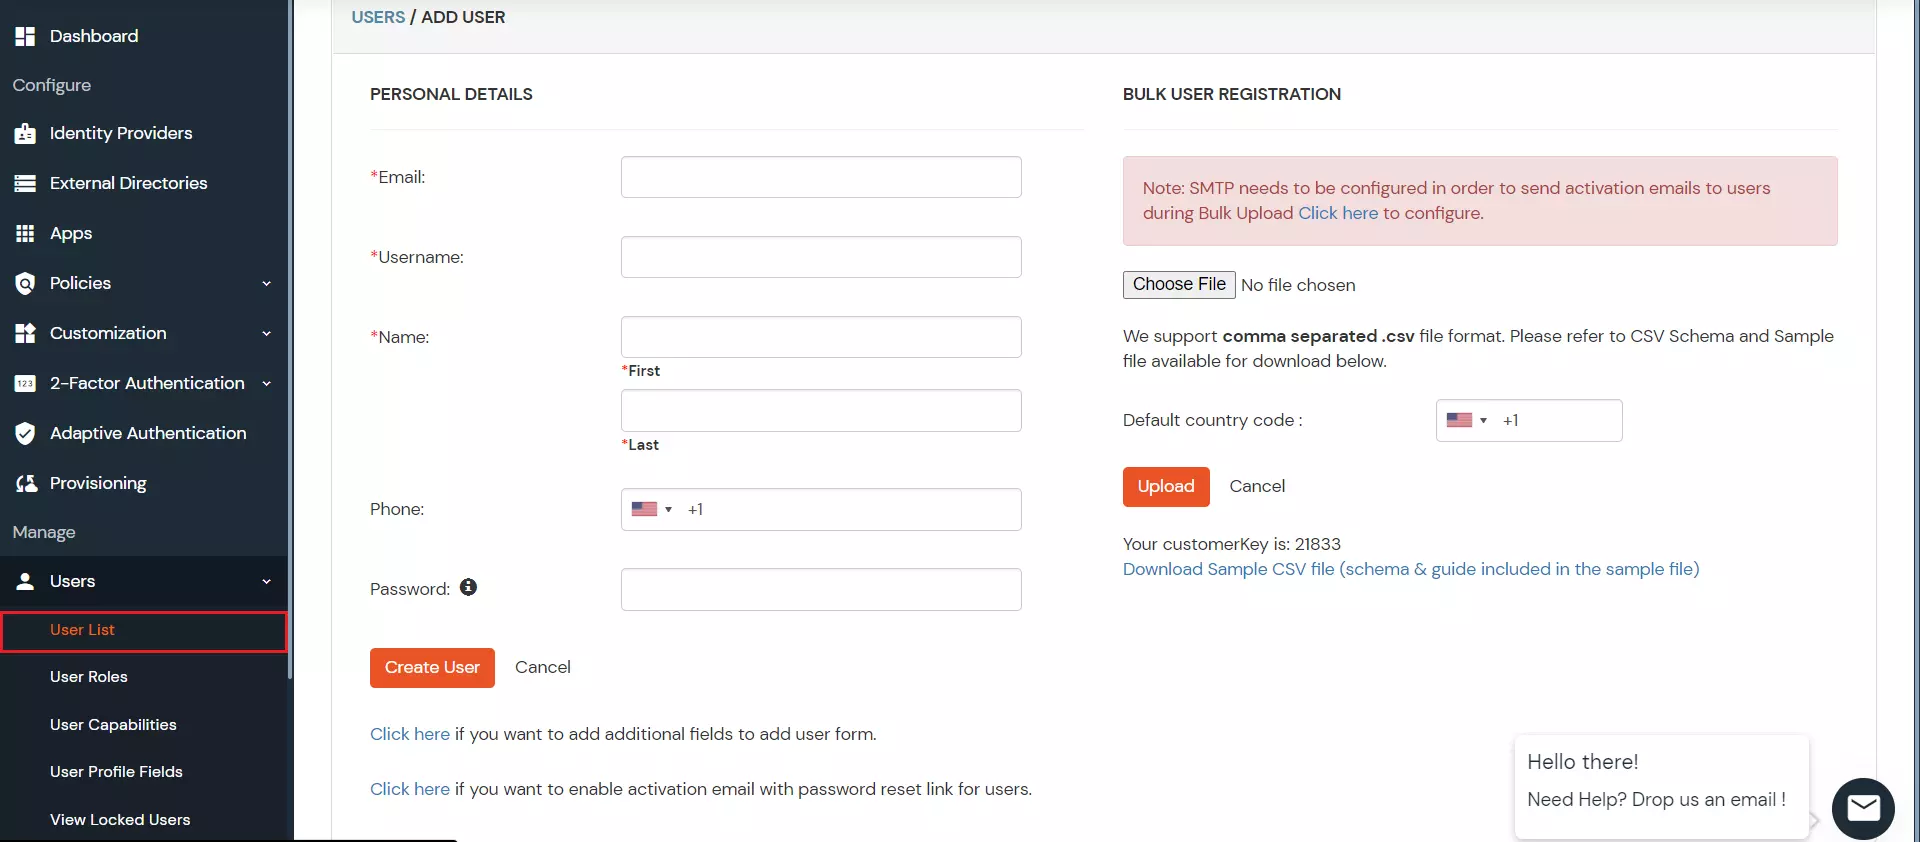
- To create a user in miniOrange , Go to Users >> User List >> click on the Add User button.
- Fill out user basic information and click on Create User button.
4. Edit Users
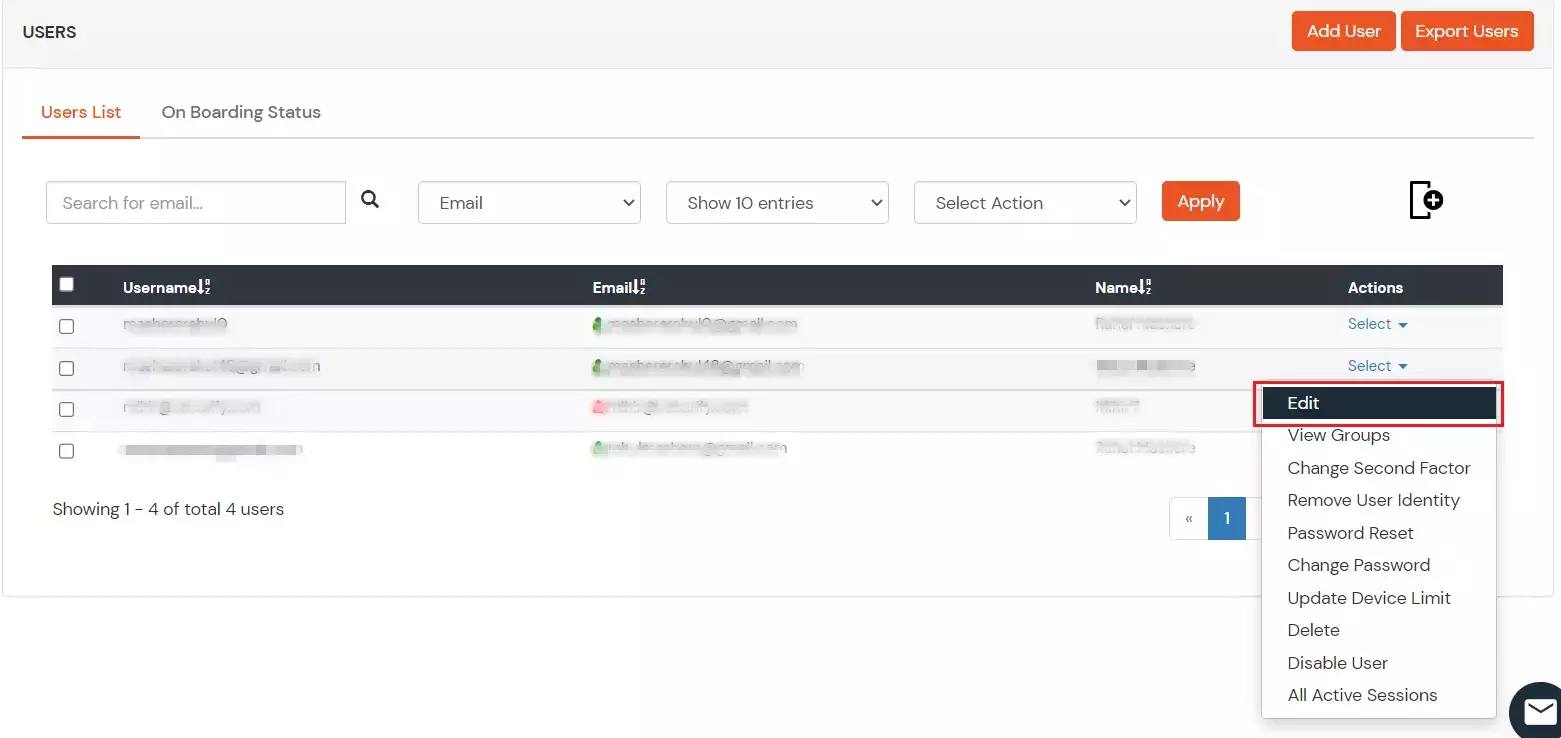
- To update user profile, Go to Users >> User List.
- Select a particular user and in Actions dropdown select Edit.
- Fill out user updated information and click on Save button.

5. Delete Users
- To delete user, Go to Users >> User List.
- Select a particular user and in Actions dropdown select Delete.
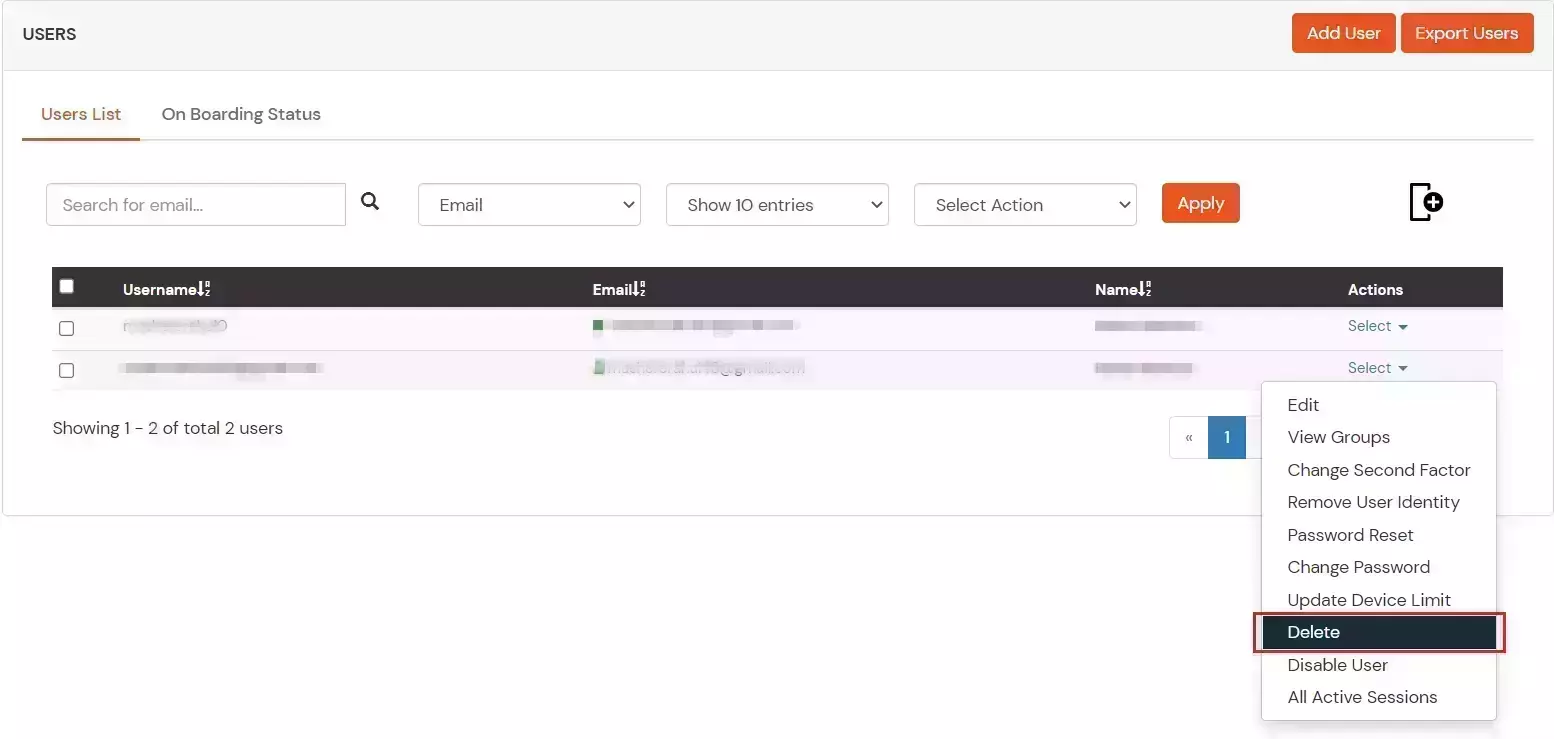
- A pop up will appear in which click on Yes button.

6. Password Sync
- To send password sync emails to the users with link to reset their Office 365 account password, Go to Users >> User List and click on Onboarding Status tab.
- Select users and in Select Action dropdown select Send Activation Mail with Password Reset Link.
- Click on Apply.

- Click on the activation link and it will direct to reset password.
- Once, the new password is set it will be synced.
7. BigCommerce Webhook Setup
Syncing BigCommerce users in Real-time
Creating, updating or deleting user in BigCommerce will automatically perform the respective operation in miniOrange. In order to do this, you have to follow the steps given below.
- Login to your miniOrange account from here.
- If you already have SSO setup for BigCommerce using miniOrange, then you can simply edit the existing BigCommerce app and copy the app secret.
- Else, refer the following steps:
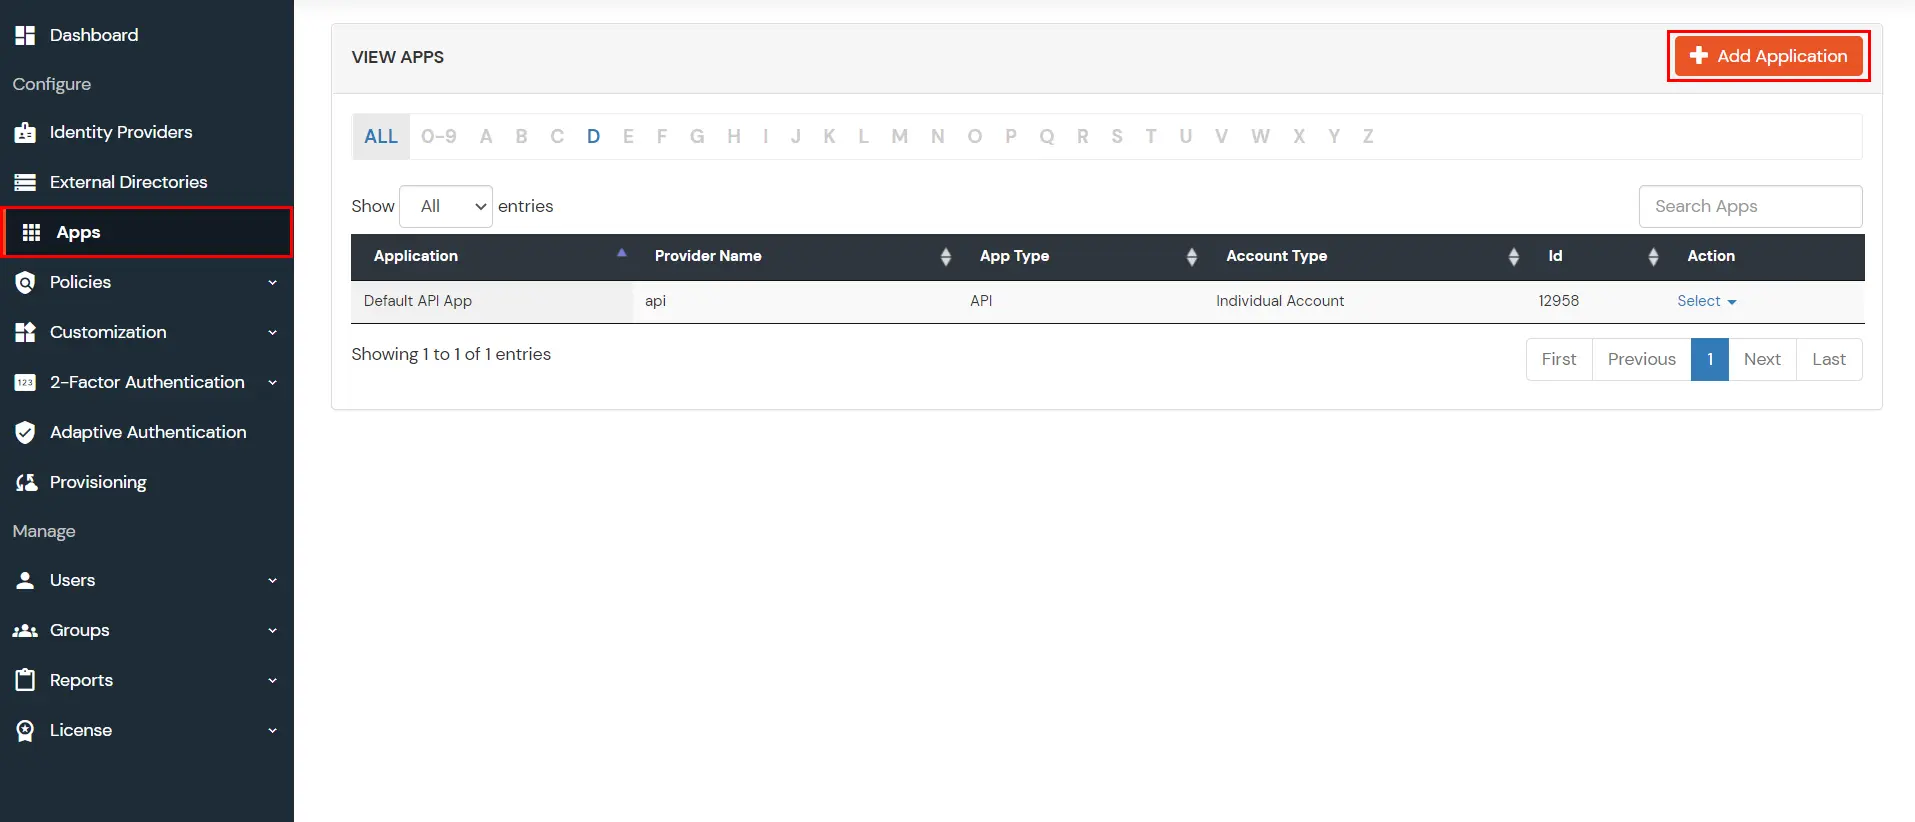
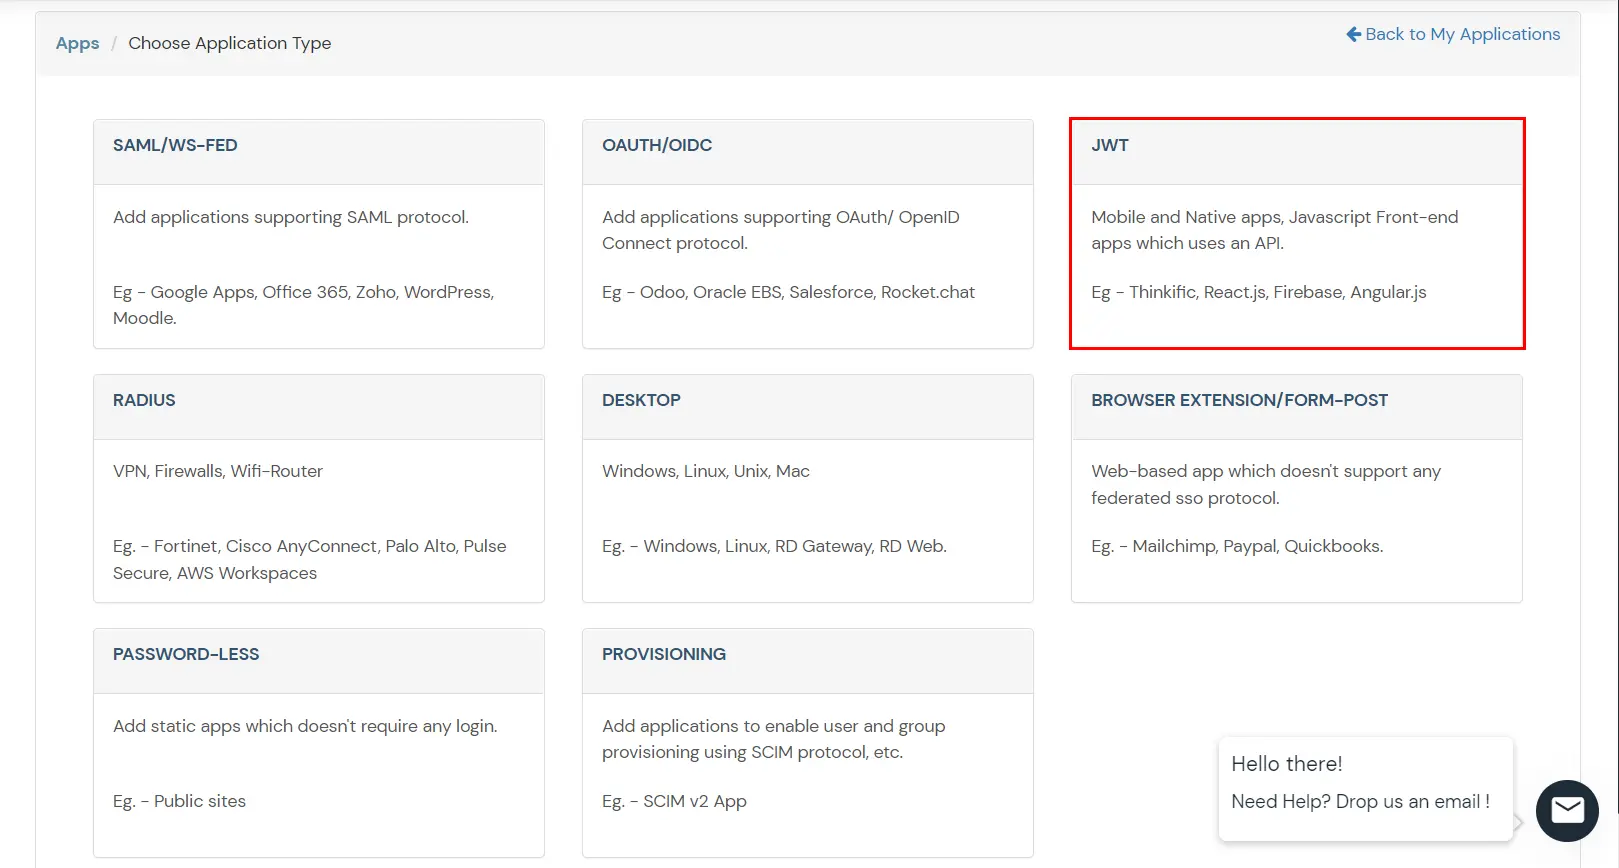
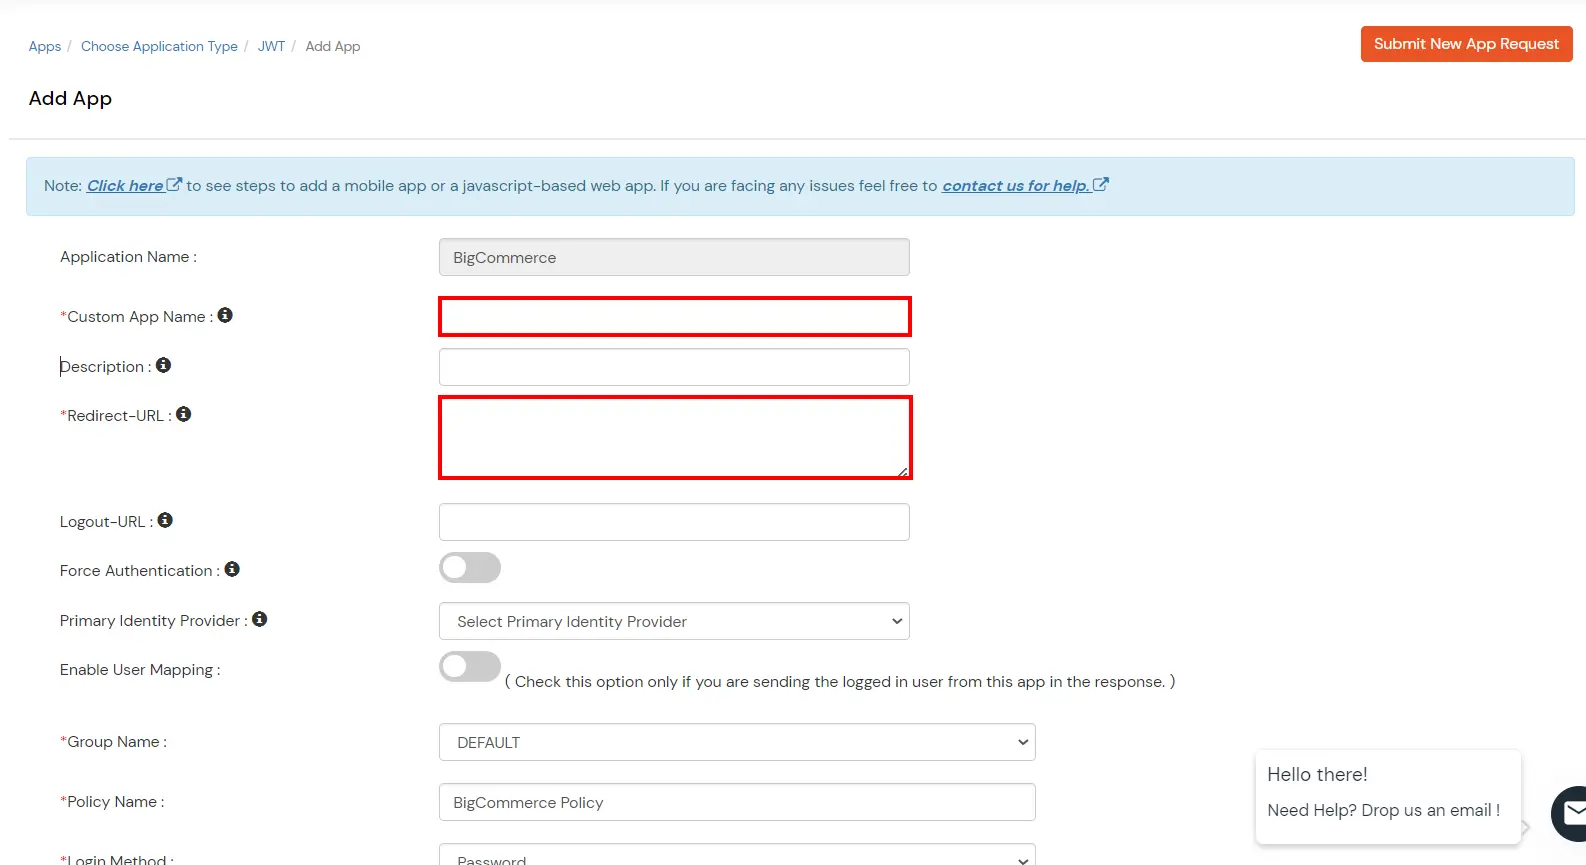
- Go to Apps -> Add Application -> JWT -> BigCommerce.
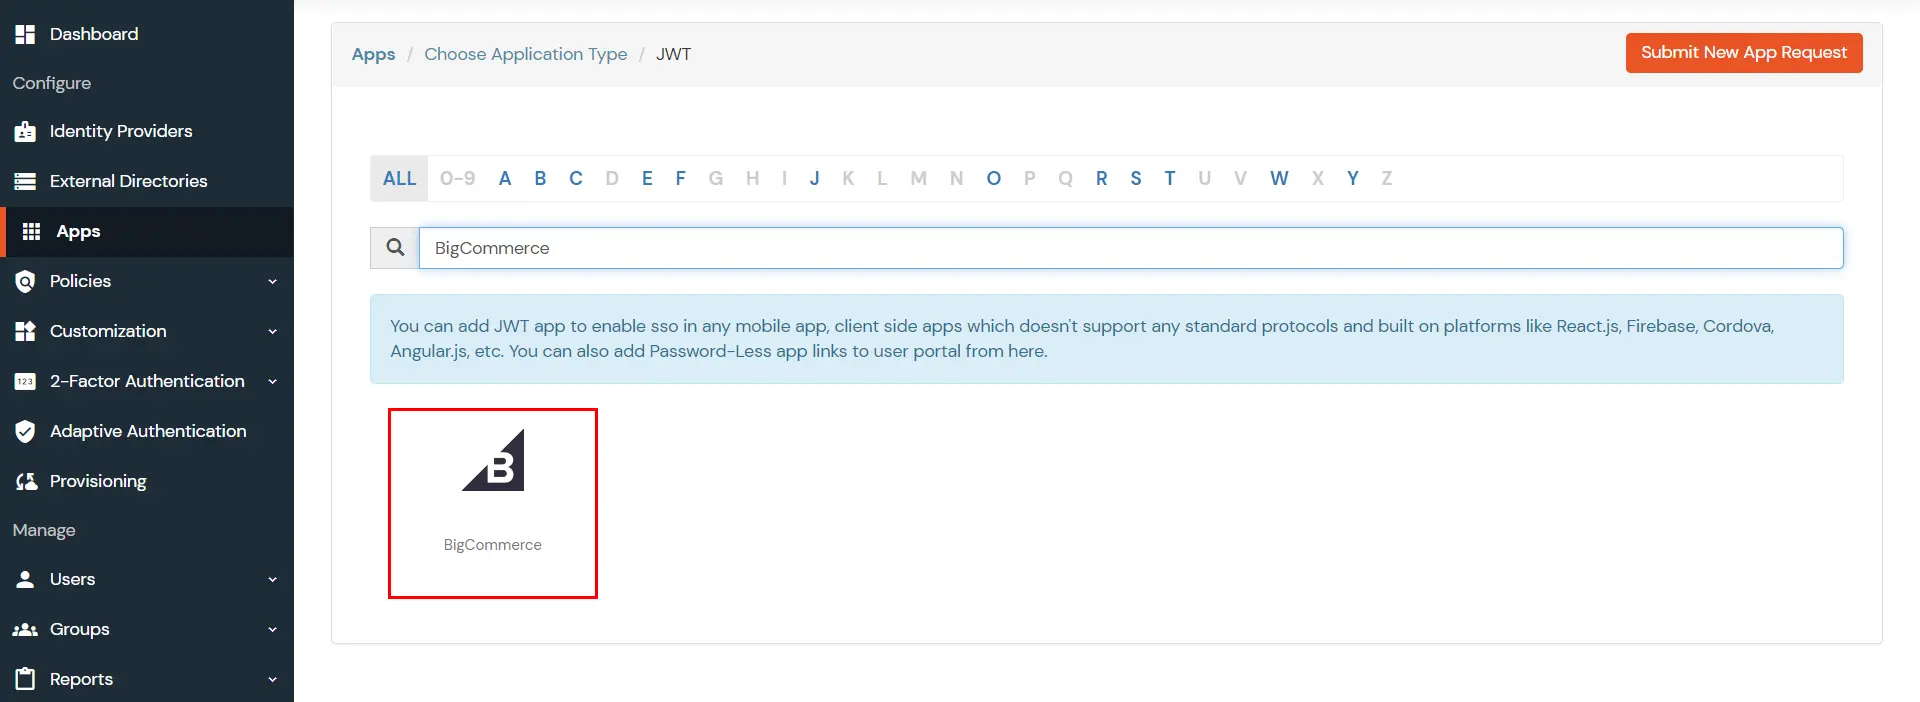
- Enter a custom app name. Enter Redirect URL of your choice.
- Turn off the Show On End User Dashboard option. Save the app.

- Now, Edit the saved app. Click on Customize near Client ID and fill the Client Id obtained from BigCommerce credential file.
- Copy the App secret and save it somewhere for later use.
- Copy Access token from the file and paste it in Client Token field.
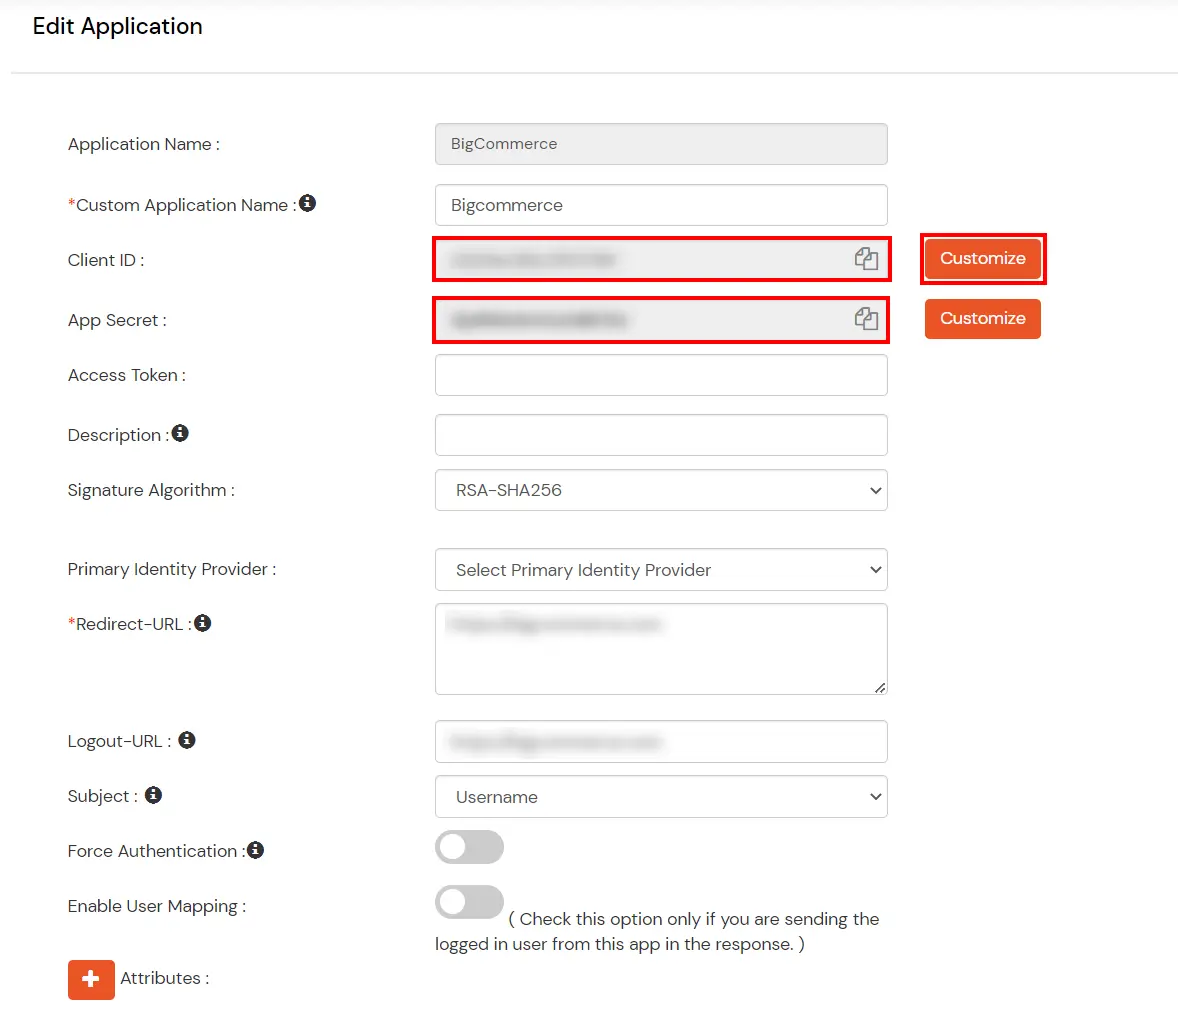
- Save all the changes.
- Now, Webhook can be created by following two ways:
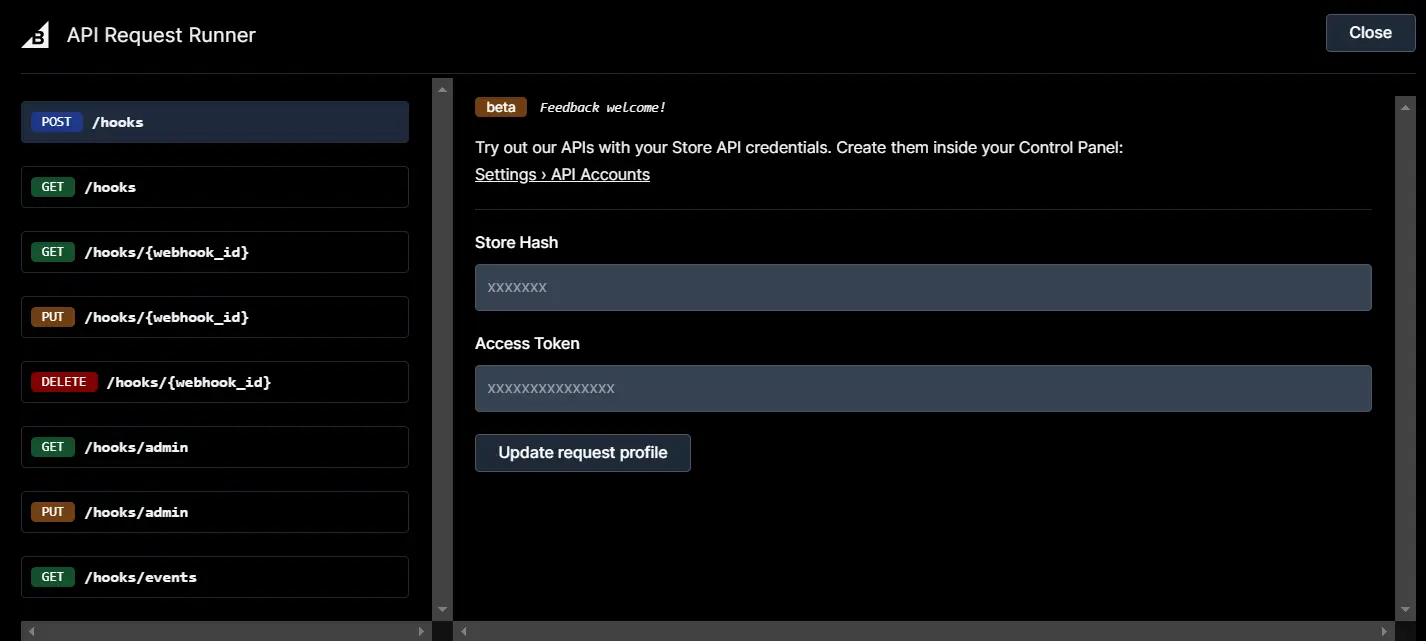
- Open this website.
- Click on Try It.
- Enter the Store hash and Access token. Click on Update request profile.
- Inside the request body, enter the following details:
{
  "headers":
  {
    "app-secret": "appSecret"
  },
  "scope": "store/customer/*",
  "destination":
"https://login.xecurify.com/services/api/provisioning/webhook/bigcommerce/syncusers/{customerId}",
  "is_active": true
}
- Replace appSecret with the app secret obtained from miniOrange BigCommerce app.
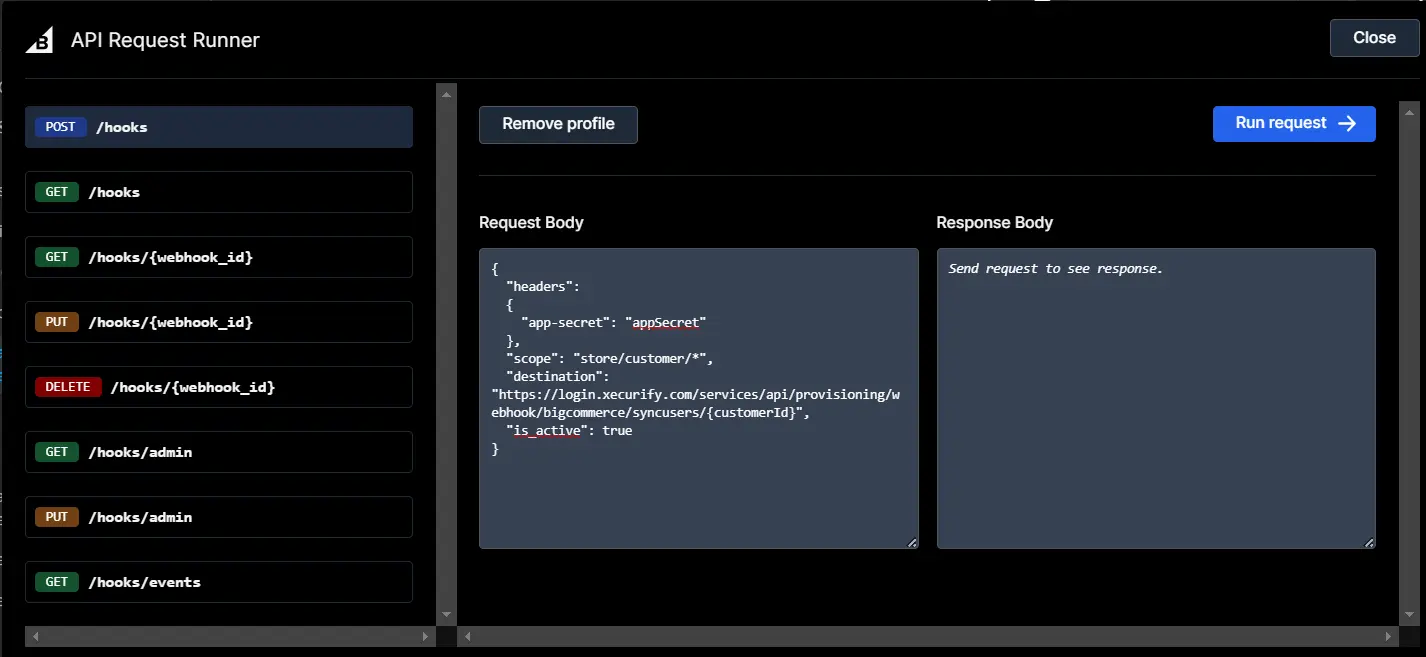
- At last, click on Send Run request button.
- Now, Creating/Updating/deleting a user in BigCommerce will Create/Update/Delete the user in miniOrange.
- Alternatively, using Postman app, perform a Post call to the URL
https://api.bigcommerce.com/stores/{Store_hash}/v3/hooks
- Set header as X-Auth-Token and set its value as the Access Token obtained from BigCommerce credential file.
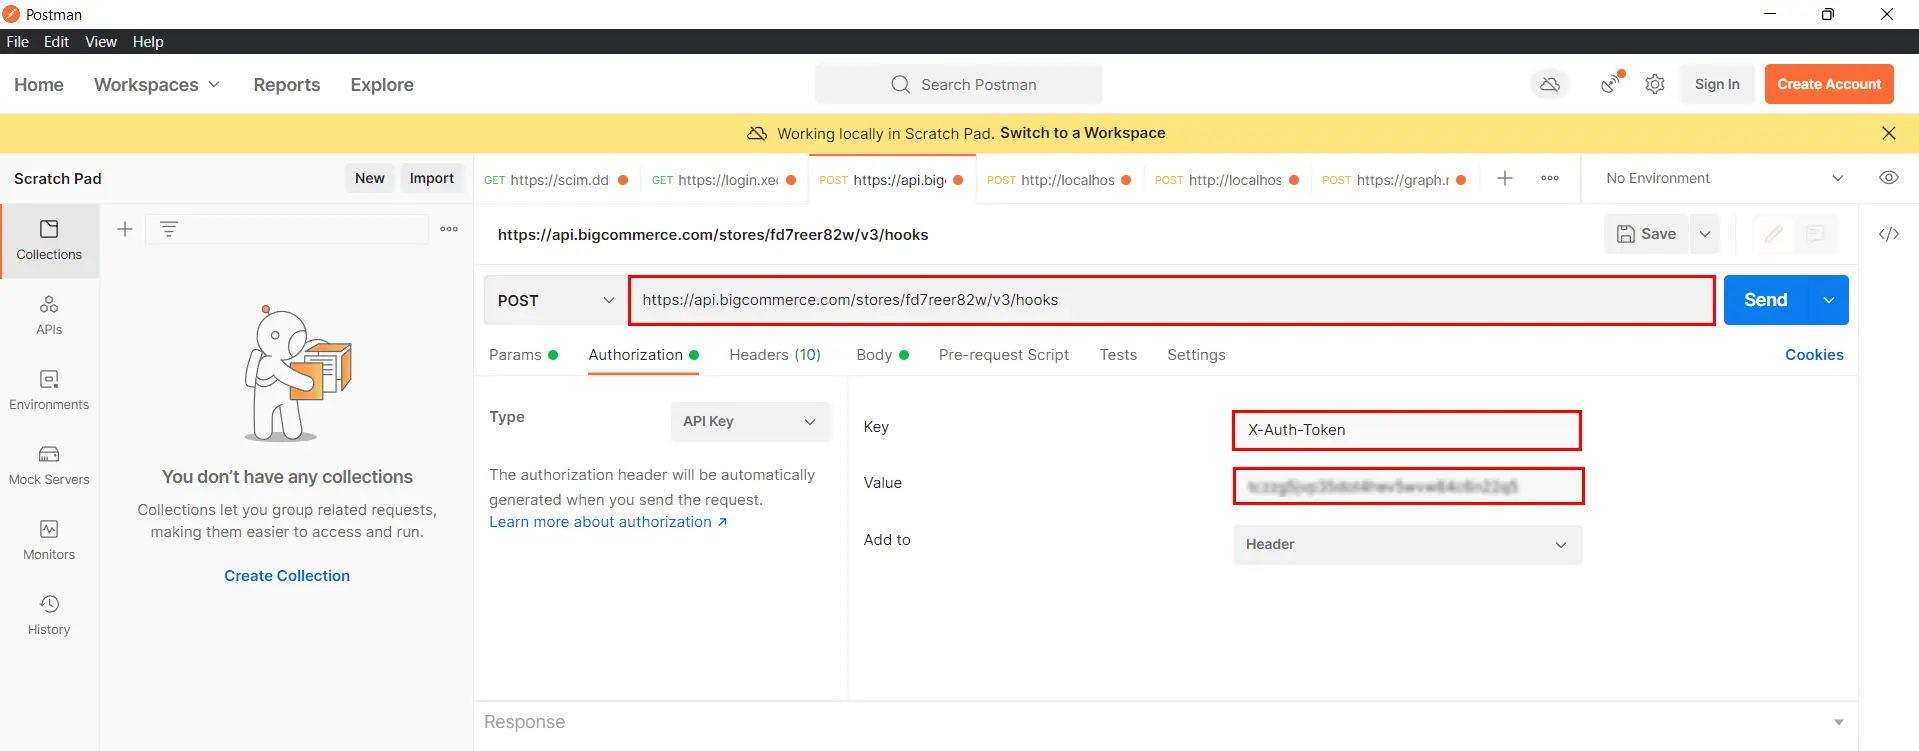
- Inside body as JSON, enter following details
{
  "headers":
  {
    "app-secret": "appSecret"
  },
  "scope": "store/customer/*",
  "destination": "https://login.xecurify.com/services/api/provisioning/webhook/bigcommerce/syncusers/{customerId}",
  "is_active": true
}
- Replace appSecret with the app secret obtained from miniOrange BigCommerce app.

- At last, click on Send button.
- Now, Creating/Updating a user in BigCommerce will Create/Update the user in miniOrange.
View Provisioning Reports
How to access Provisioning Reports?
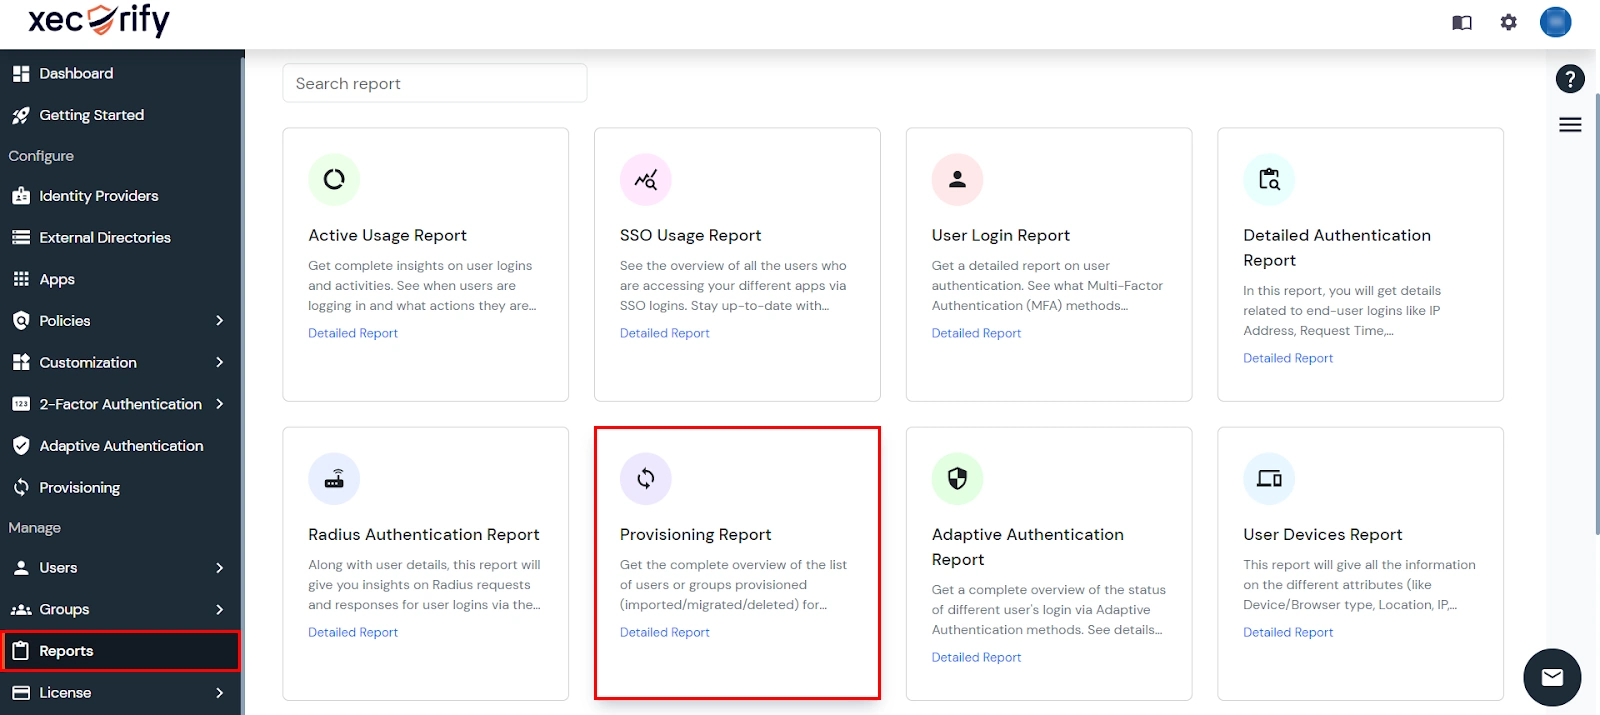
- Navigate to the Reports in the left-hand navigation pane and select Provisioning Report.
- Filter the reports by specifying Enduser Identifier and Application Name criteria. Additionally, choose the desired timespan for the reports. Once done, click on the Search.
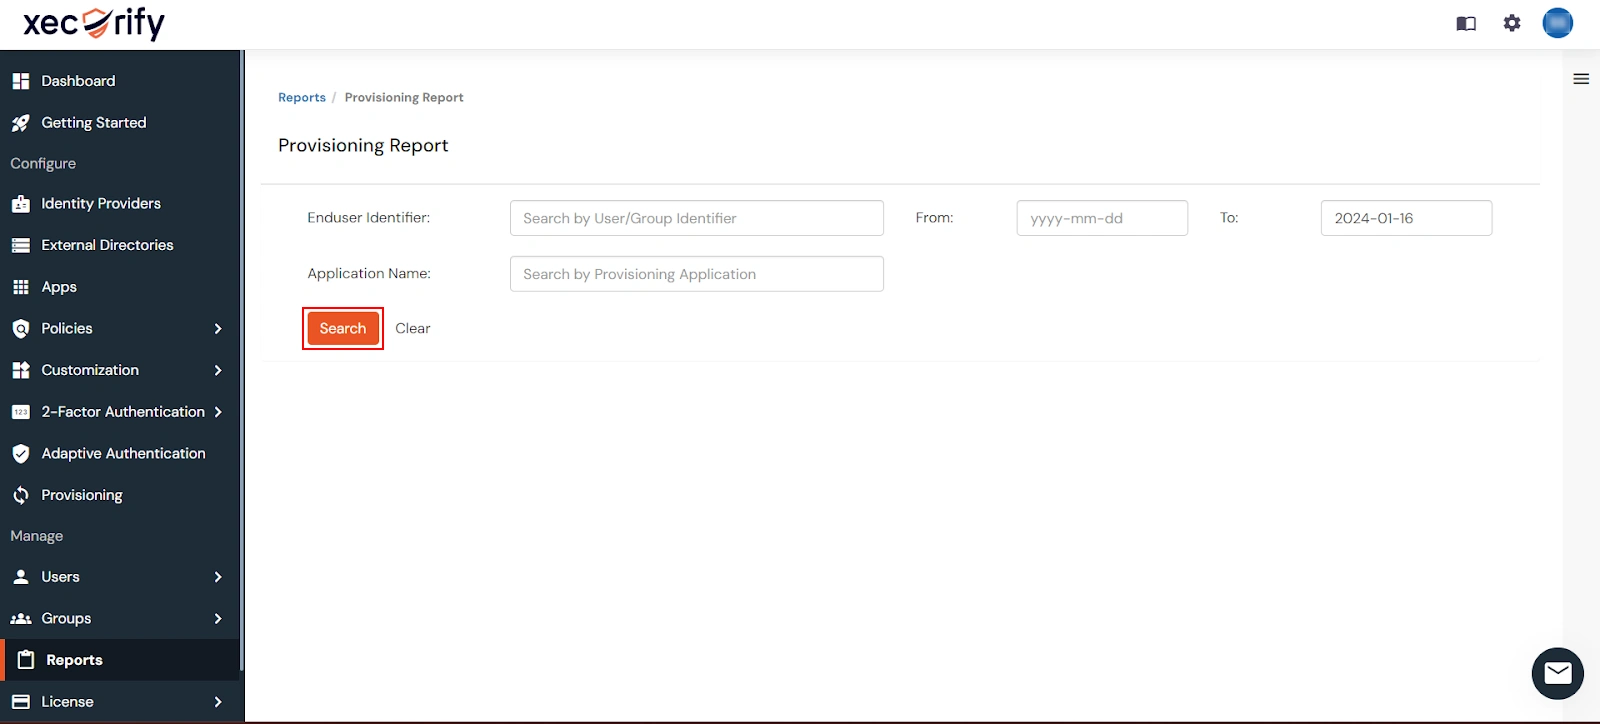
- Alternatively, you can directly click on Search to retrieve all provisioning reports based on time without applying any specific filters.
External References